Creating a CI/CD Pipeline for a NodeJS Application
What will we learn?
Today we are going to set up a complete CI/CD pipeline for a NodeJS app using GitHub actions and Amazon web services (AWS).
For this article, we are using the Nest.js framework. All of the processes will be exactly the same for any Node.js framework. (Like Express.js)
Pre Requisites
A GitHub account
An AWS account
Basic Understanding of Docker
Basic Understanding of NestJS or NodeJS
Steps to Follow
Create a nestJS (will also work with any nodeJS framework) application
Dockerize the app
Create a Repository in Elastic Container Repository in AWS
Create a Task to Contain the Repository in Elastic Container Service
Create a New Target Group
Create a Load Balancer
Create a new Cluster in Elastic Container Service
Create a new Service to Connect them
Finally, add Github action to automate the whole process
Step 1: Create NestJs app and Dockerize
In a previous article, we created a basic nestJS app and Dockerized the app. We will continue from there …
https://www.mohammadfaisal.dev/blog/dockerizing-a-basic-nodejs-nestjs-application
Step 2: Create a new Repository in Elastic Container Service
First, log in to the AWS console
Search Elastic Container Service
Click on Create New Repository

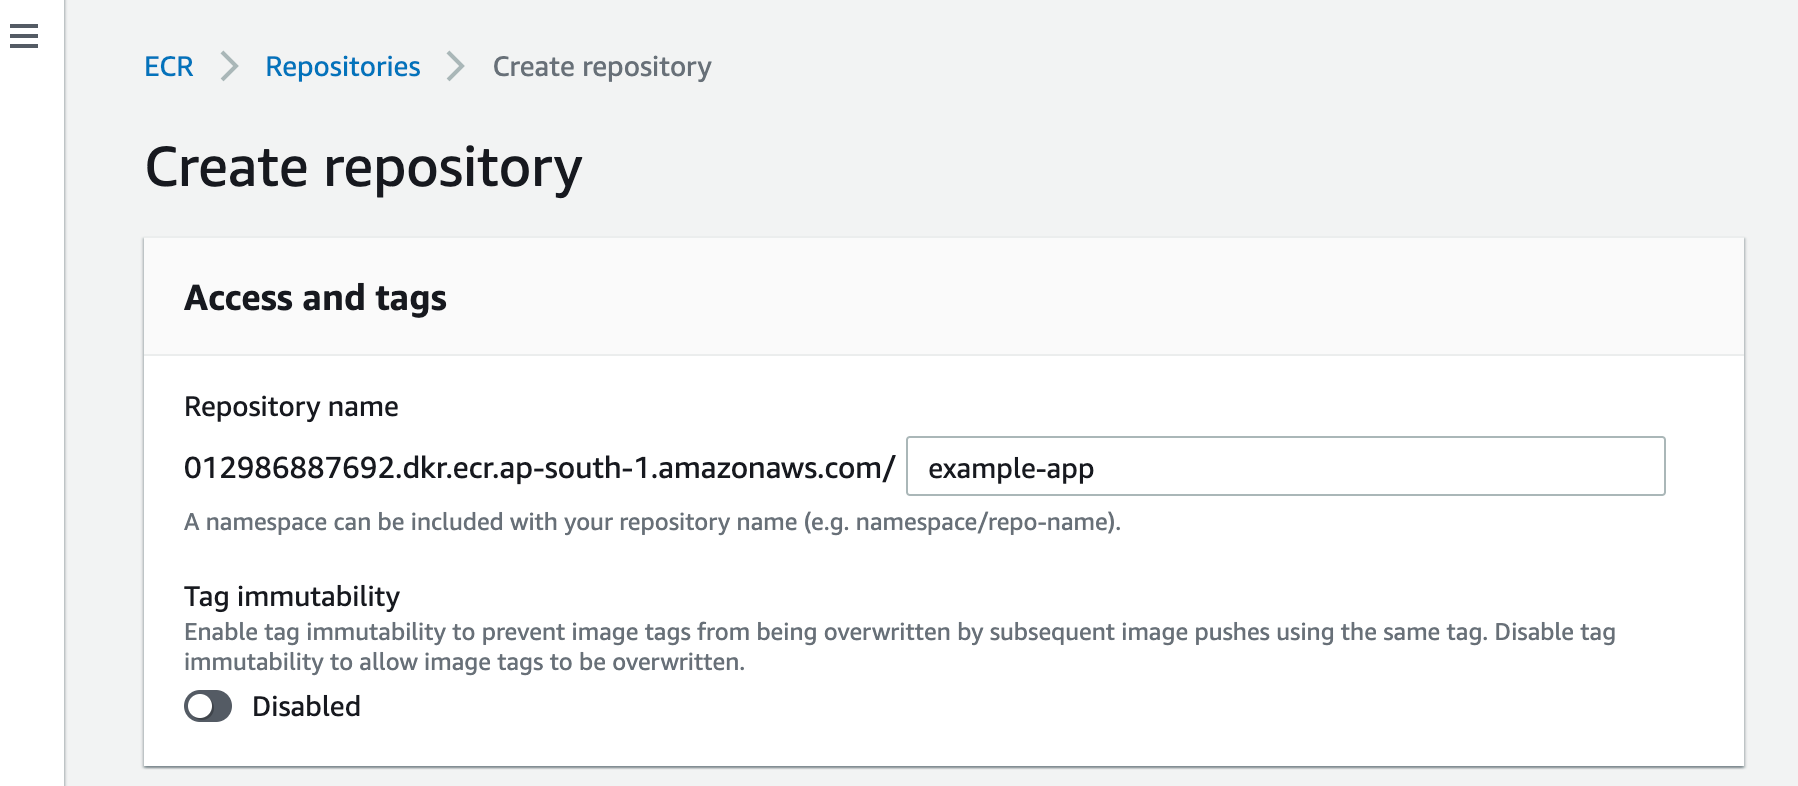
- Give a name to your repository and click Create
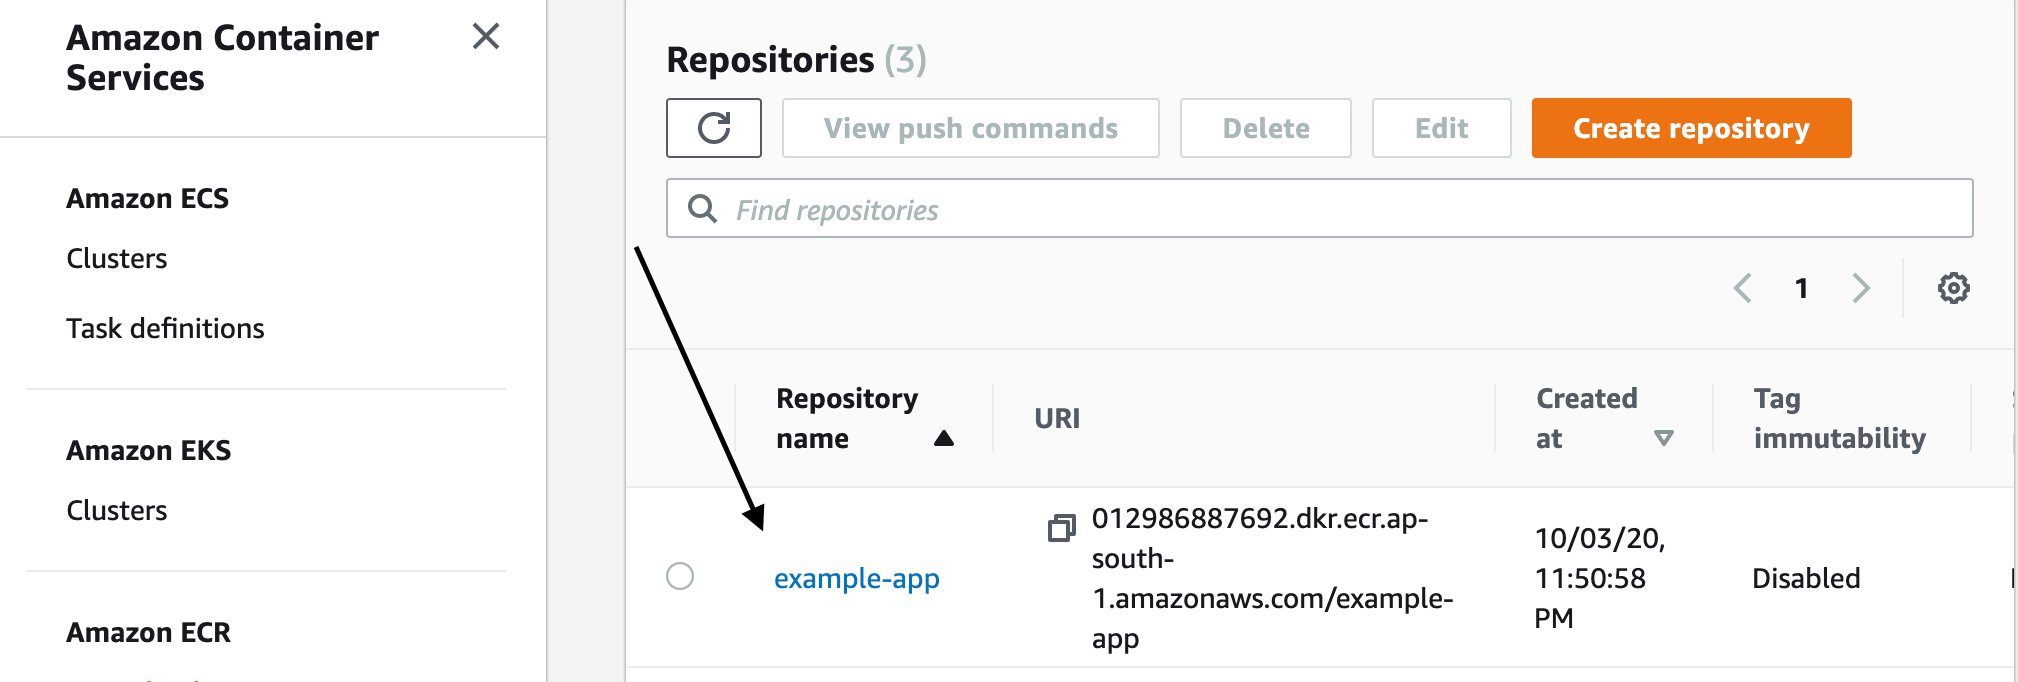
- After a moment your repository will come into the list
Step 3: Create a task
Go into Elastic Container Service
Go to Tasks in the sidebar and click Create New Task

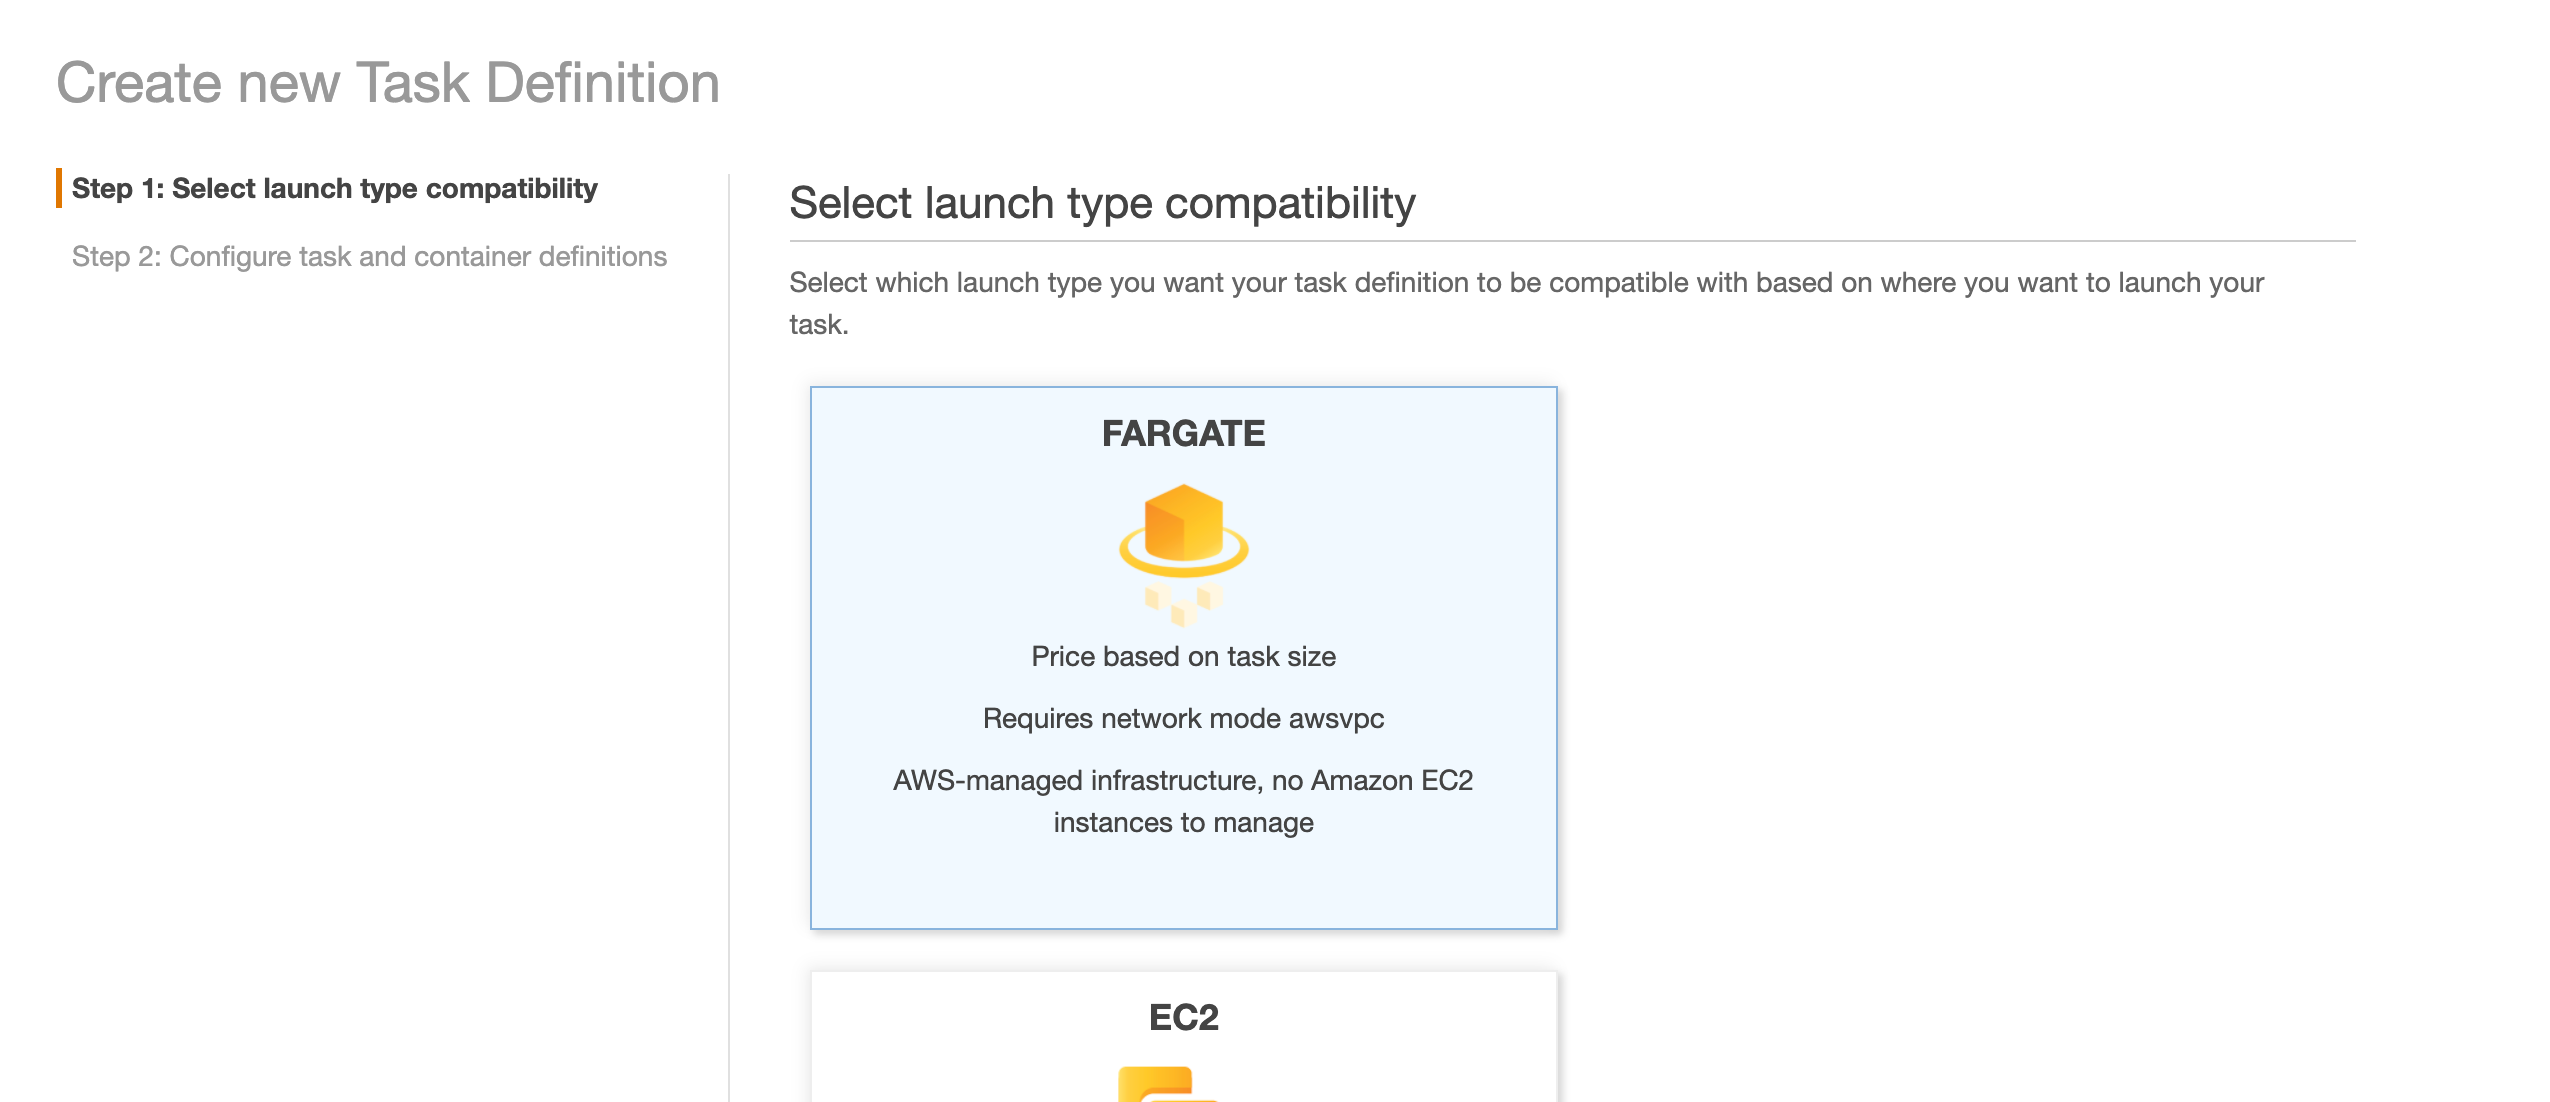
- Choose Instance type Fargate
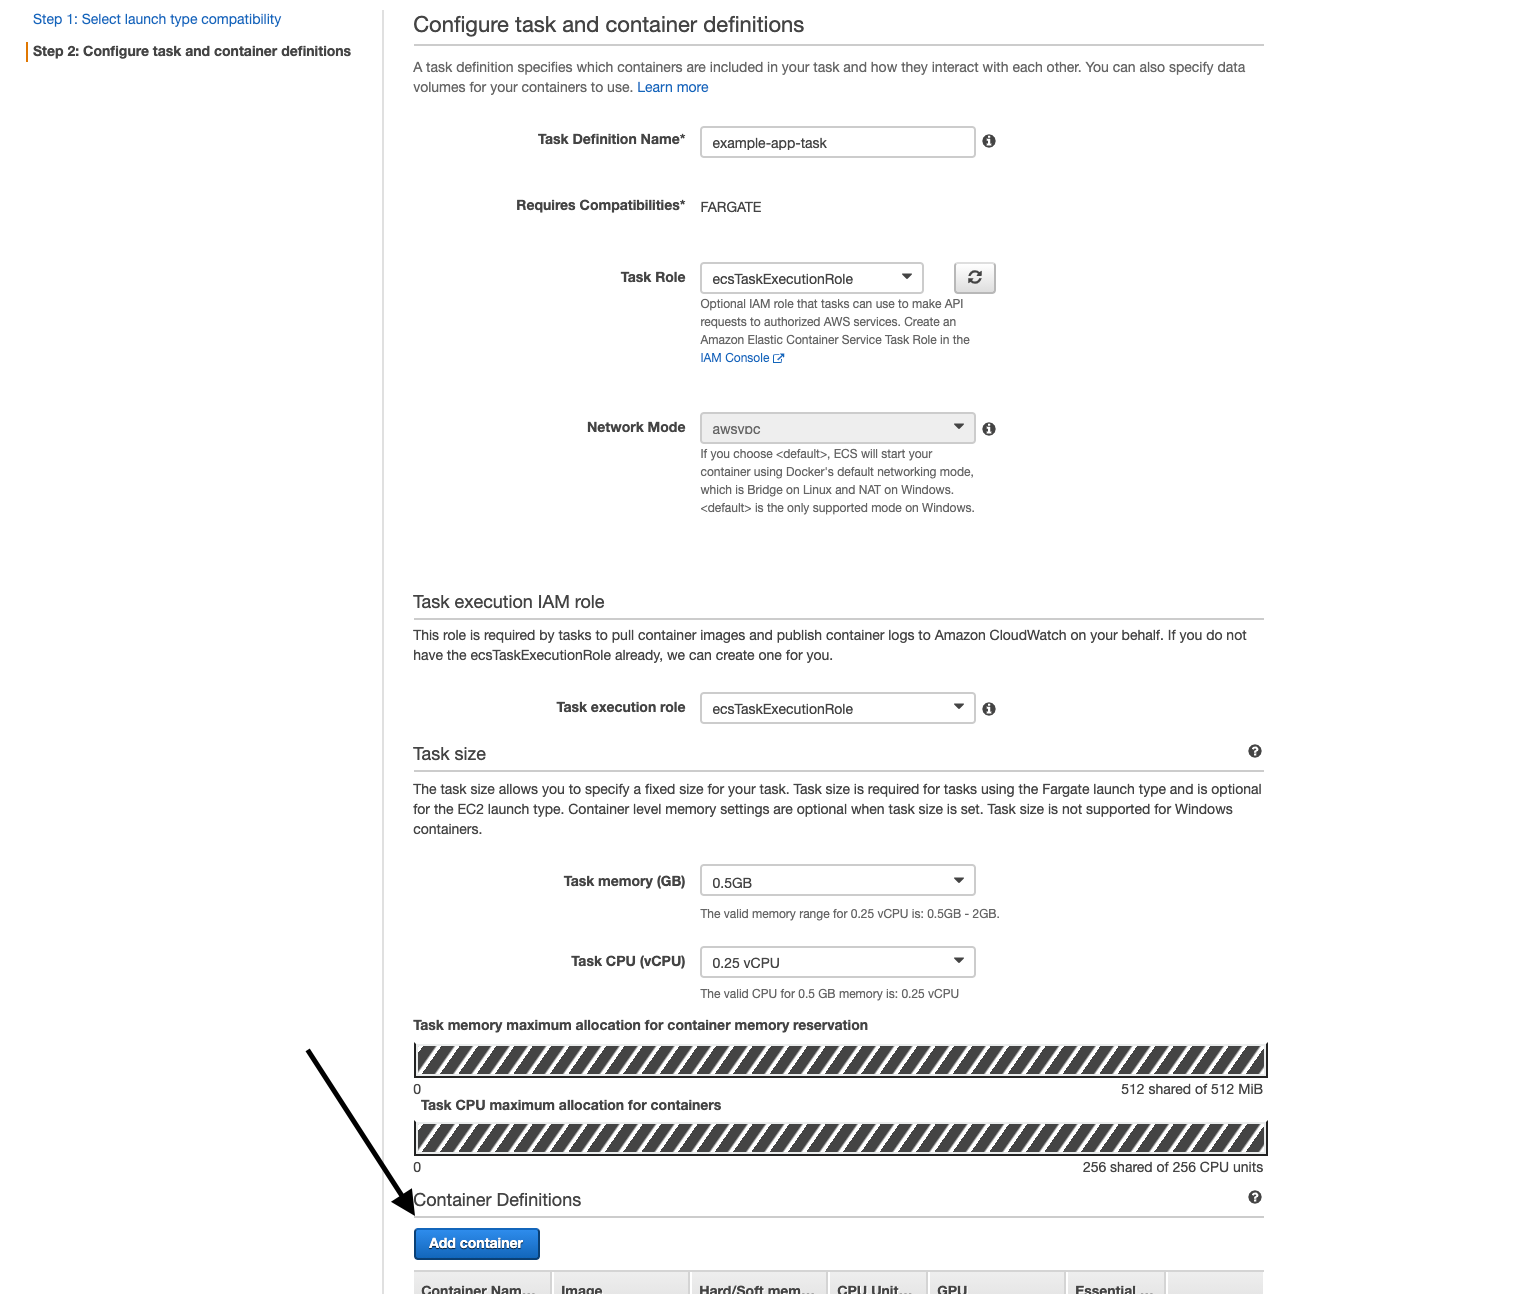
Give any name you want
Select Role as ecsTaskExecutionRole
Select Task memory 0.5GB and 0.25vcpu (we are choosing minimum for now)
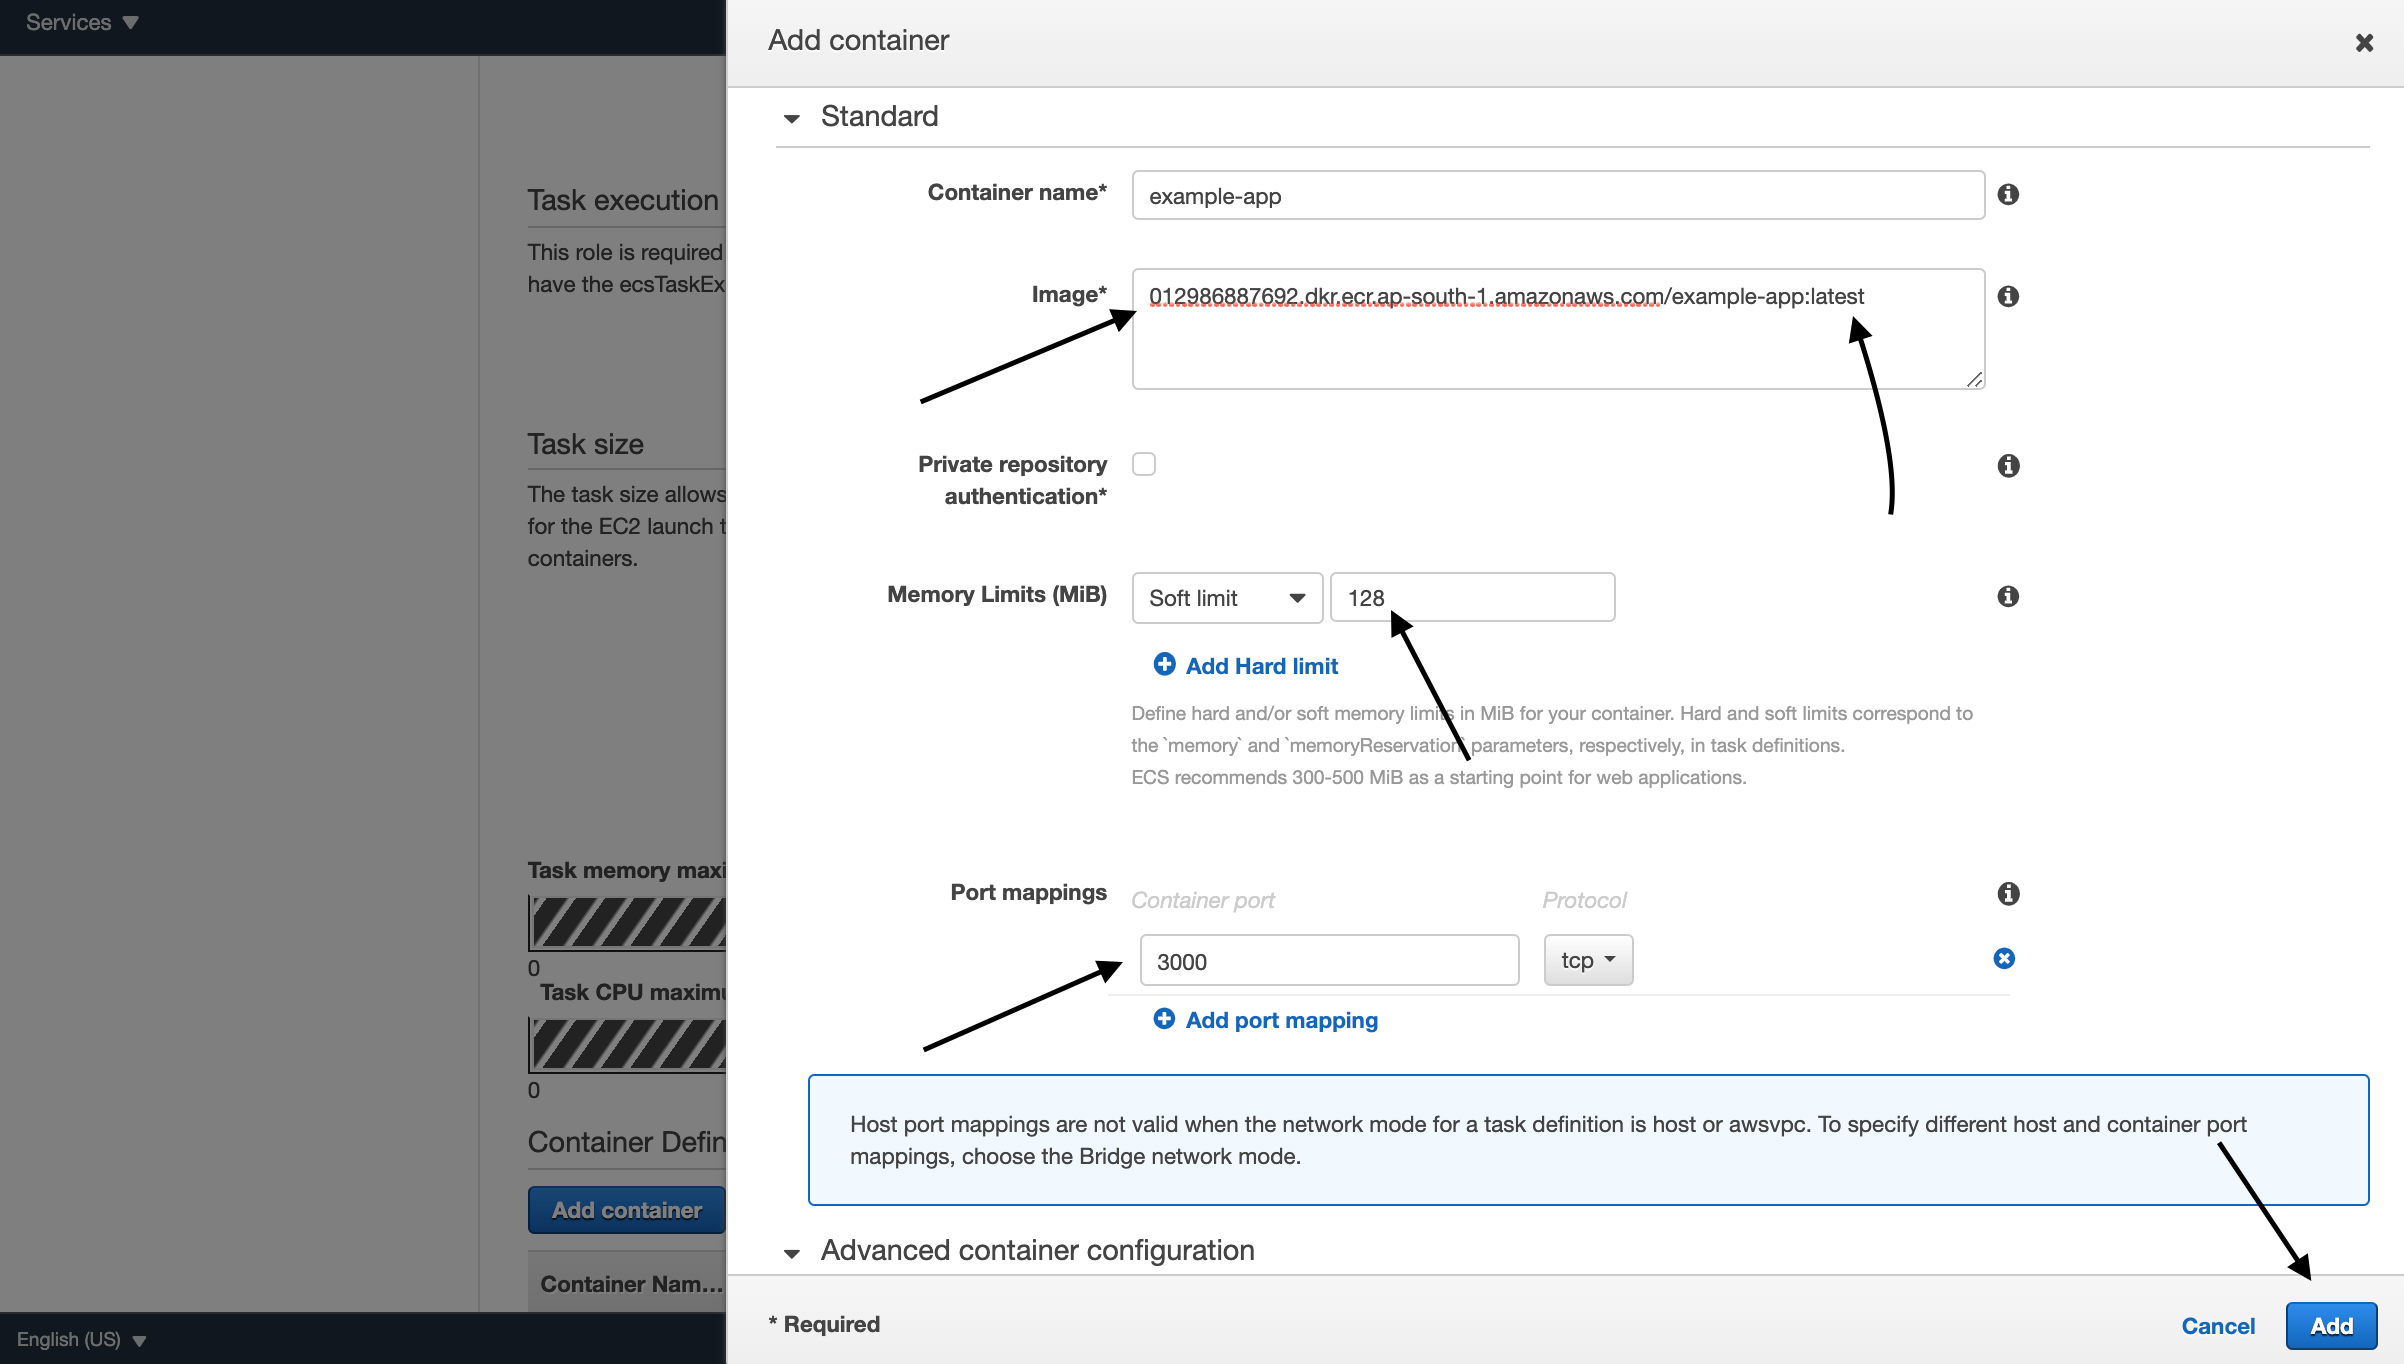
And then Click on Add Container
We will grab the link of the repository we created earlier and paste the link and append: latest at the end of it because we need the latest container to run
we will fill out the name of the repository and set the soft limit as 128 (minimum memory needed to run the task )
We need to add 3000 in the port mapping as our container is exposing 3000 (See the previous article) You can map your desired port here. It should match the port that you are exposing from your container.
Leave everything else as default and click on Add
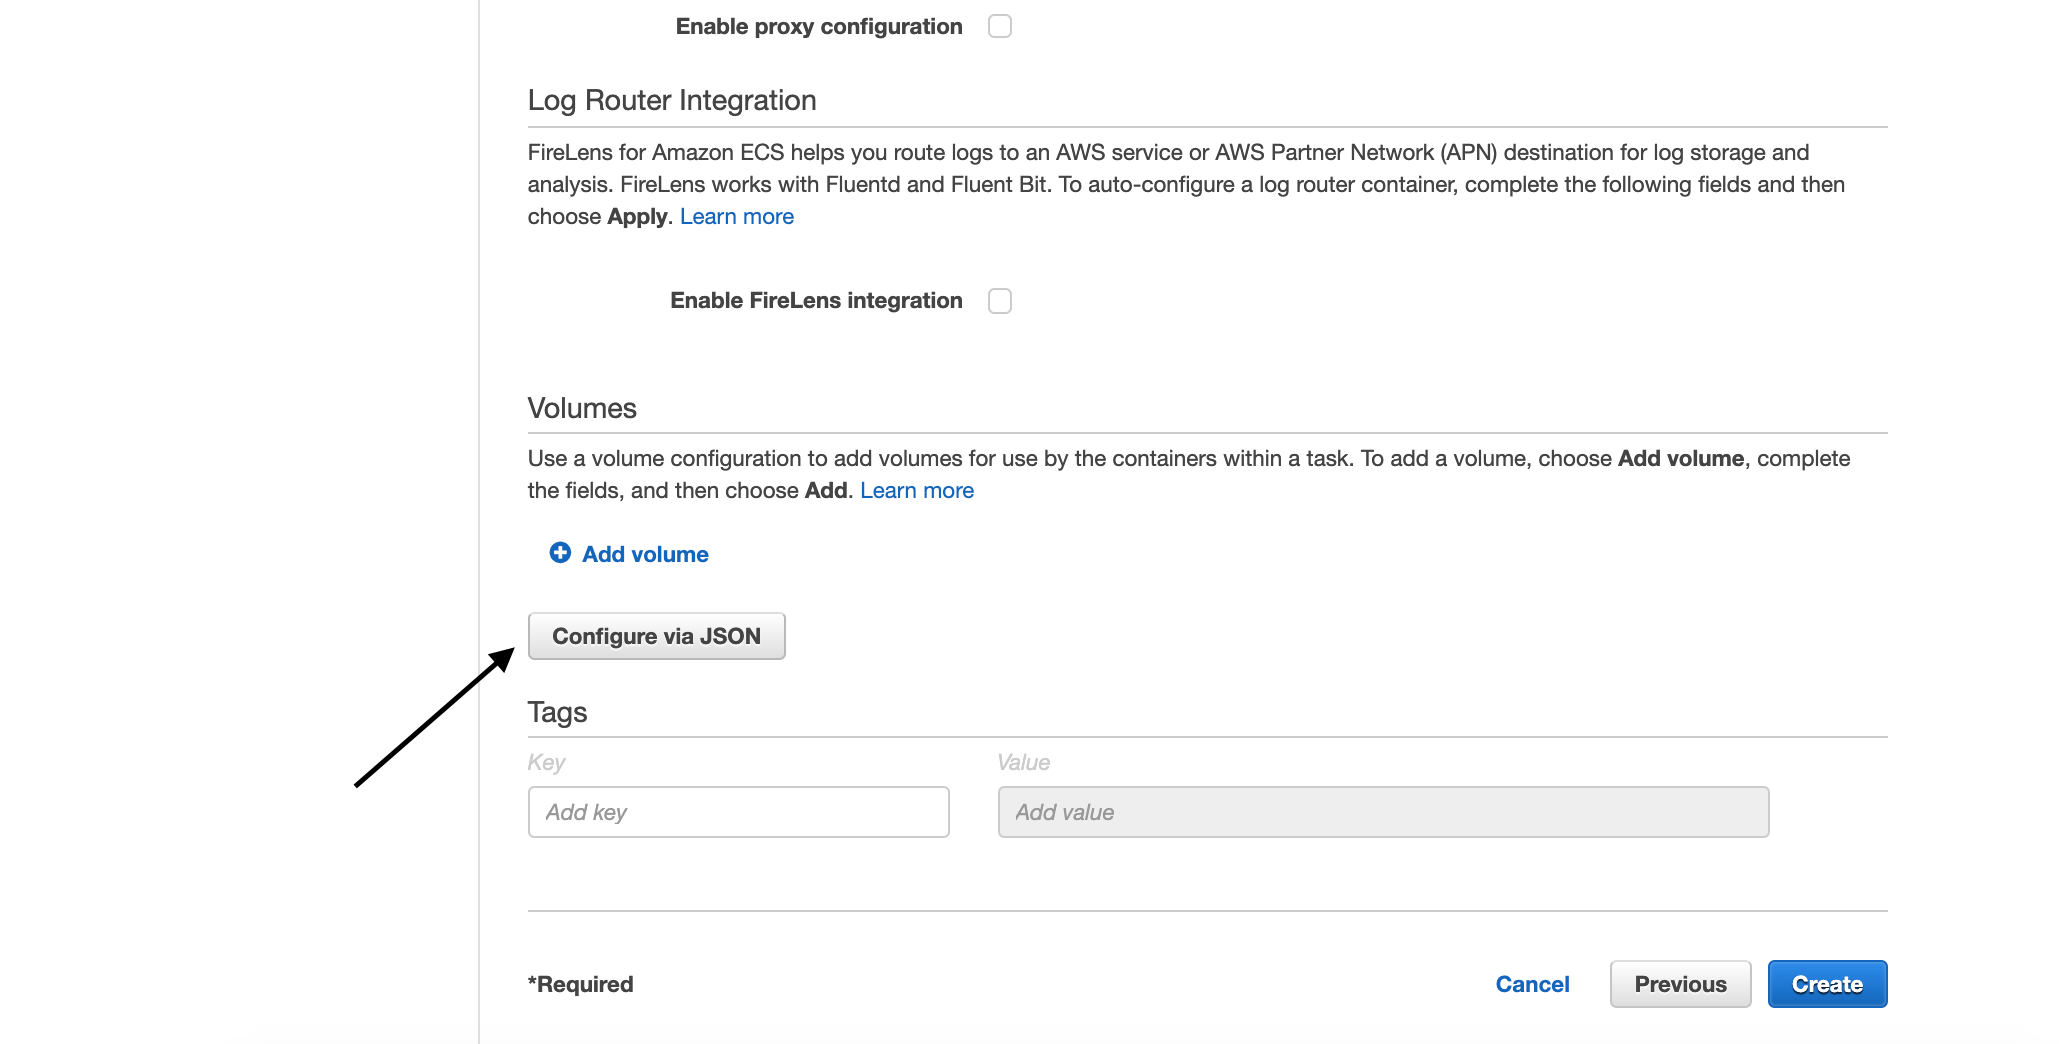
- Go to the bottom of the page and click on Configure via JSON
- Copy the JSON code from the sidebar and click save.
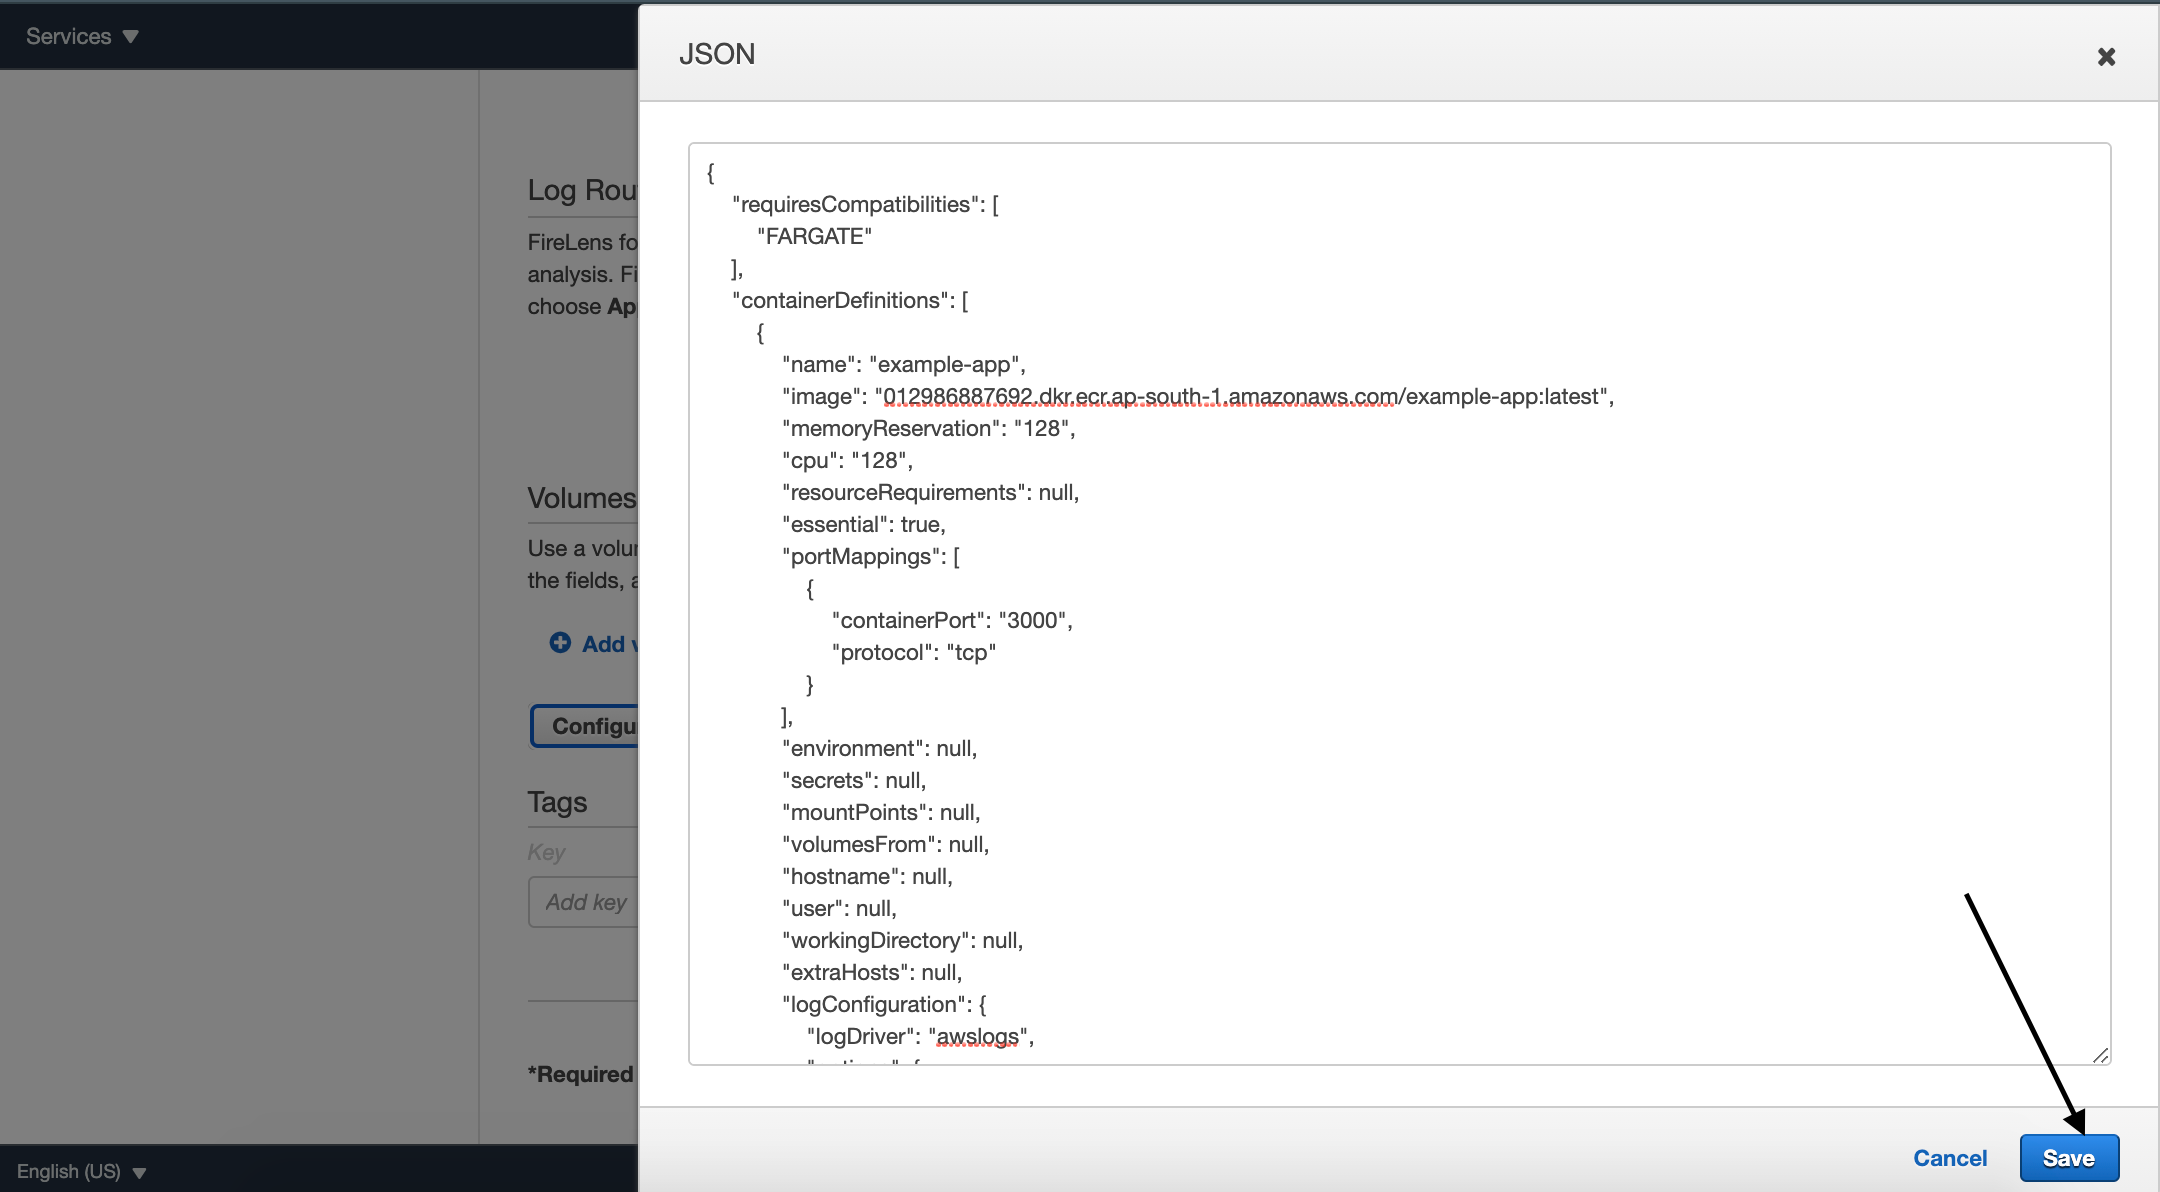
Now Click Save and then Create at the bottom of the page.
Now Paste the JSON code that you just copied into a new file named task-definition.json and place it inside your project's root directory.
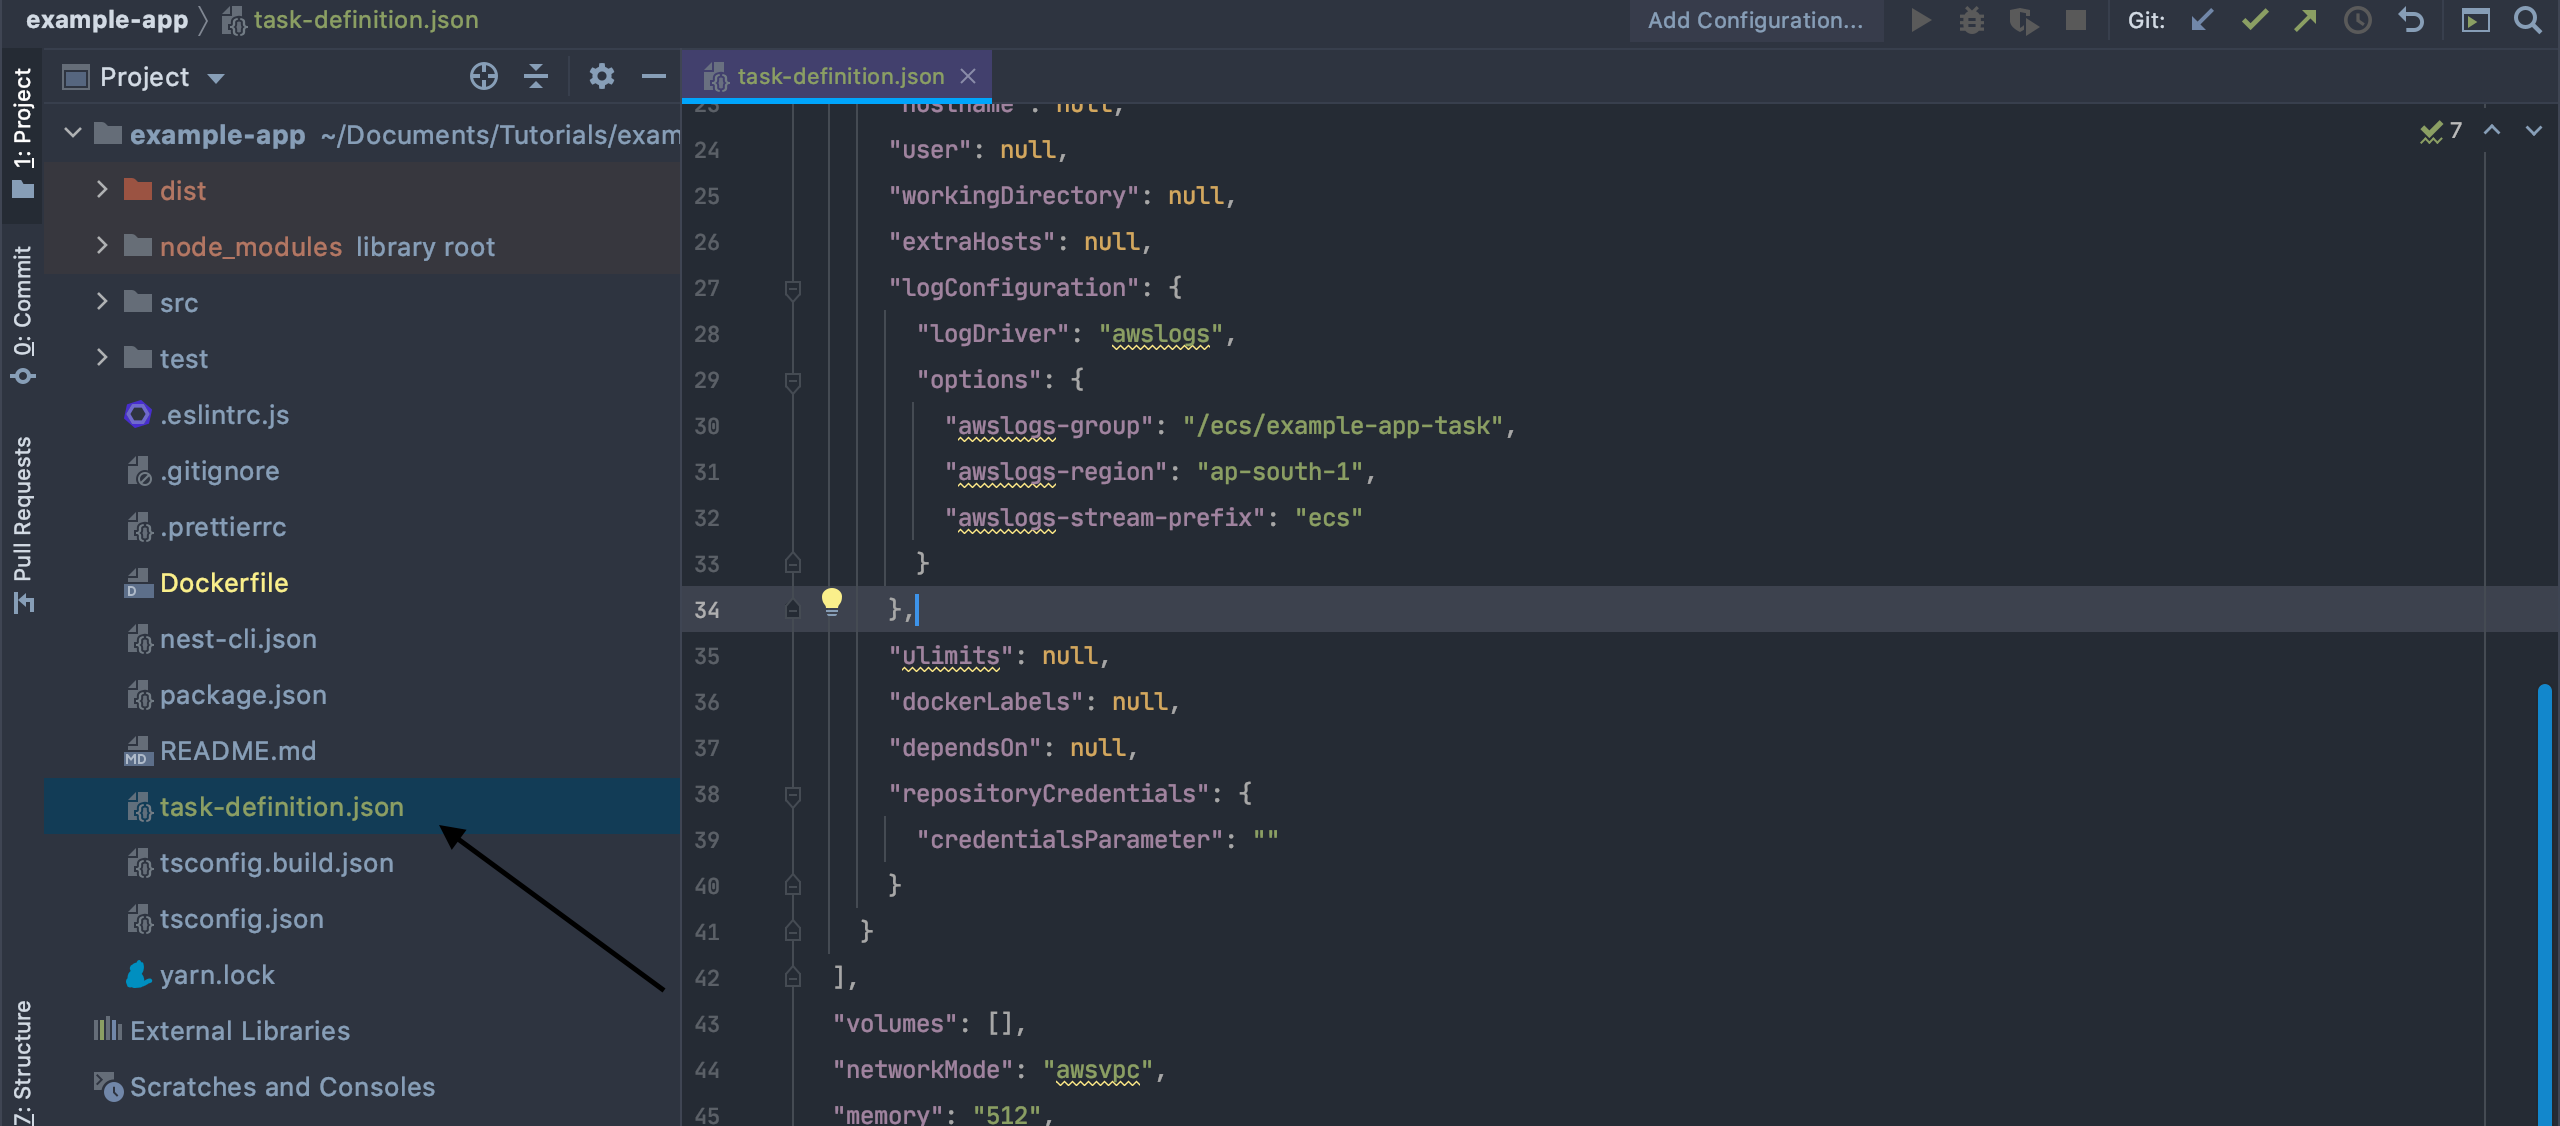
- Meanwhile, in your console, your Task Definition should be created already
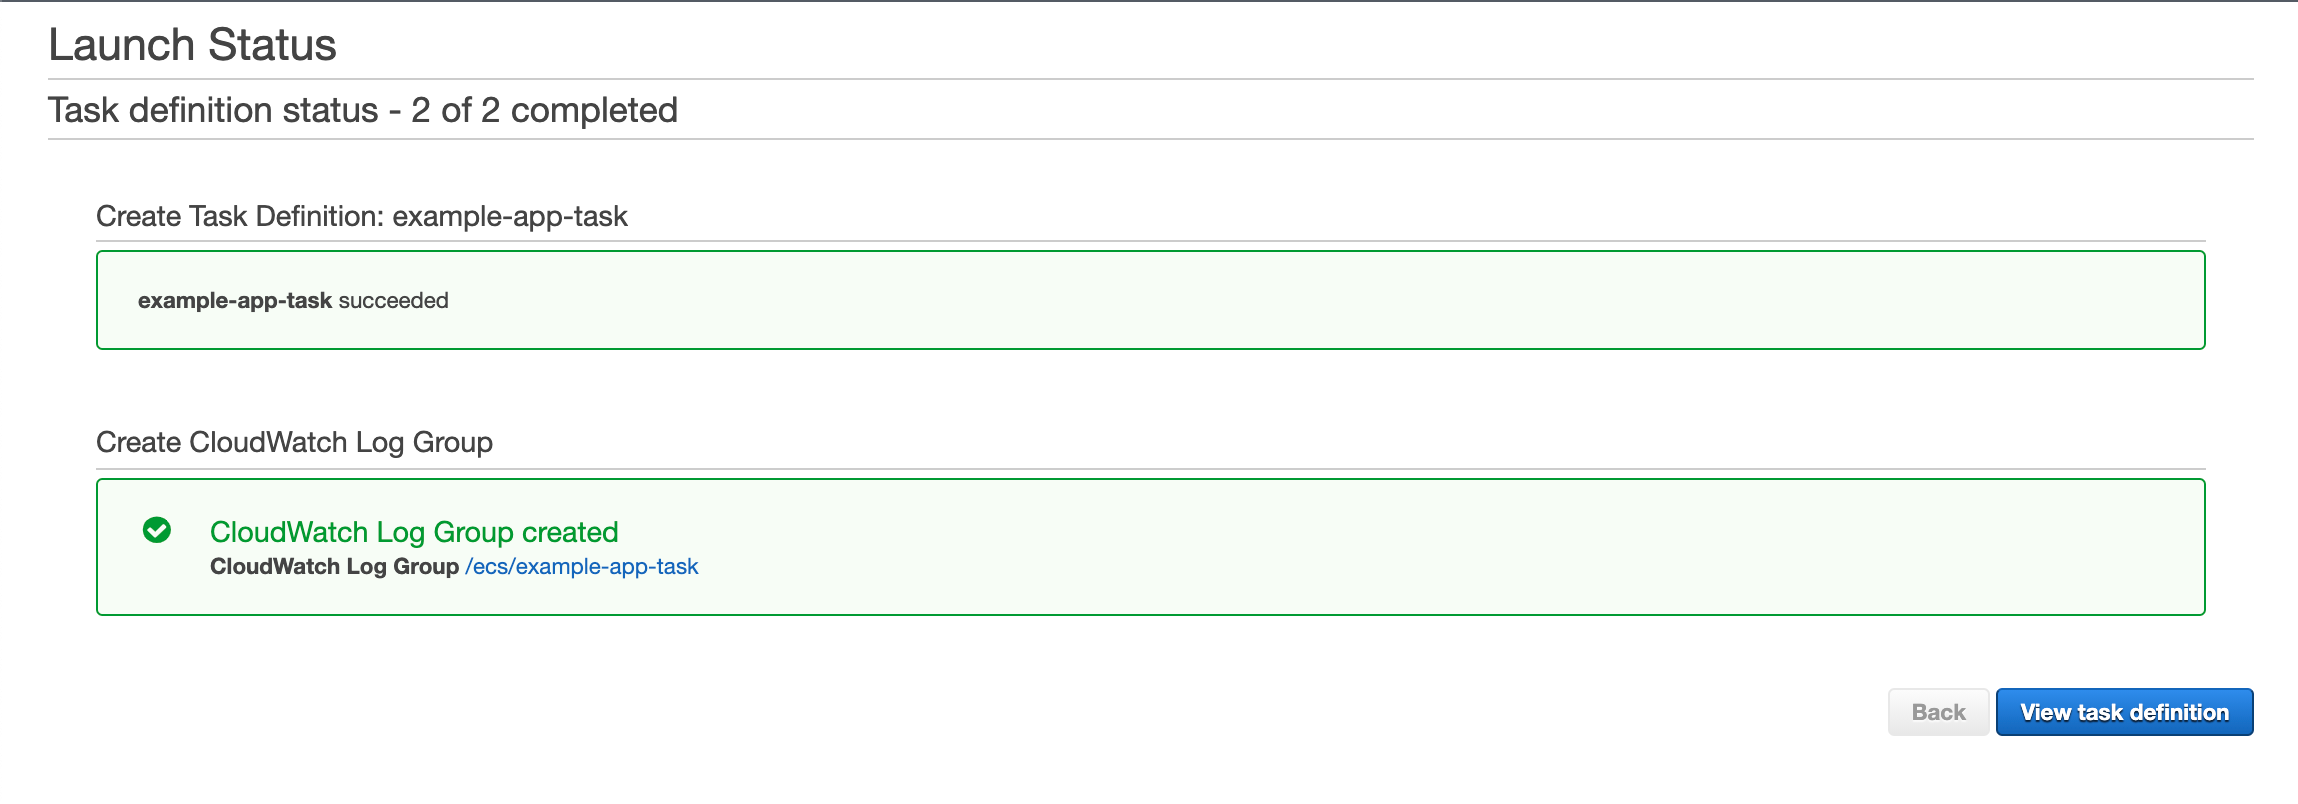
Step 4: Create a New Target Group
- Now head over to the search bar of the AWS console and search EC2

- Find Target Groups from the sidebar and select that
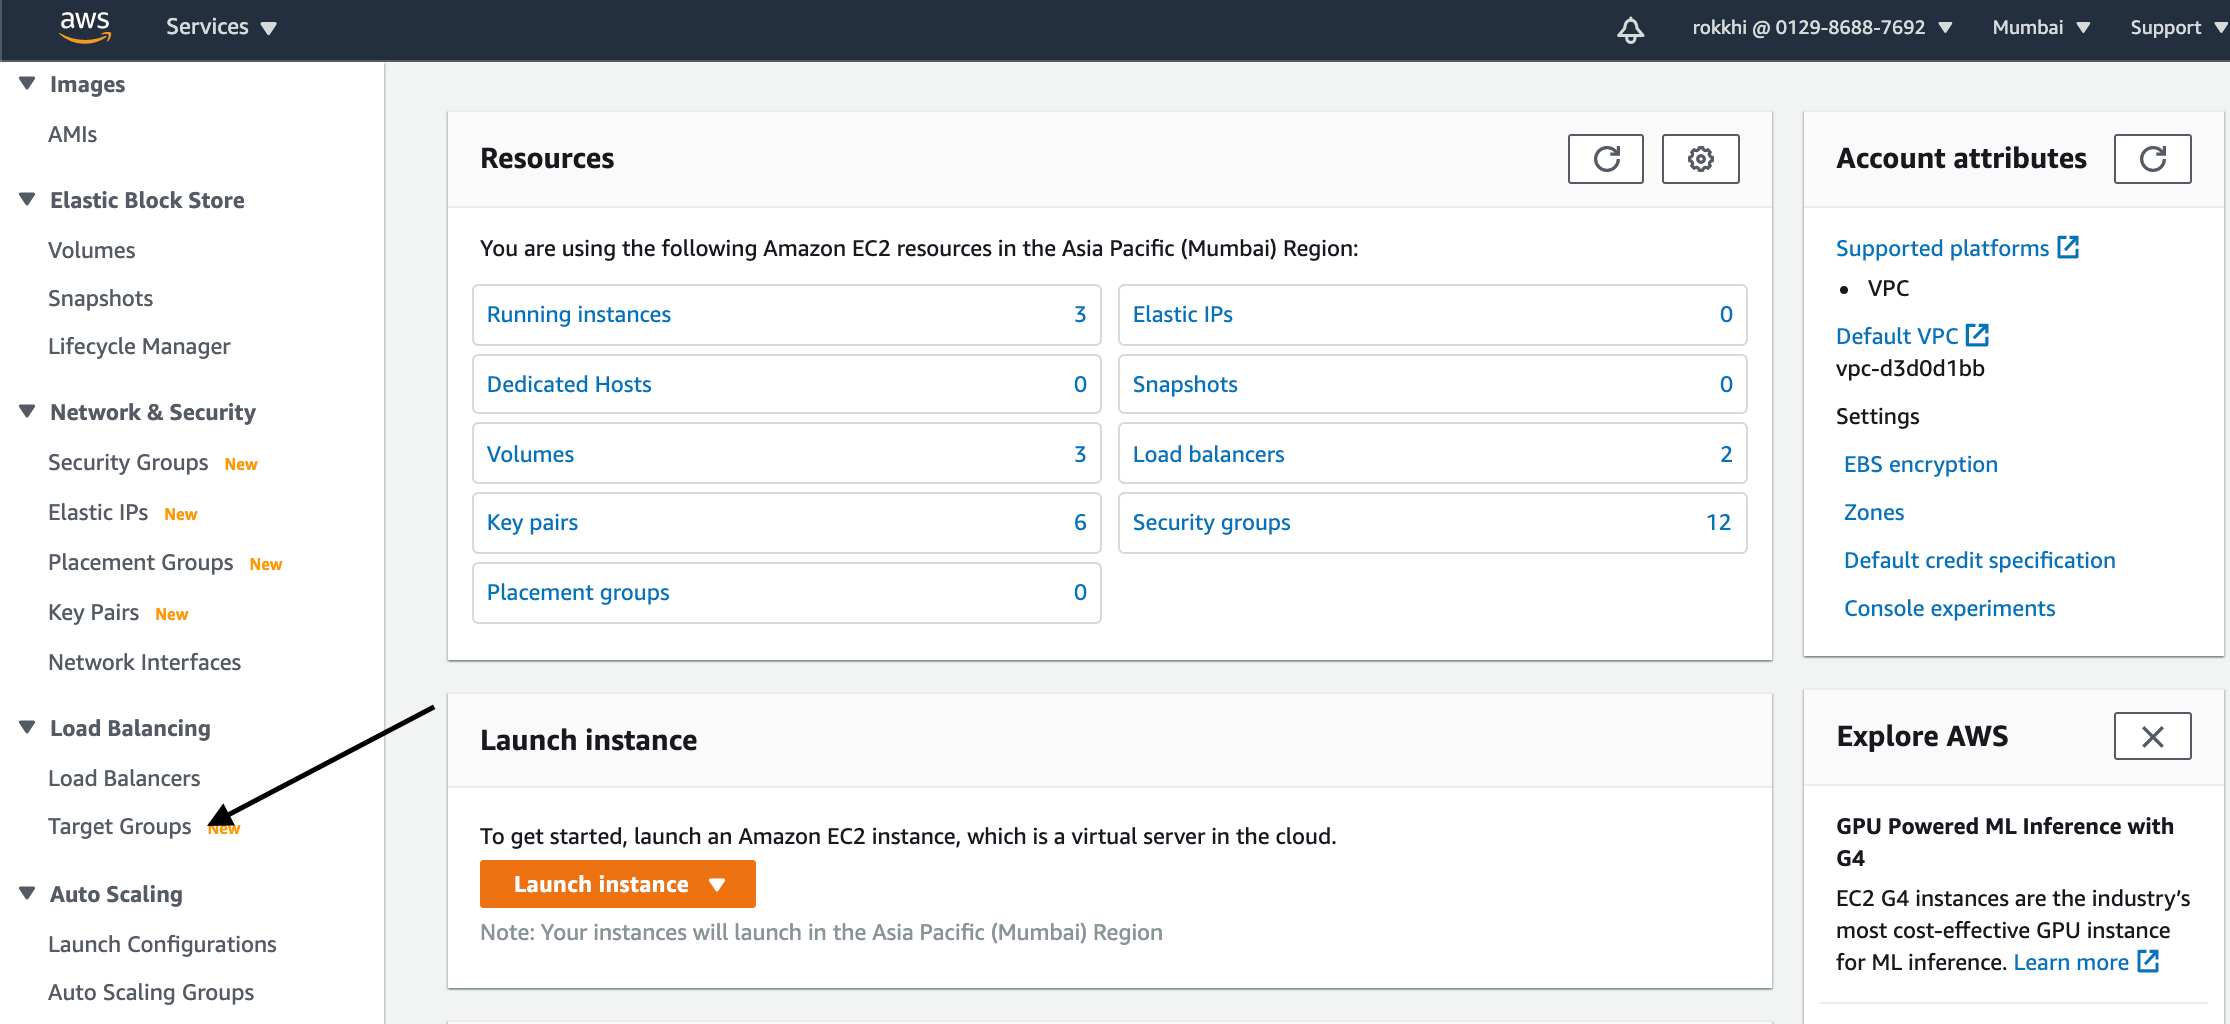
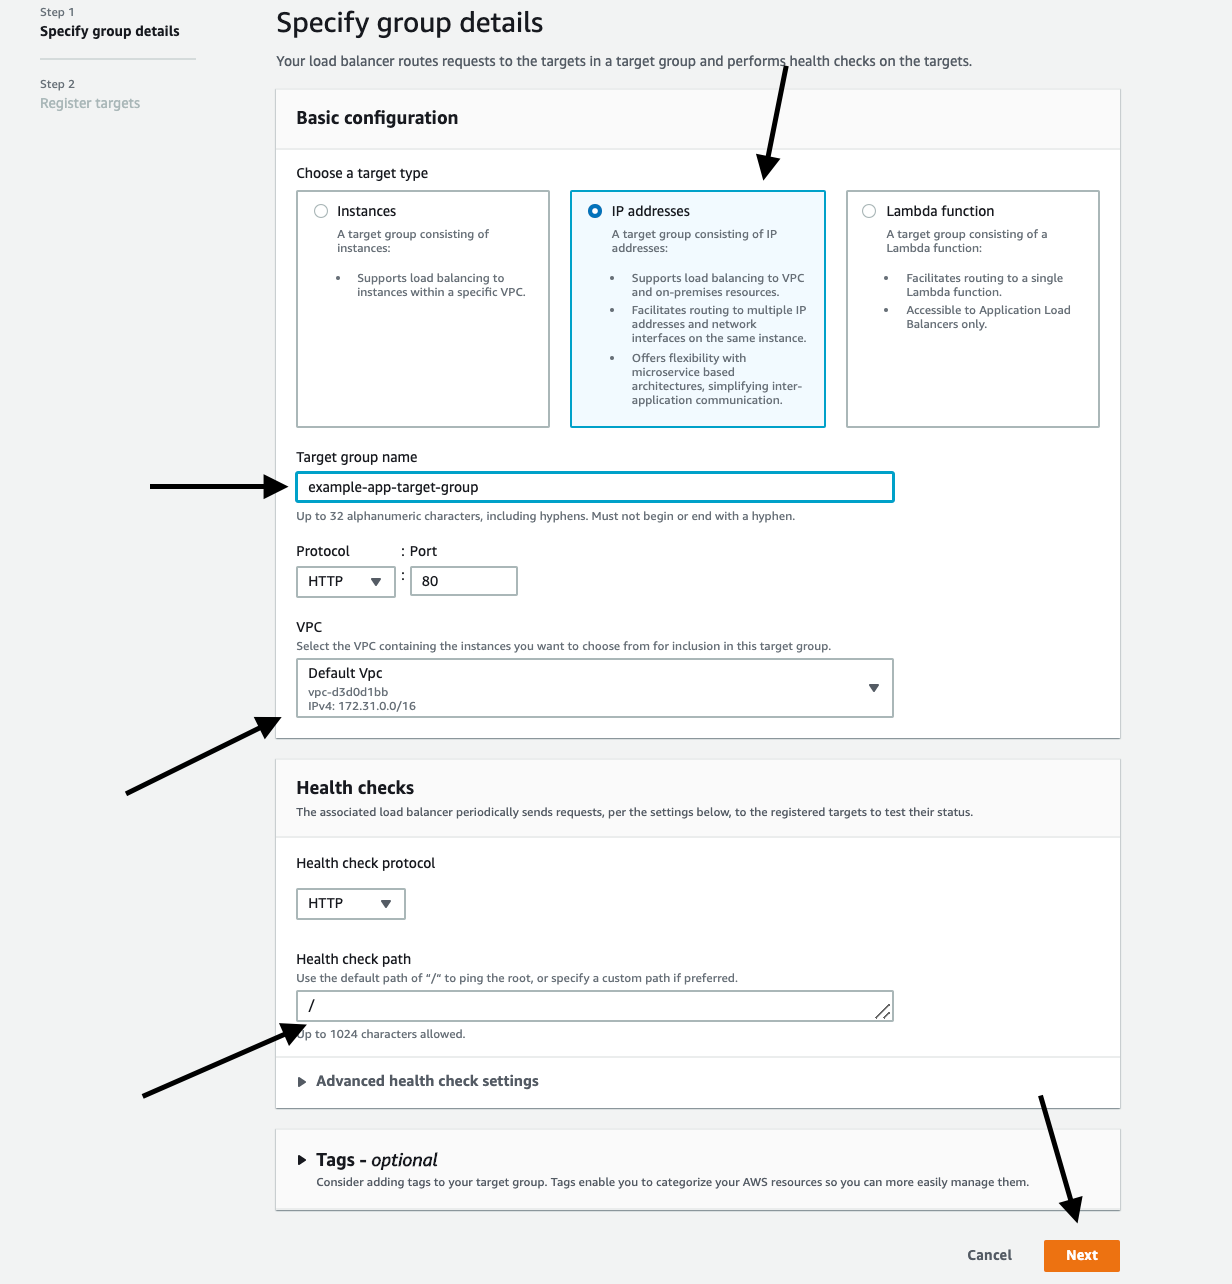
- Click on Create Target Group

Select Target Type -> Ip Address
Give a name
Select Default VPC (for now, you can choose your customized VPC)
Add the health Check route as default. We need to have a route inside our project as specified here which should return a 200 response. In this case, if we hit the ‘/’ path of our project we should get a 200 response (we will take care of this later in our project. Similarly if you specify ‘/health’ as your health check route your app should respond with 200 if we hit ‘/health’ endpoint ). This way AWS determines if a target is healthy or not.
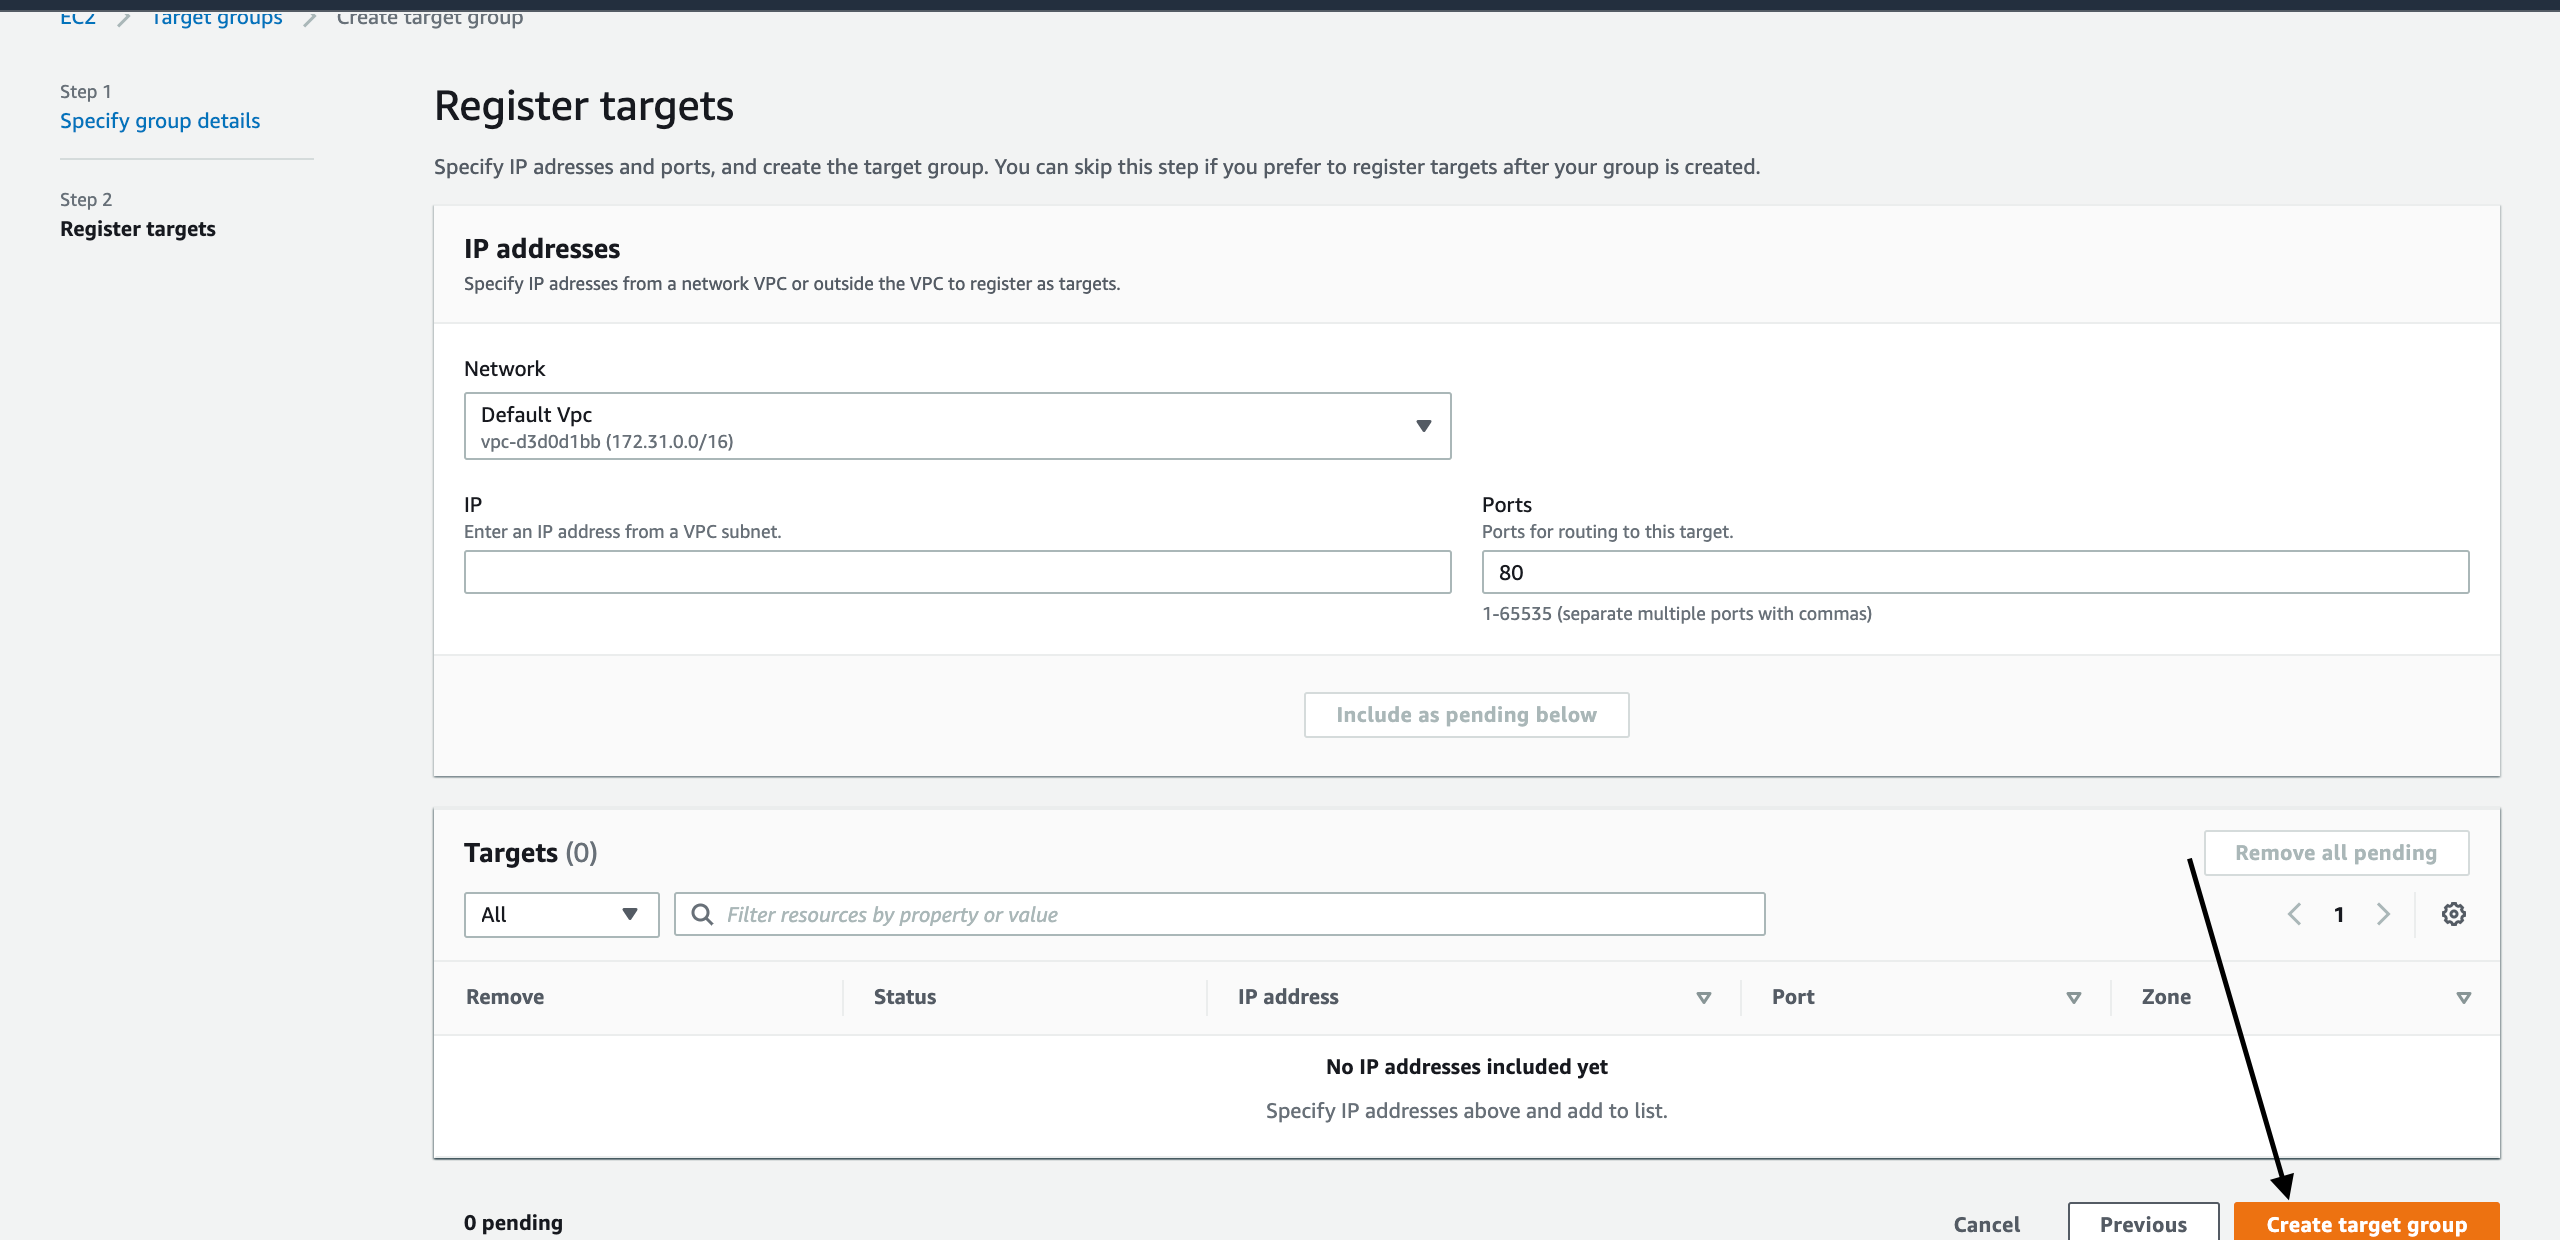
- Click next and leave everything as default on the next page (We don’t need to register any IP address or port for now as it will be taken care of by the task we created earlier ). and hit Create Target Group.
- It will turn green once created and appear on the list.
Step 5: Create a Load Balancer
- Find the Load Balancer option
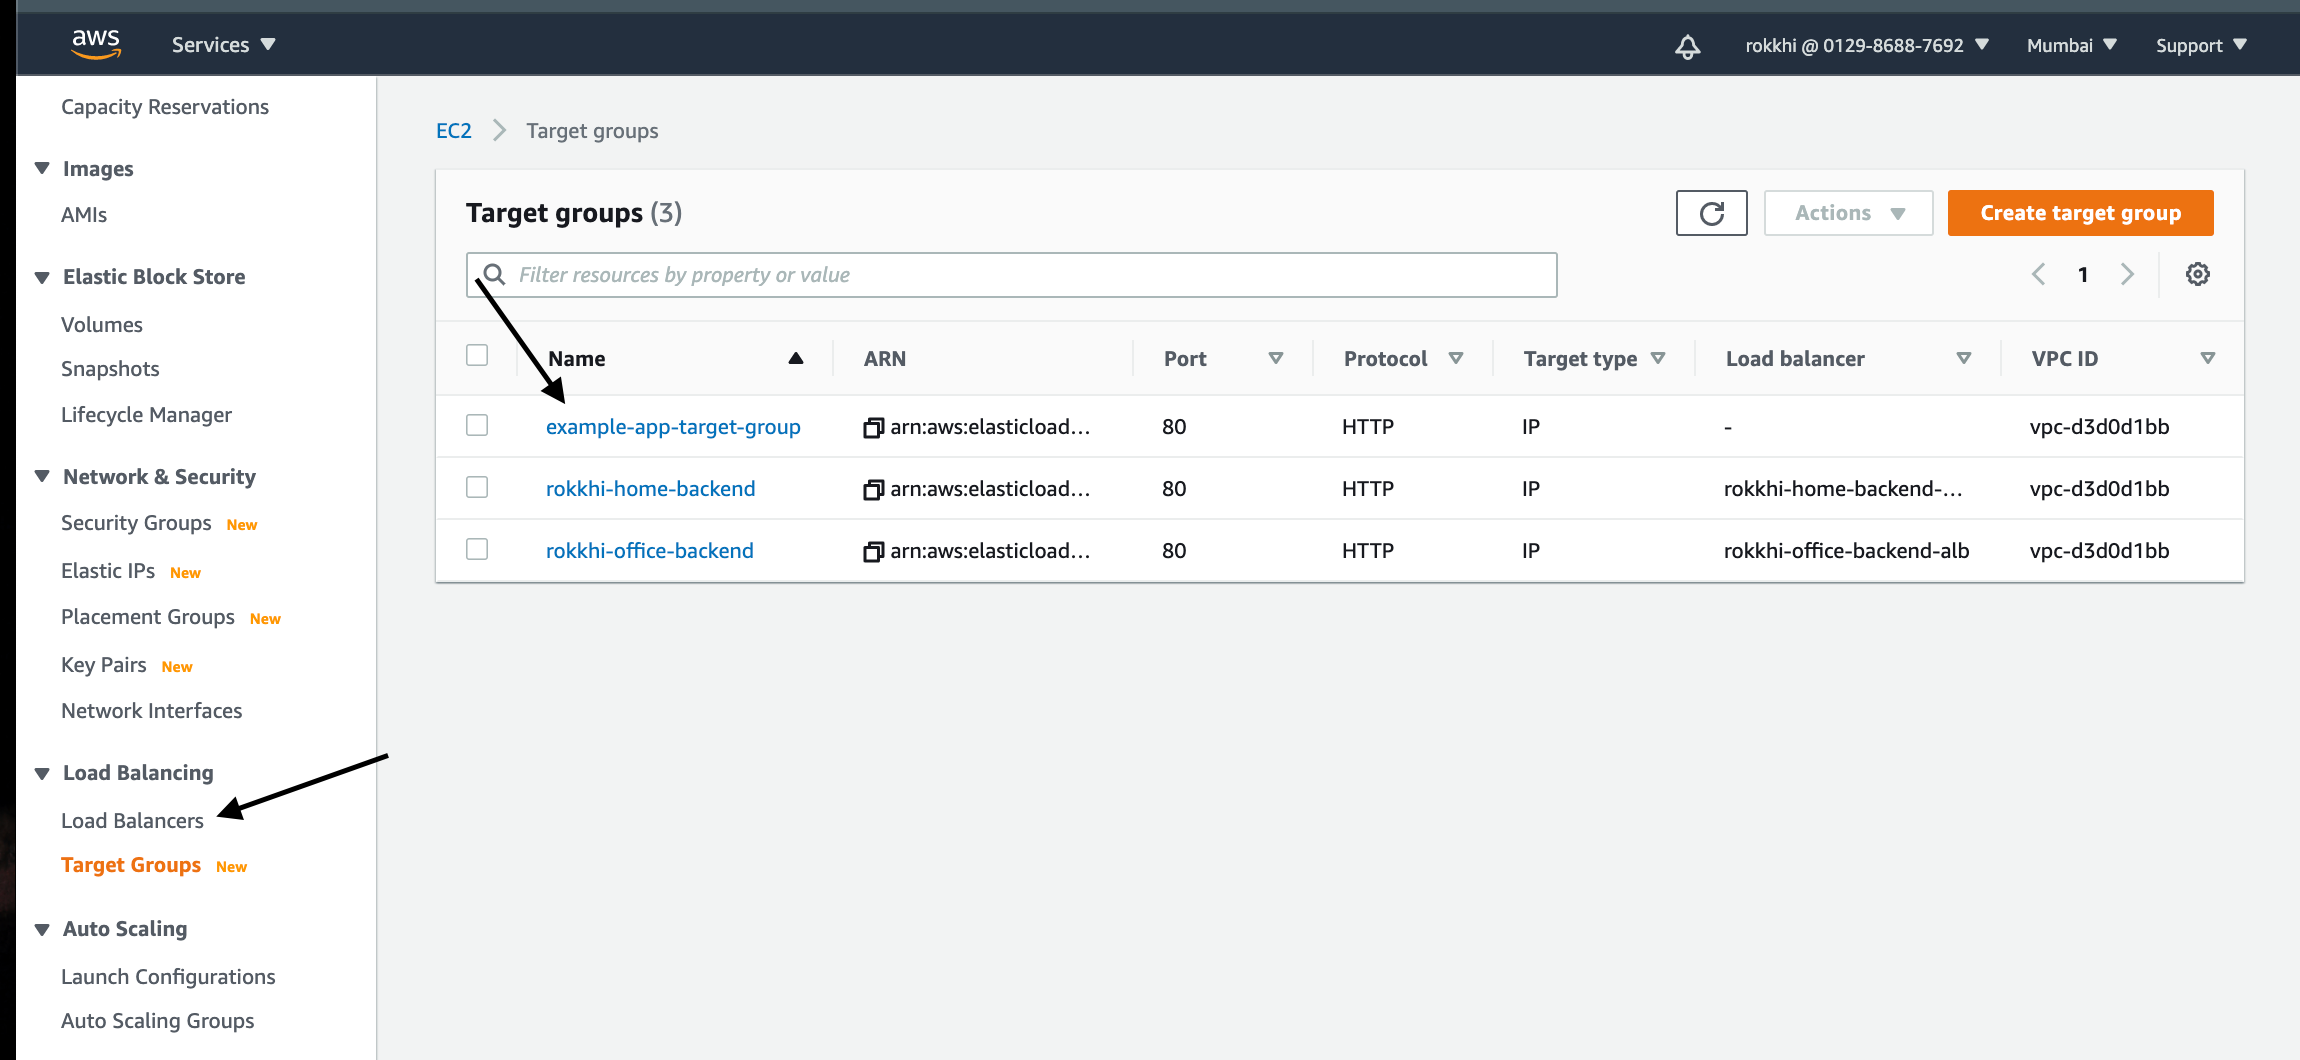
- Click on Create a new load balancer

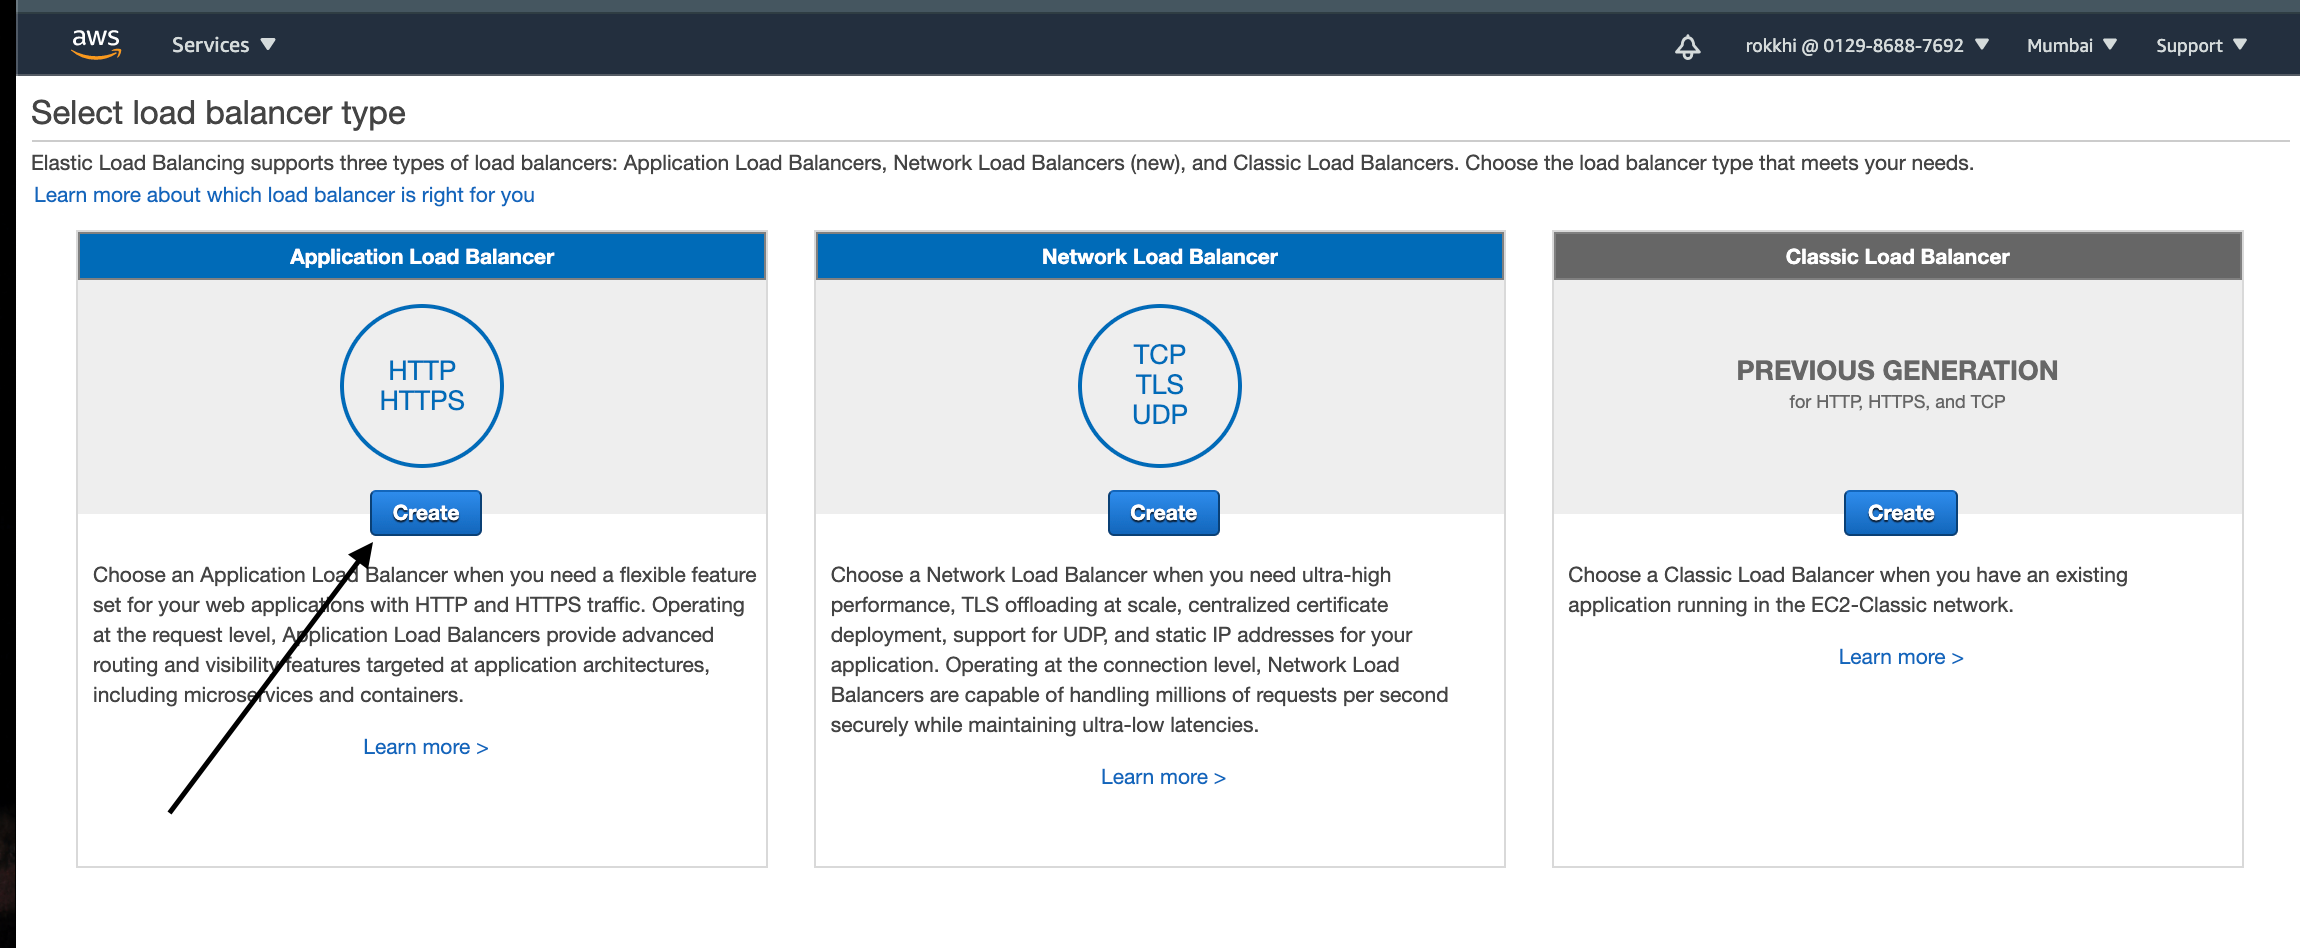
- Select Type Http/Https and Click on Create
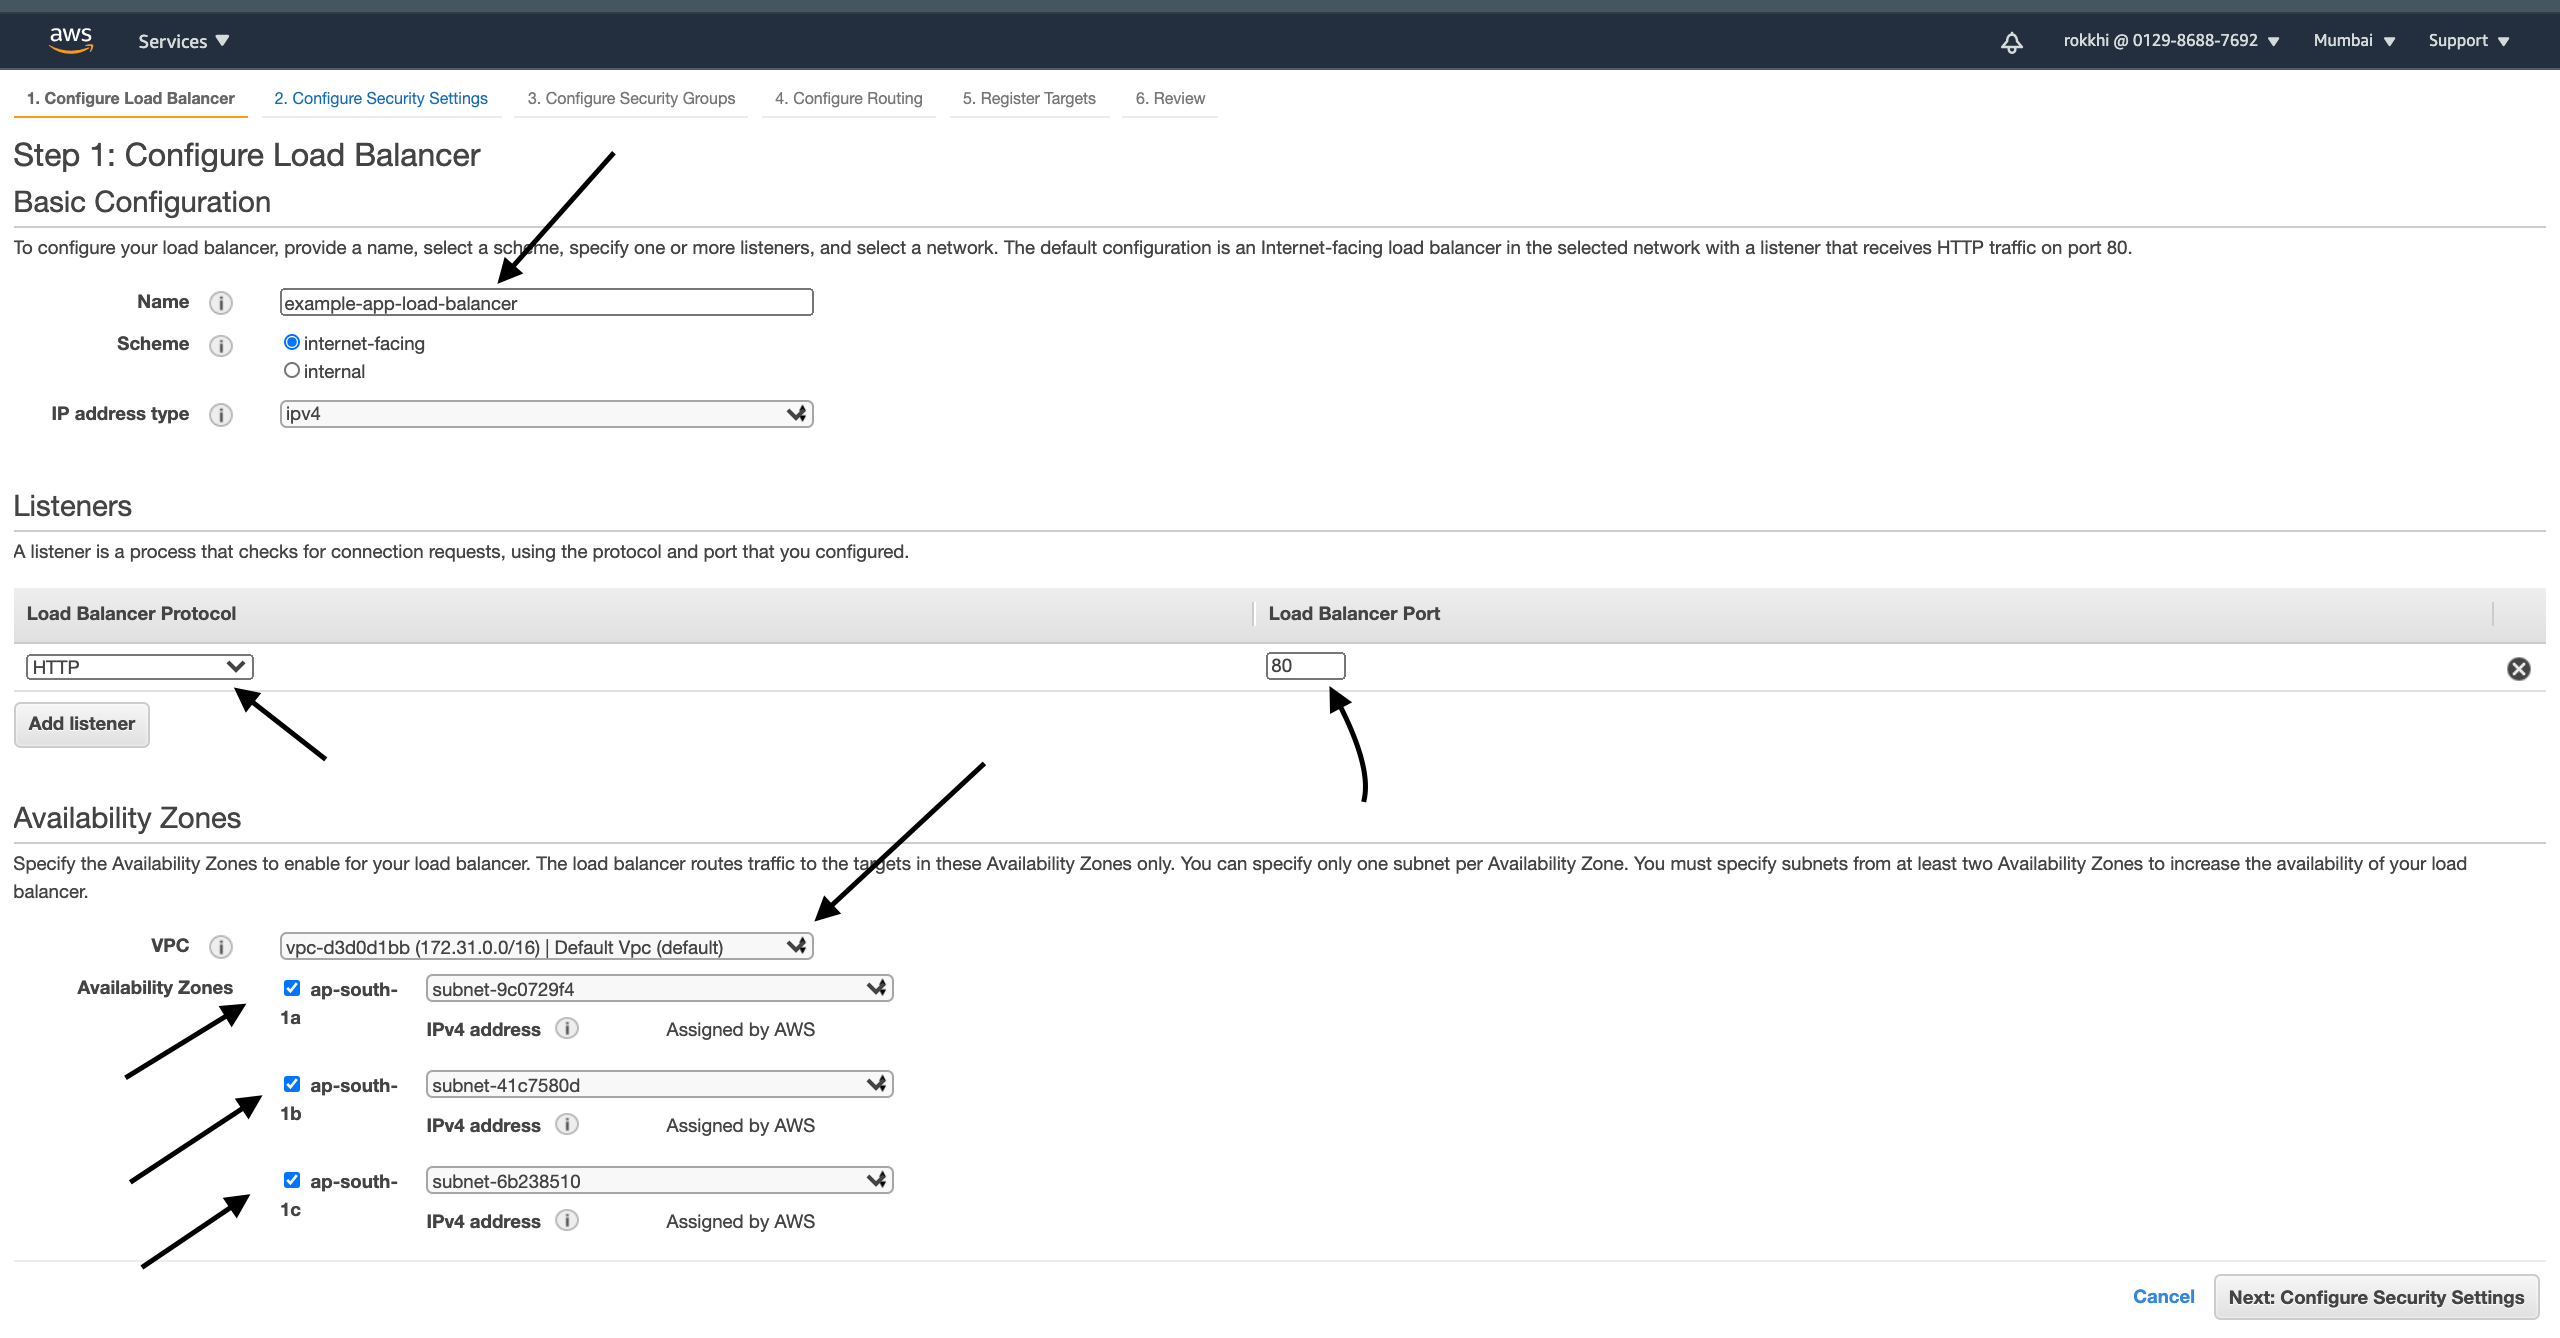
Set a name and set Scheme as Internet-facing as we want our load balancer to be accessible from outside of AWS.
Add HTTP: 80 as the listener. You can also add HTTPS if you want HTTPS and have the proper certificates. But for now, we are skipping it
Select the Default VPC for now and select More than 1 subnet from different availability zones. we selected 3 in our case.
Click next
- It will give us a warning about security as we did not select HTTPS. Don’t worry hit next

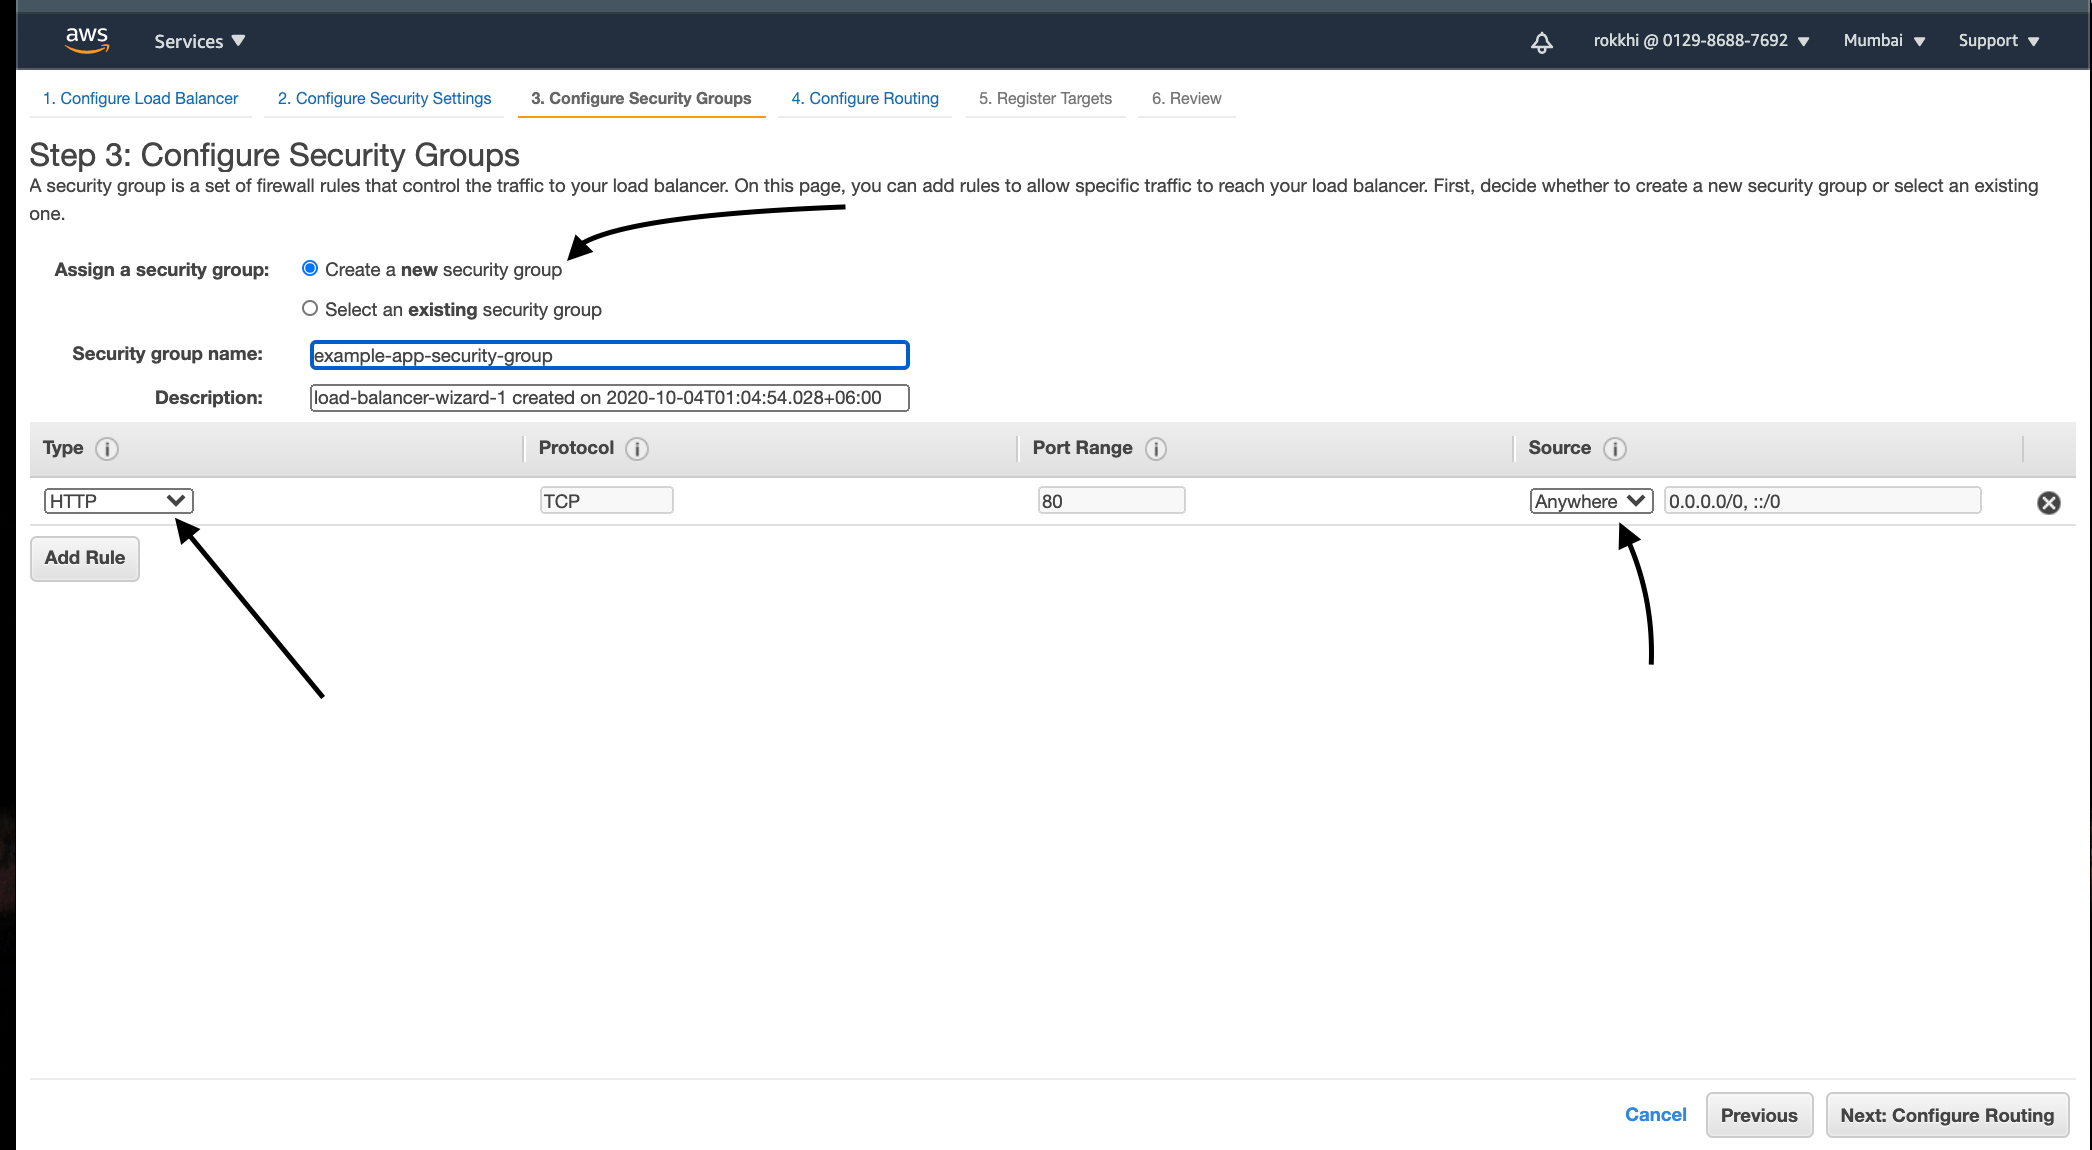
- Choose to Create a new security group and click next and allow HTTP from anywhere to access the load balancer
- Hit next and on the next page of configuring routing select the Existing target group and select the target group that we already created in the previous step. It will autofill the remaining fields
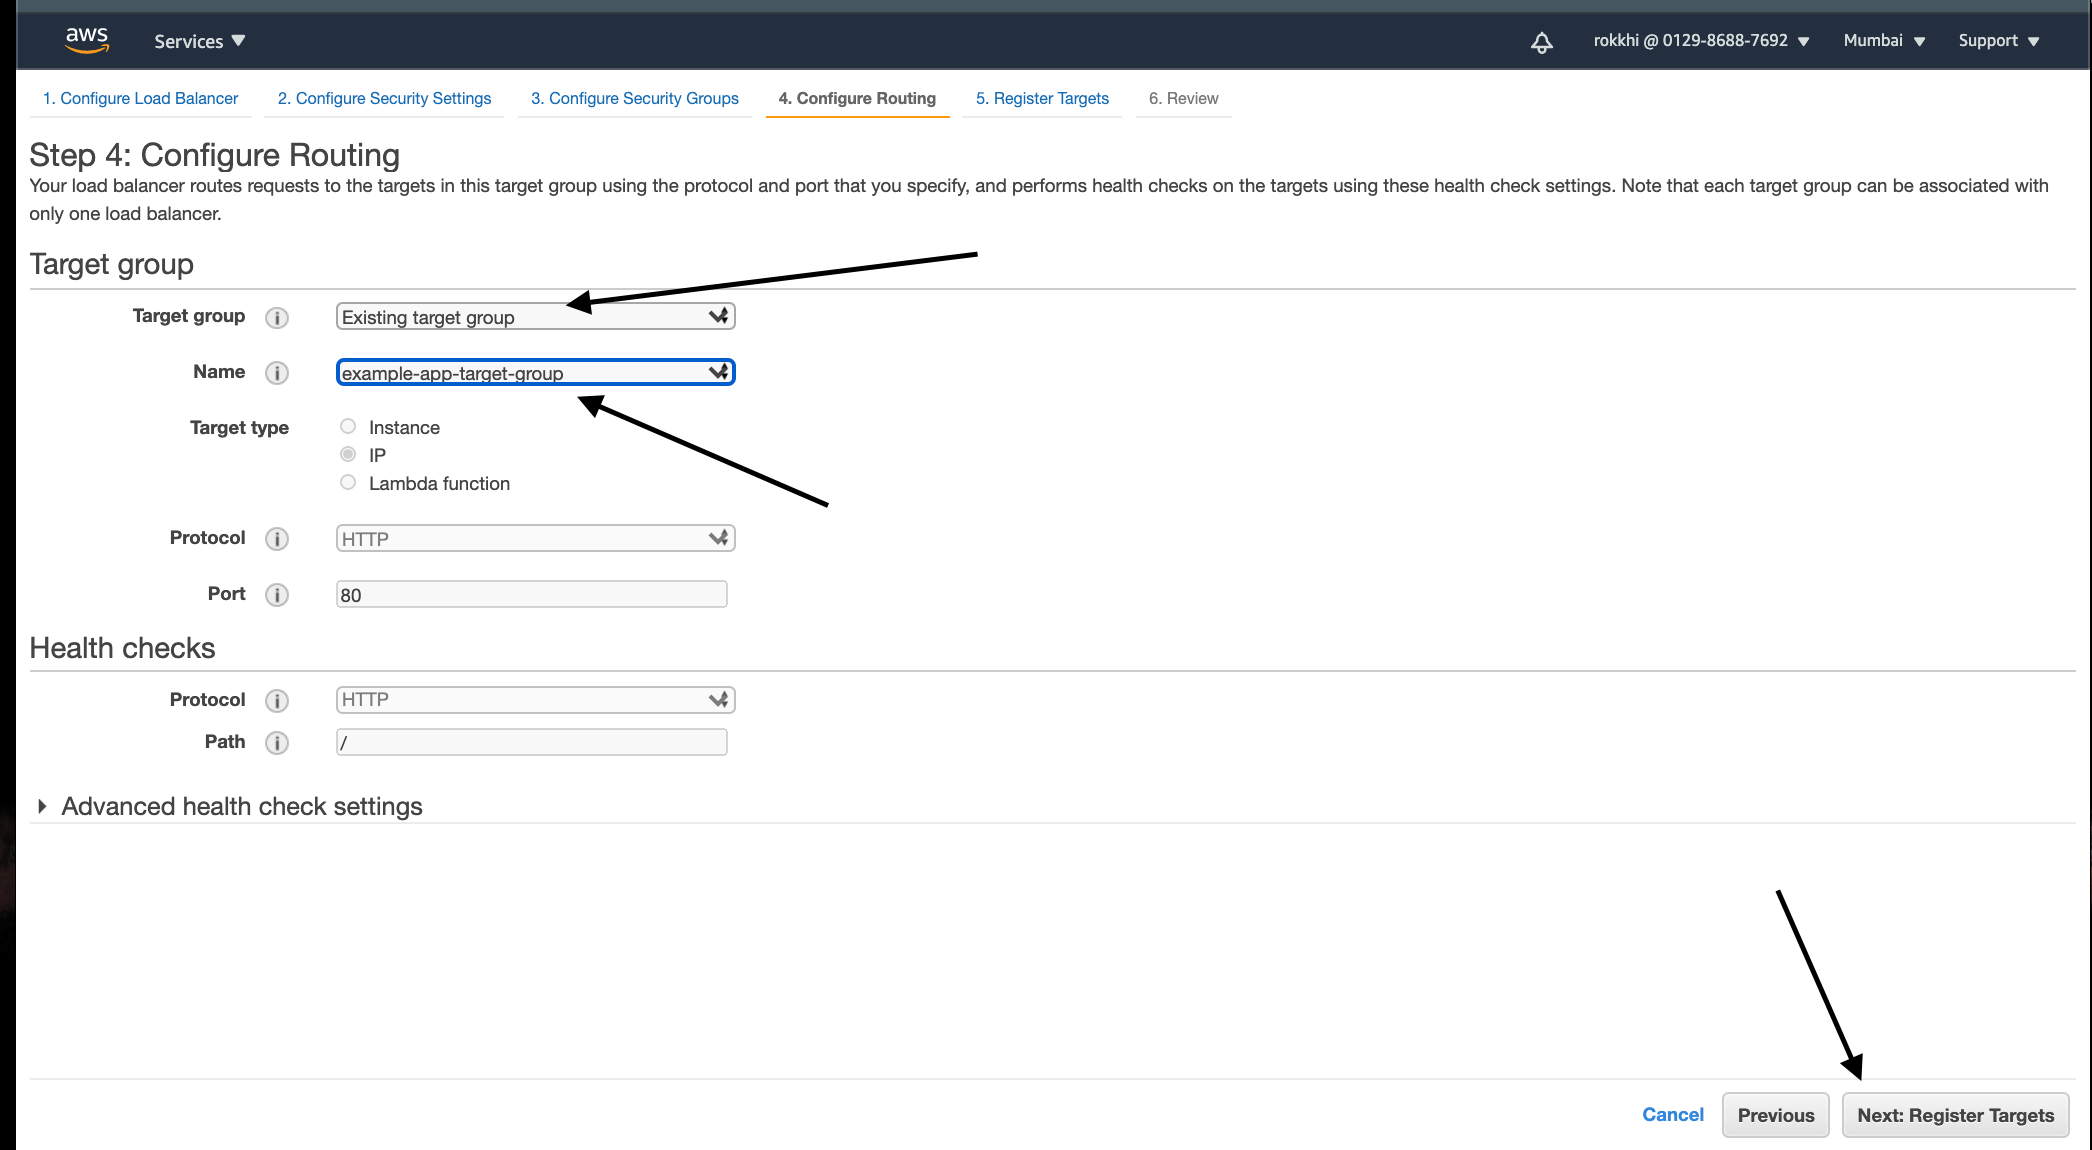
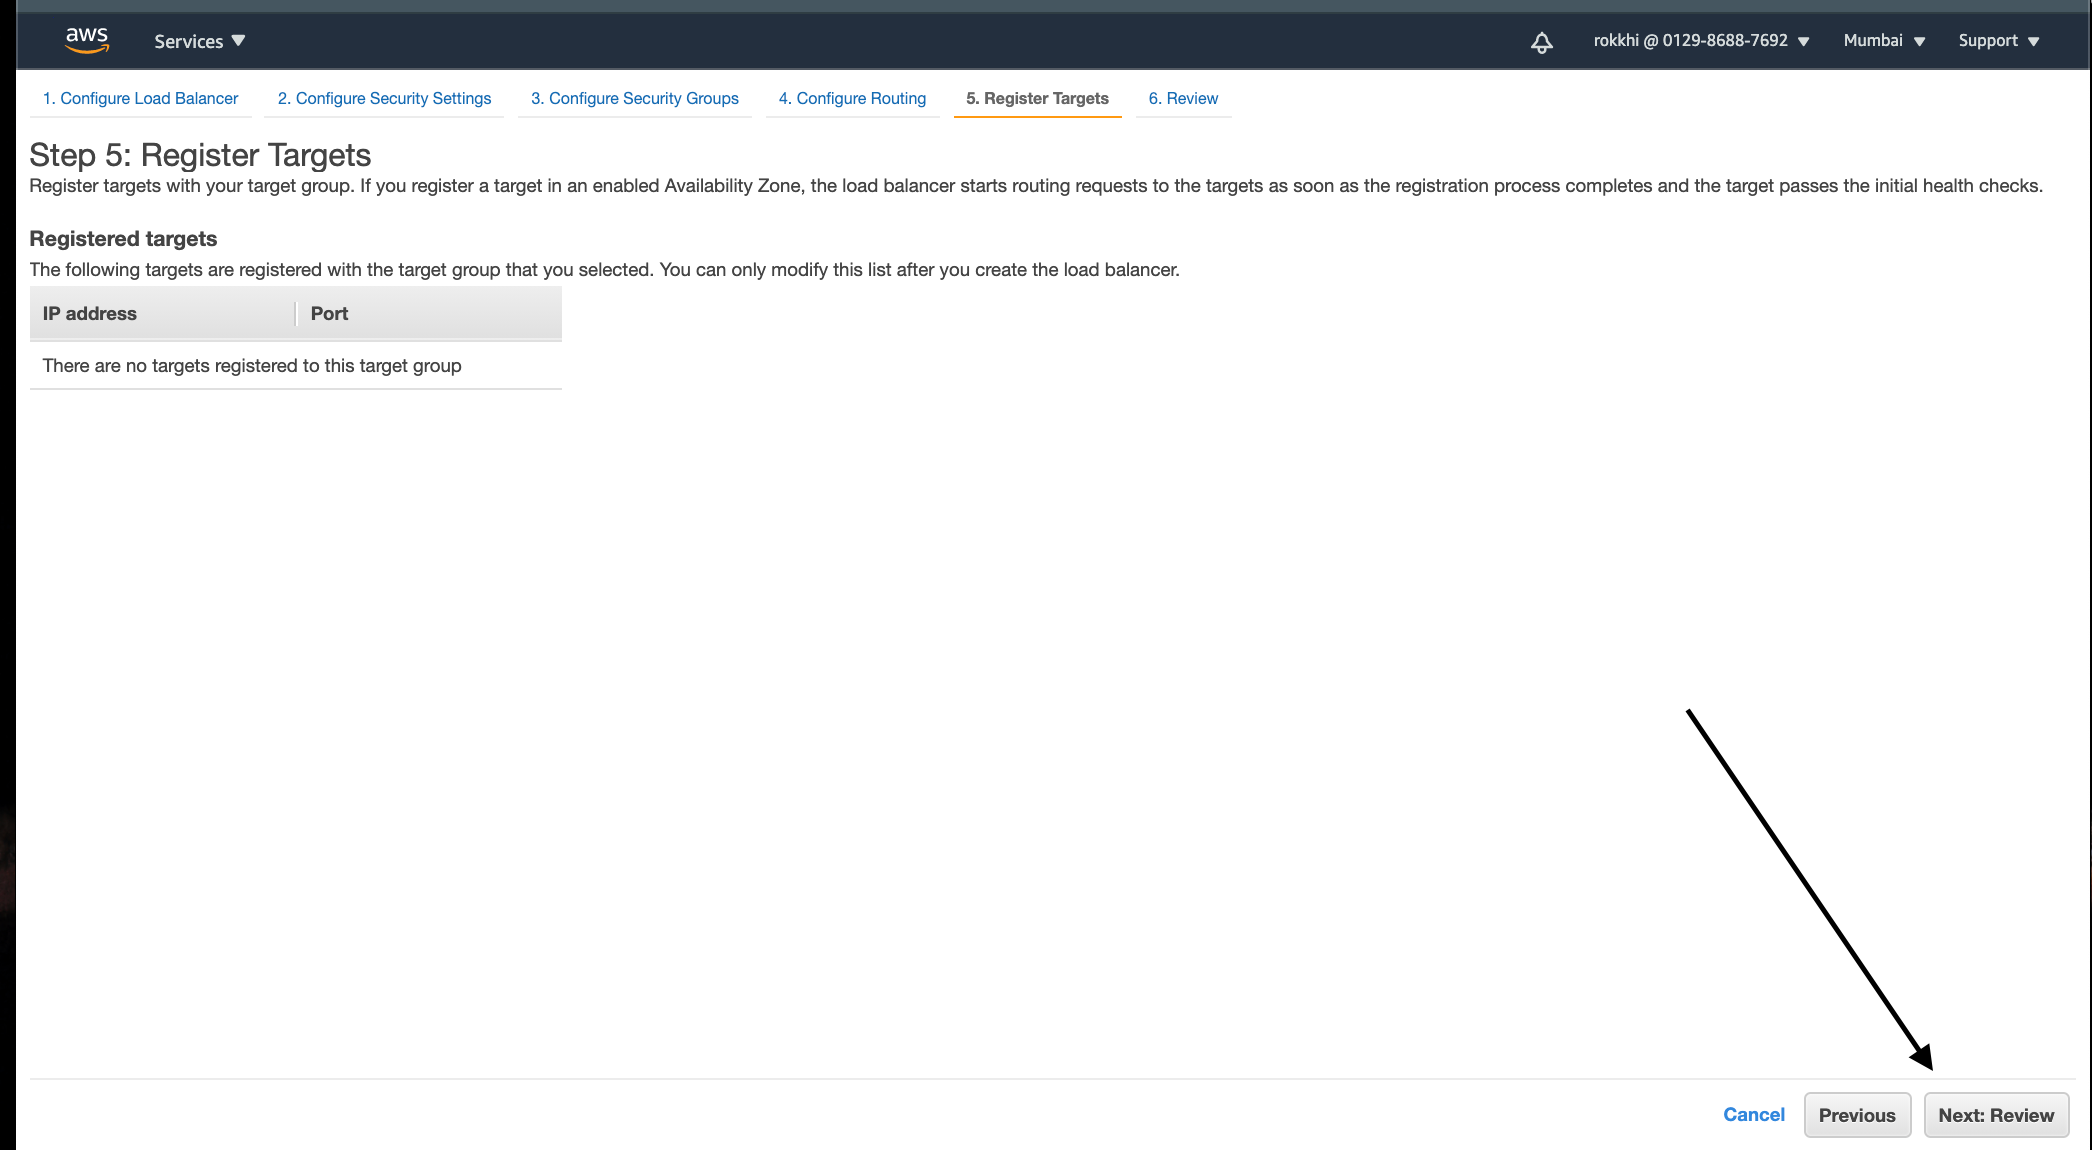
- On the next Page, we leave it as it is and hit next
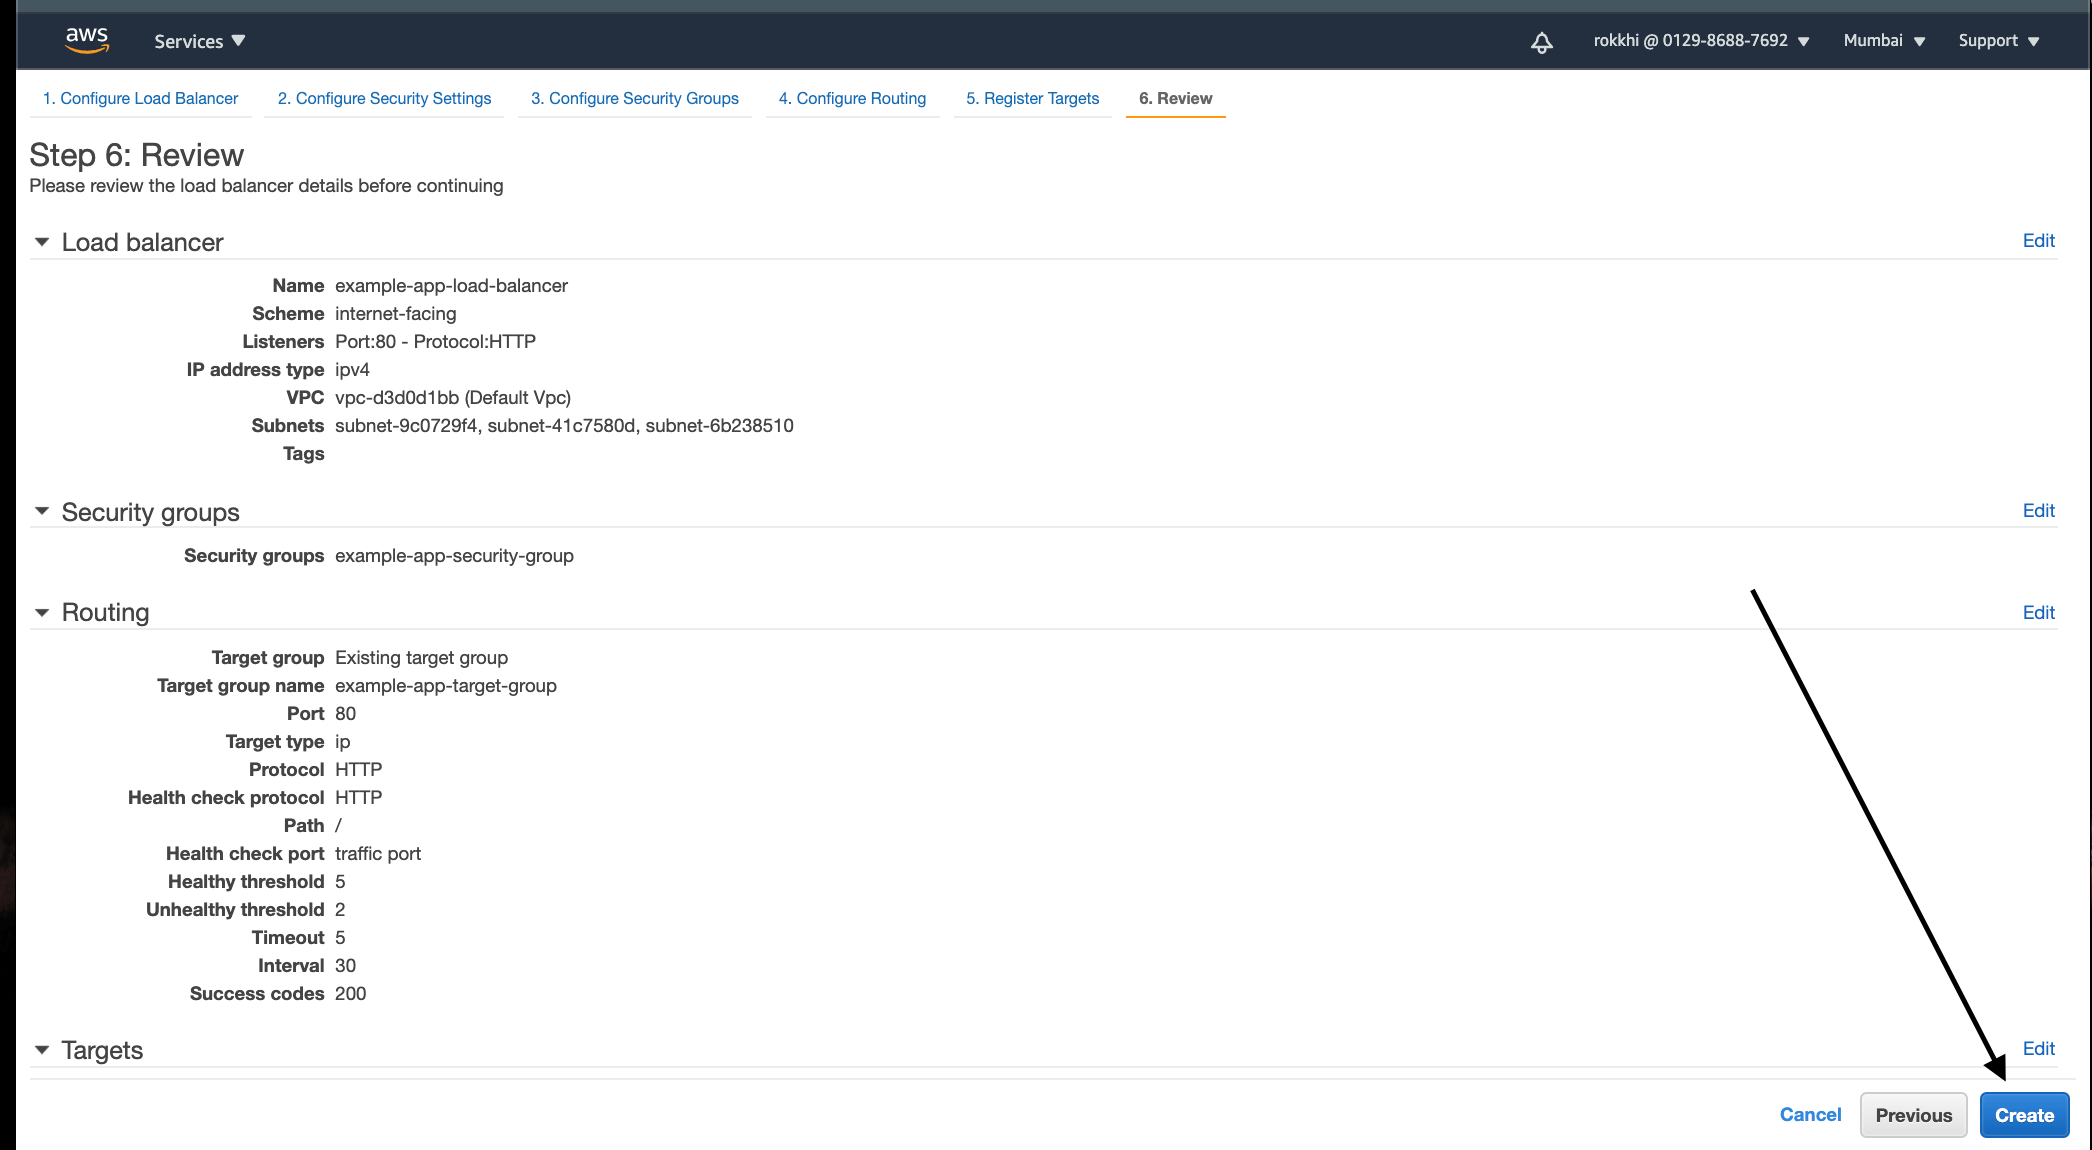
- On the final page, we review everything and click Create
- And we are done with our load balancer

Step 6: Create a new Cluster in Elastic Container Service
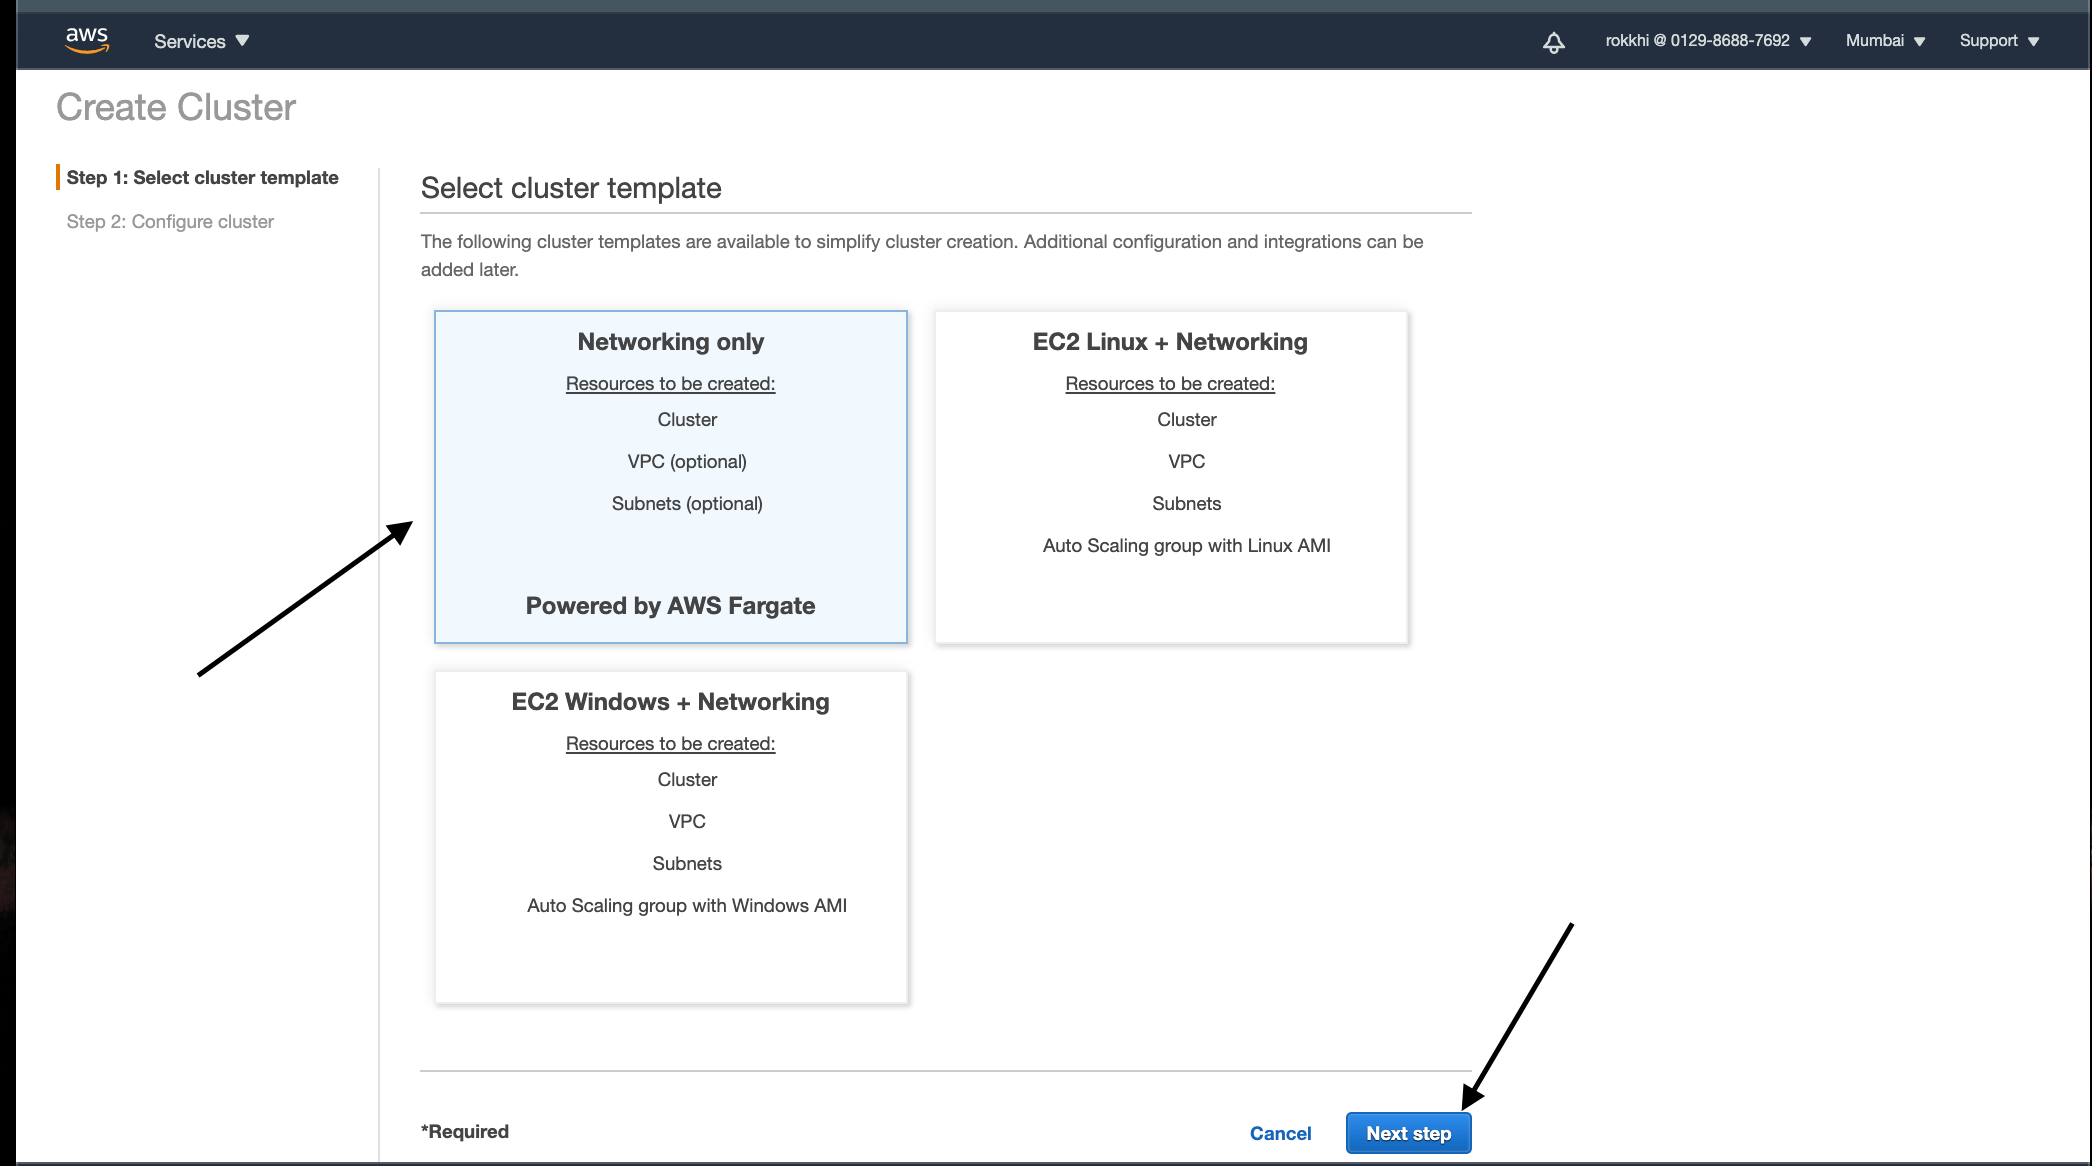
- We go back to the Elastic container service and Click Clusters -> CreateCluster
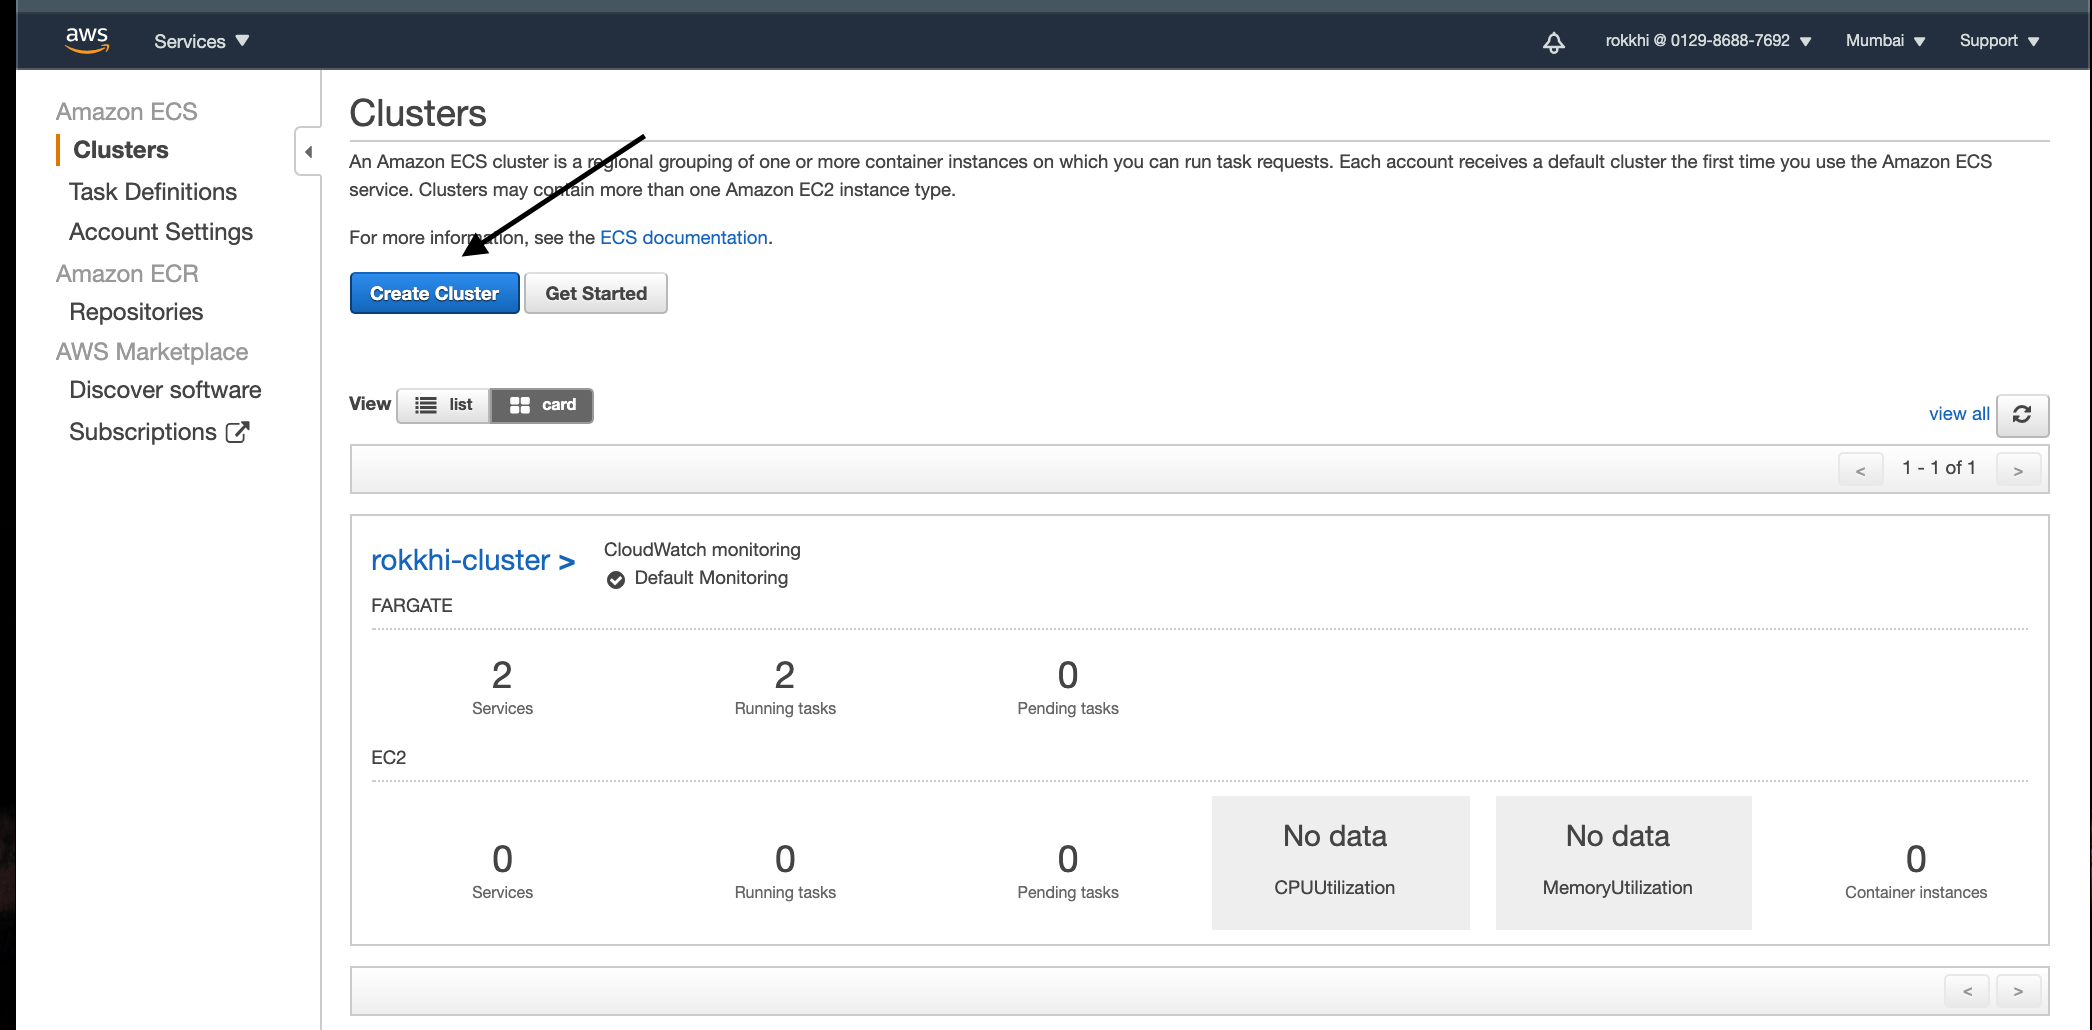
- Select NetWorking Only as Cluster Template. We will use Fargate in this tutorial. Fargate is awesome for managing Containers as it is managed automatically by AWS
- Give a name and don’t click on the create VPC checkbox as we will use our default VPC for this tutorial
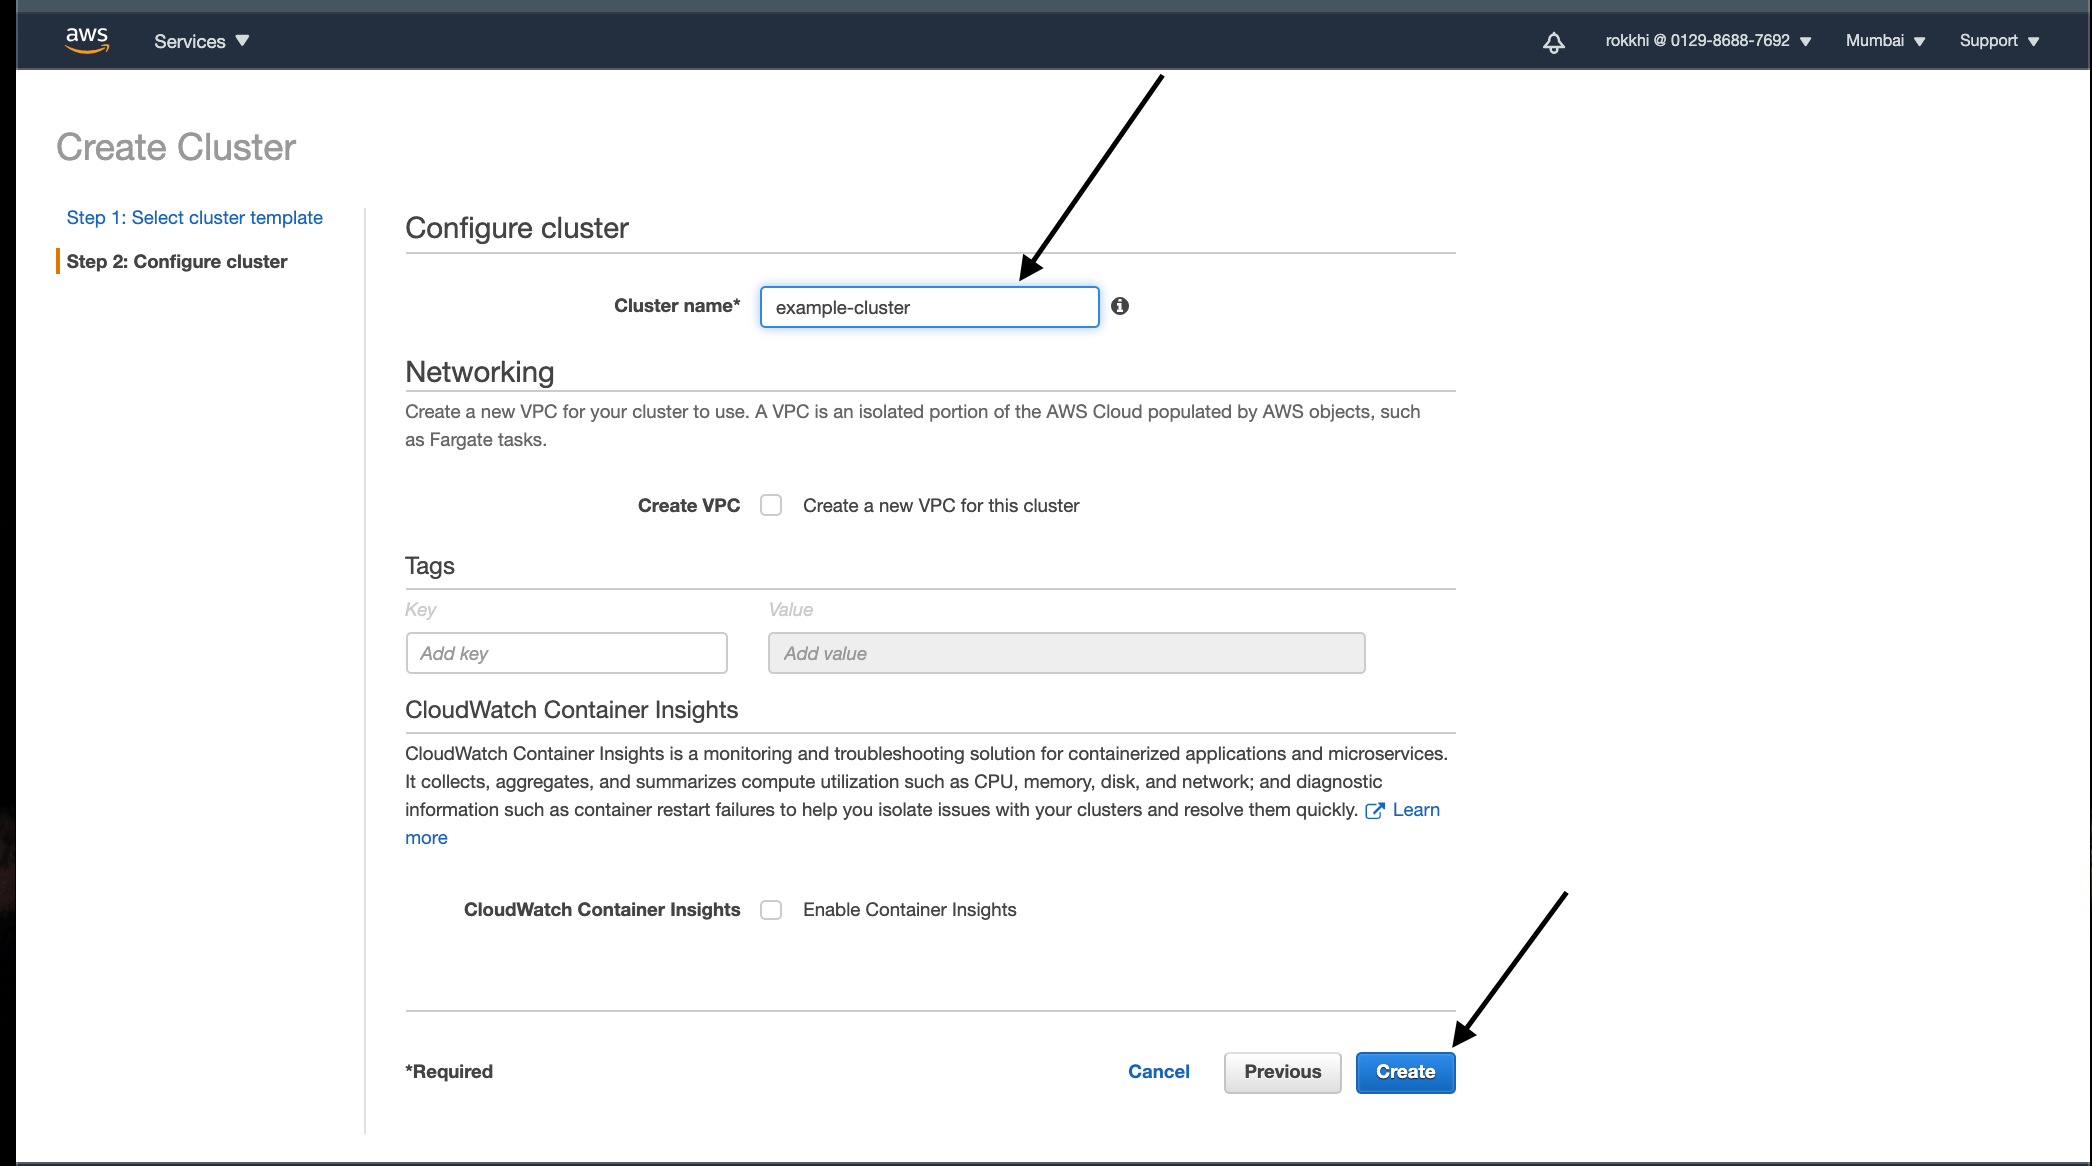
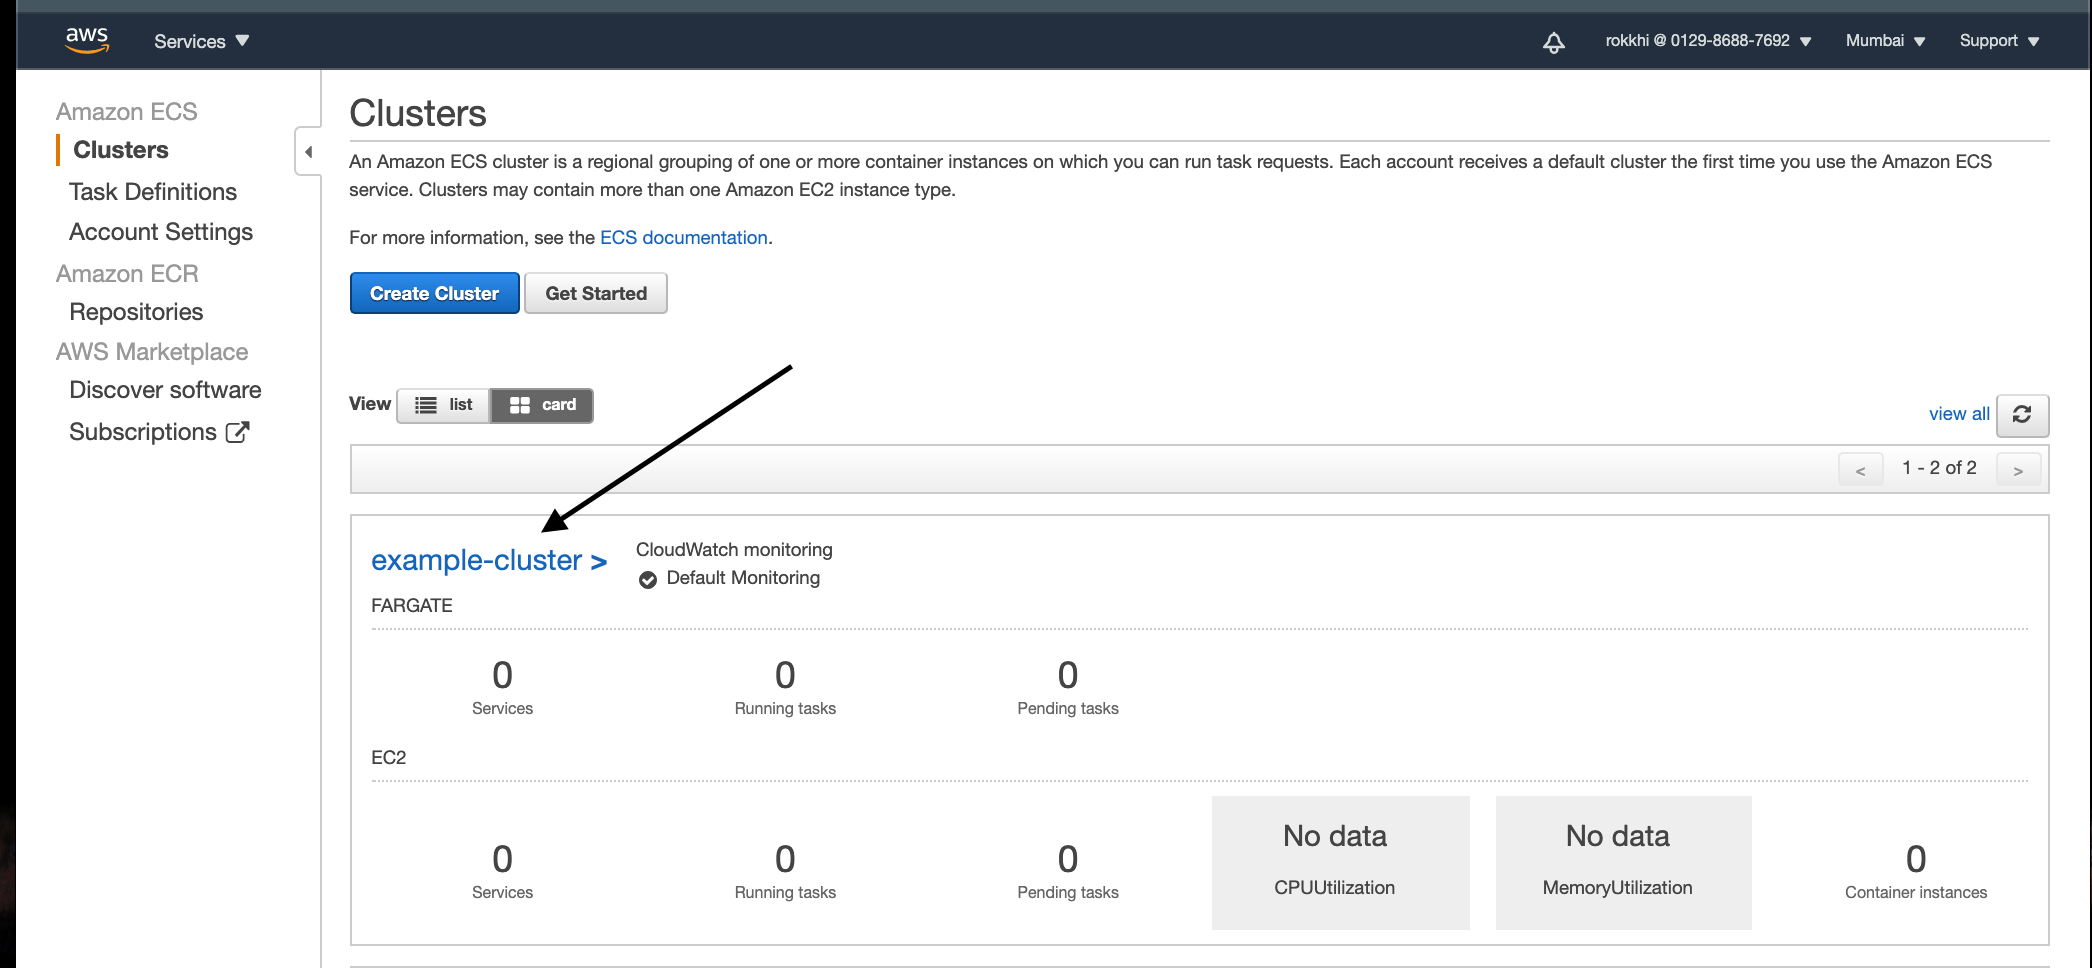
- Click on Create and you will have your cluster :D

Step 7: Create a new Service to Connect them
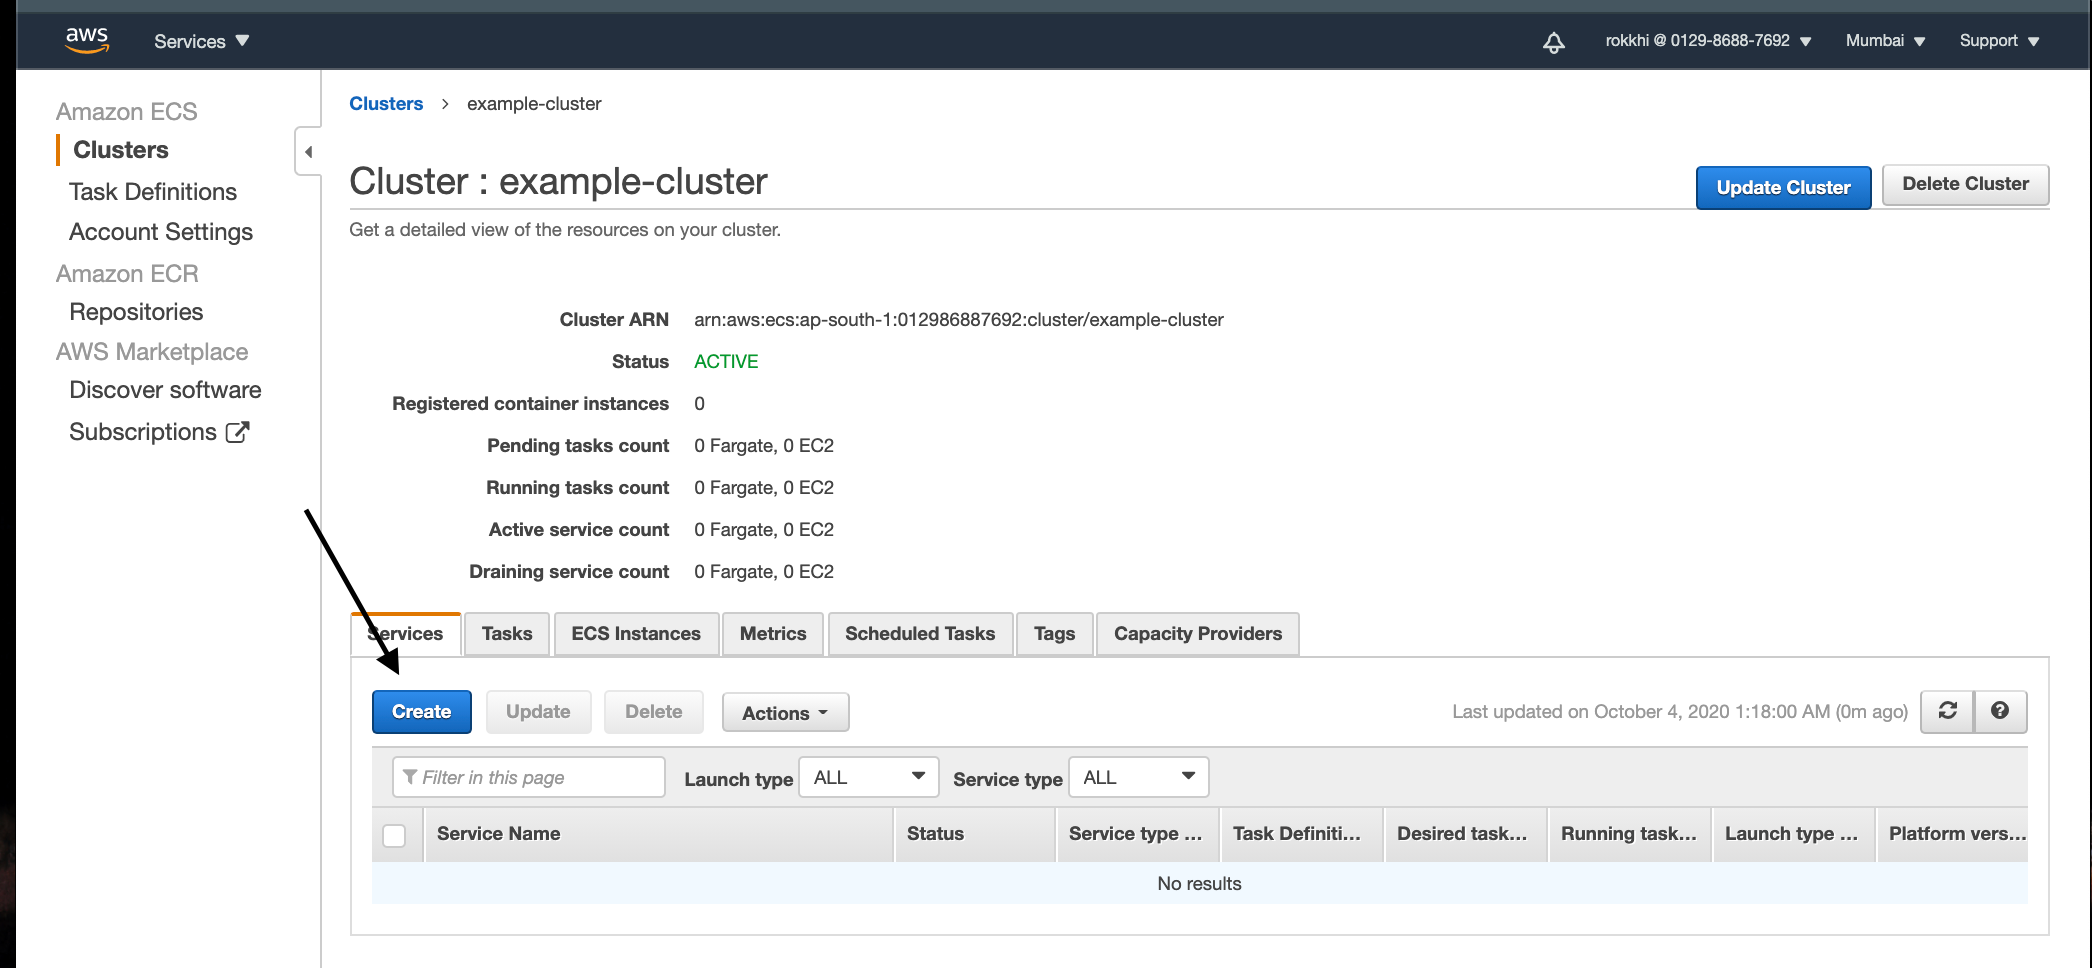
- First Go into your newly created Cluster
- Then Hit Create to Create a new Service
- Then Choose Fargate as the launch type. Select the task definition we selected earlier give a name and keep the number of tasks as 1 (It means our service will run one instance of our task resulting in one fargate instance ) If we want more than one instance for our app we can choose as many as we want > After completing the tutorial come back here and edit the number of tasks back to 0 or delete the service entirely to reduce cost otherwise it will continue to charge you.
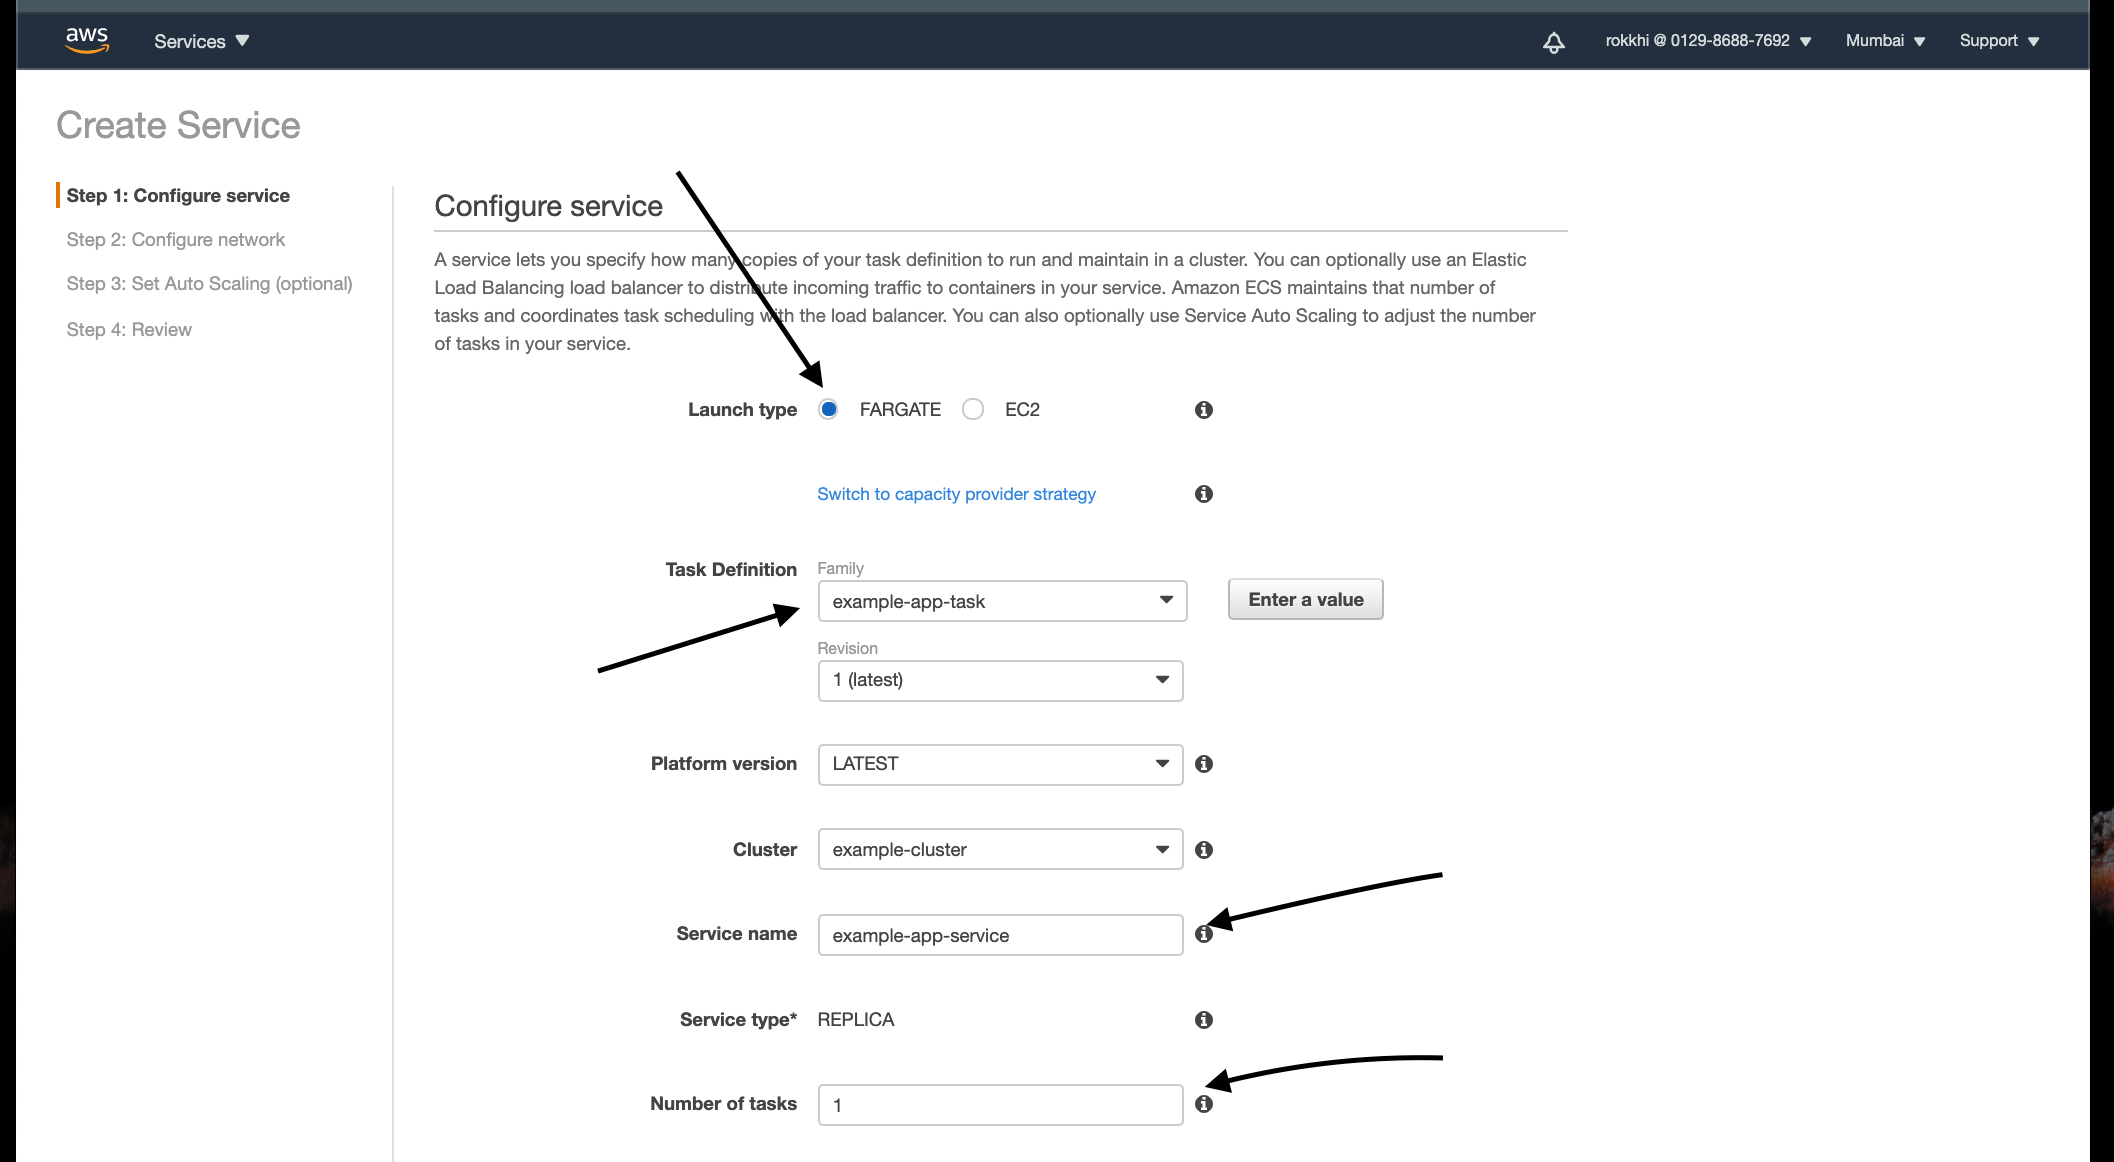
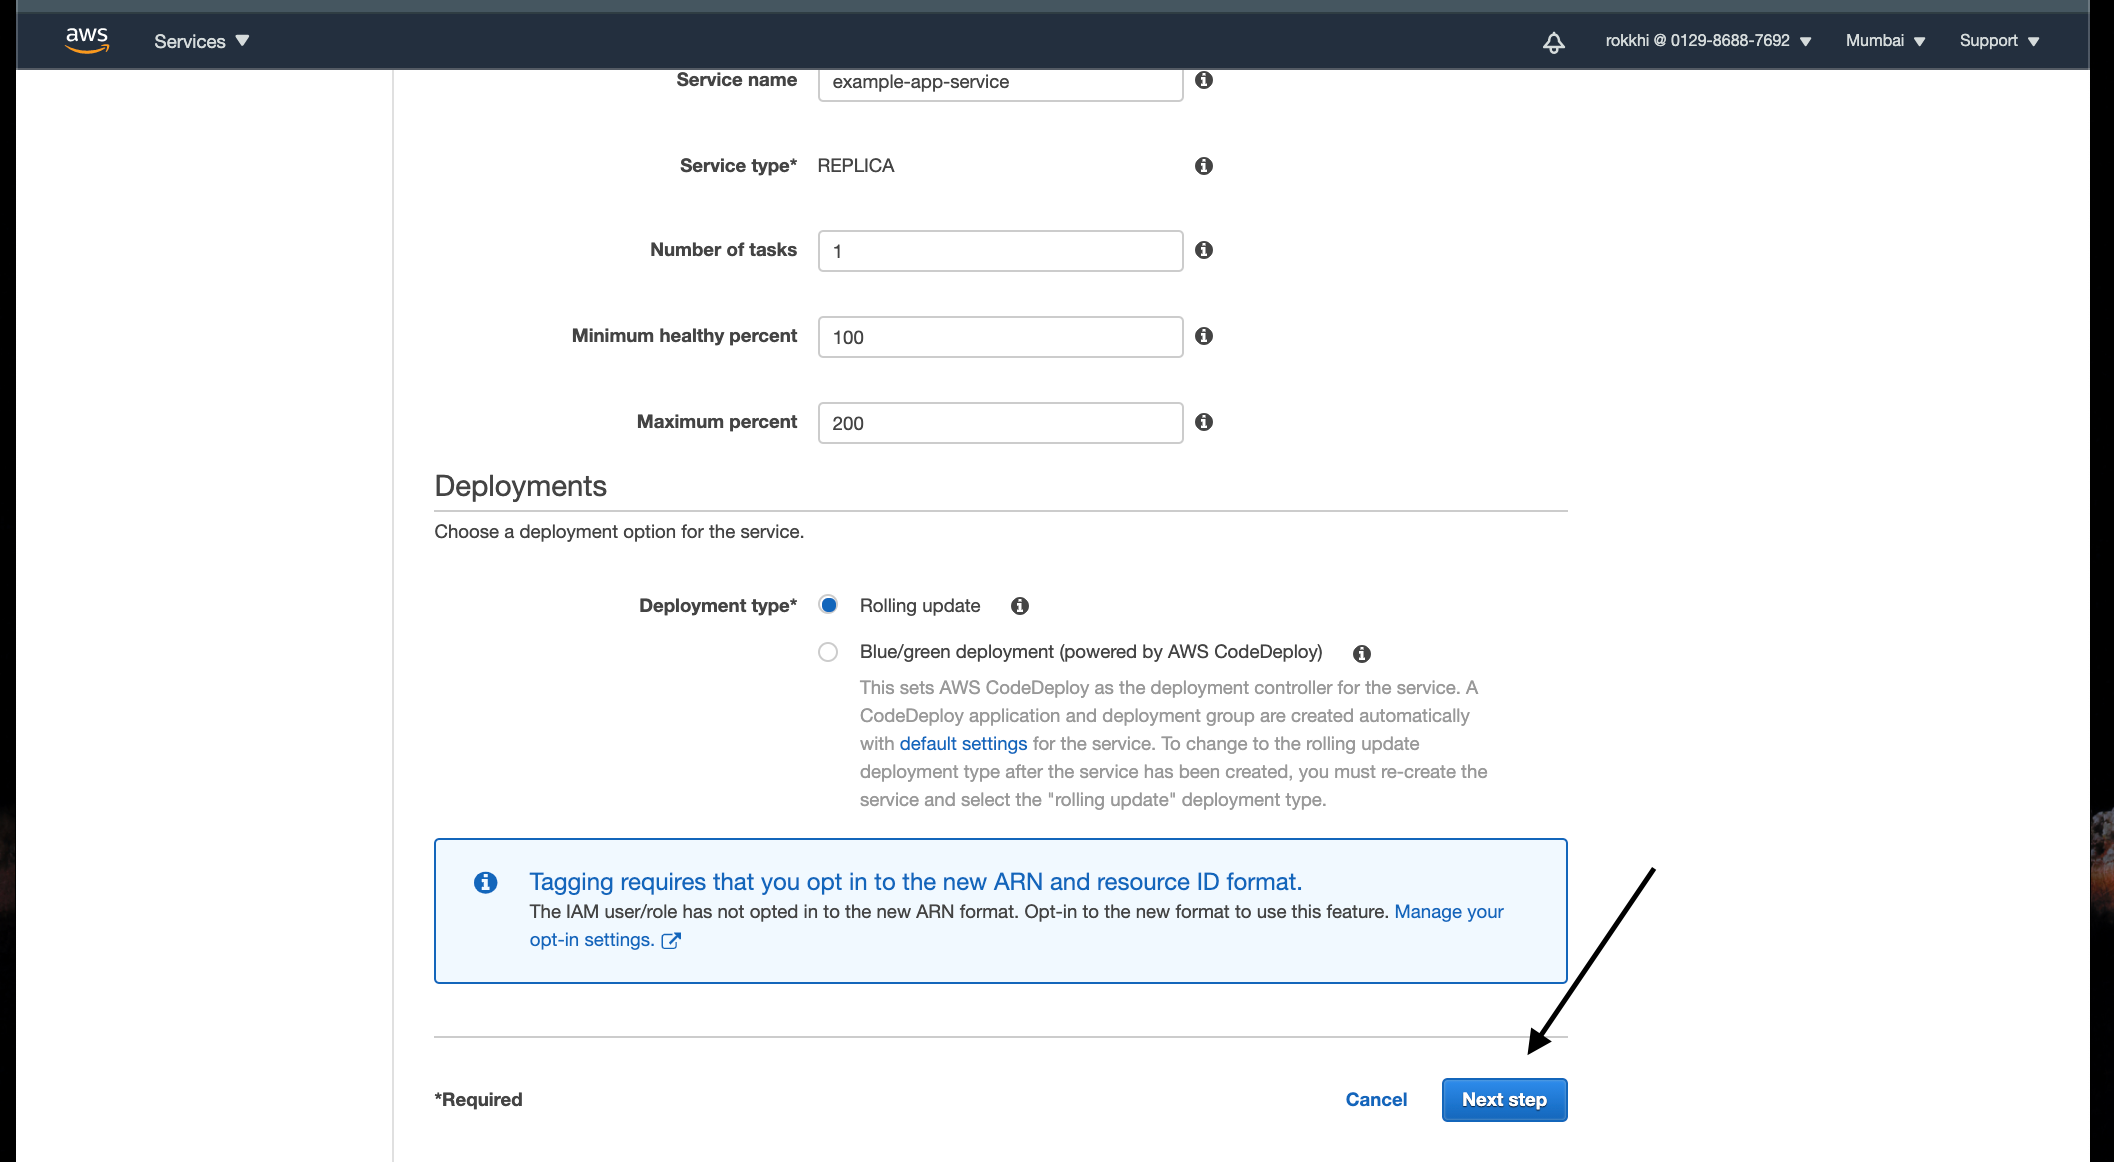
- At the bottom leave everything as it is and hit next
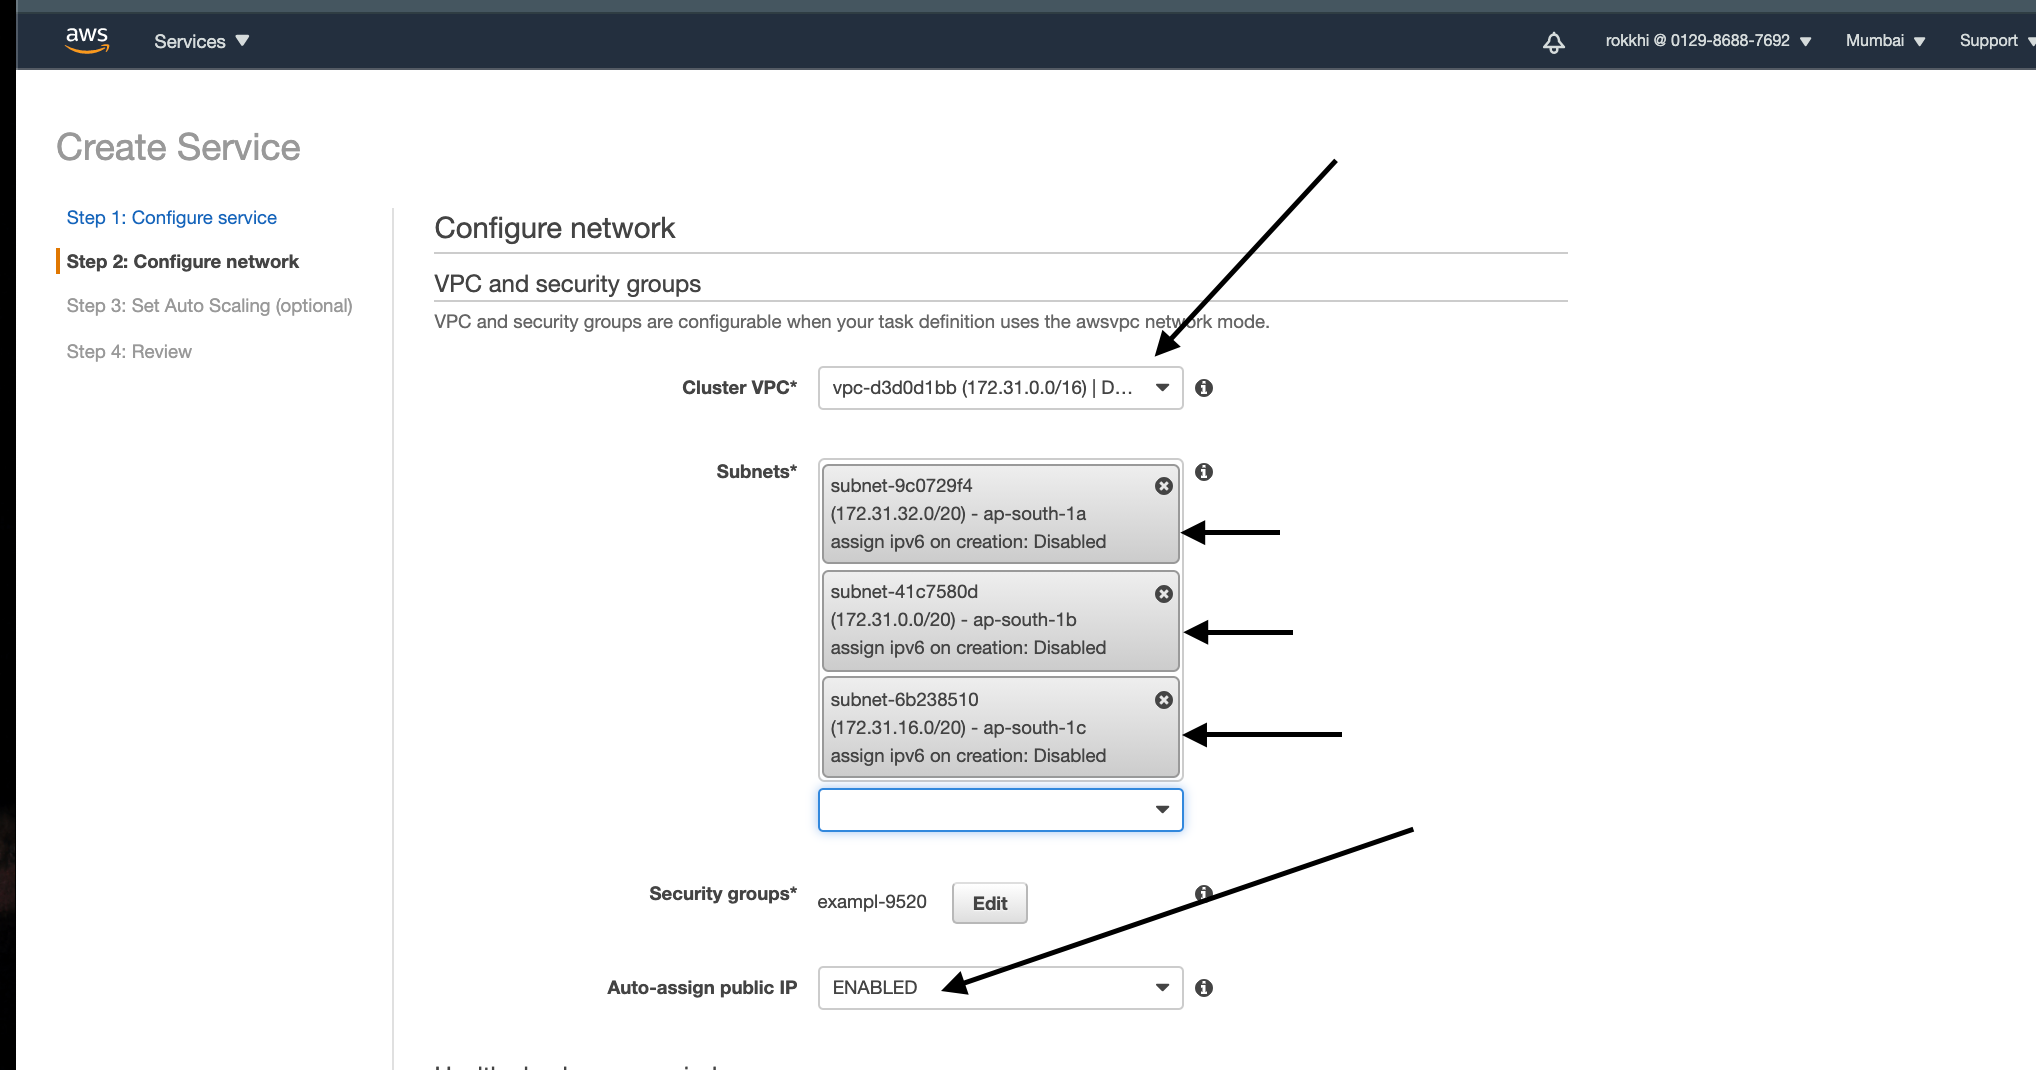
On the next page select default VPC and from the dropdown select three subnets
Keep auto-assign public IP as Enabled so that we can access the fargate instances in case of any error
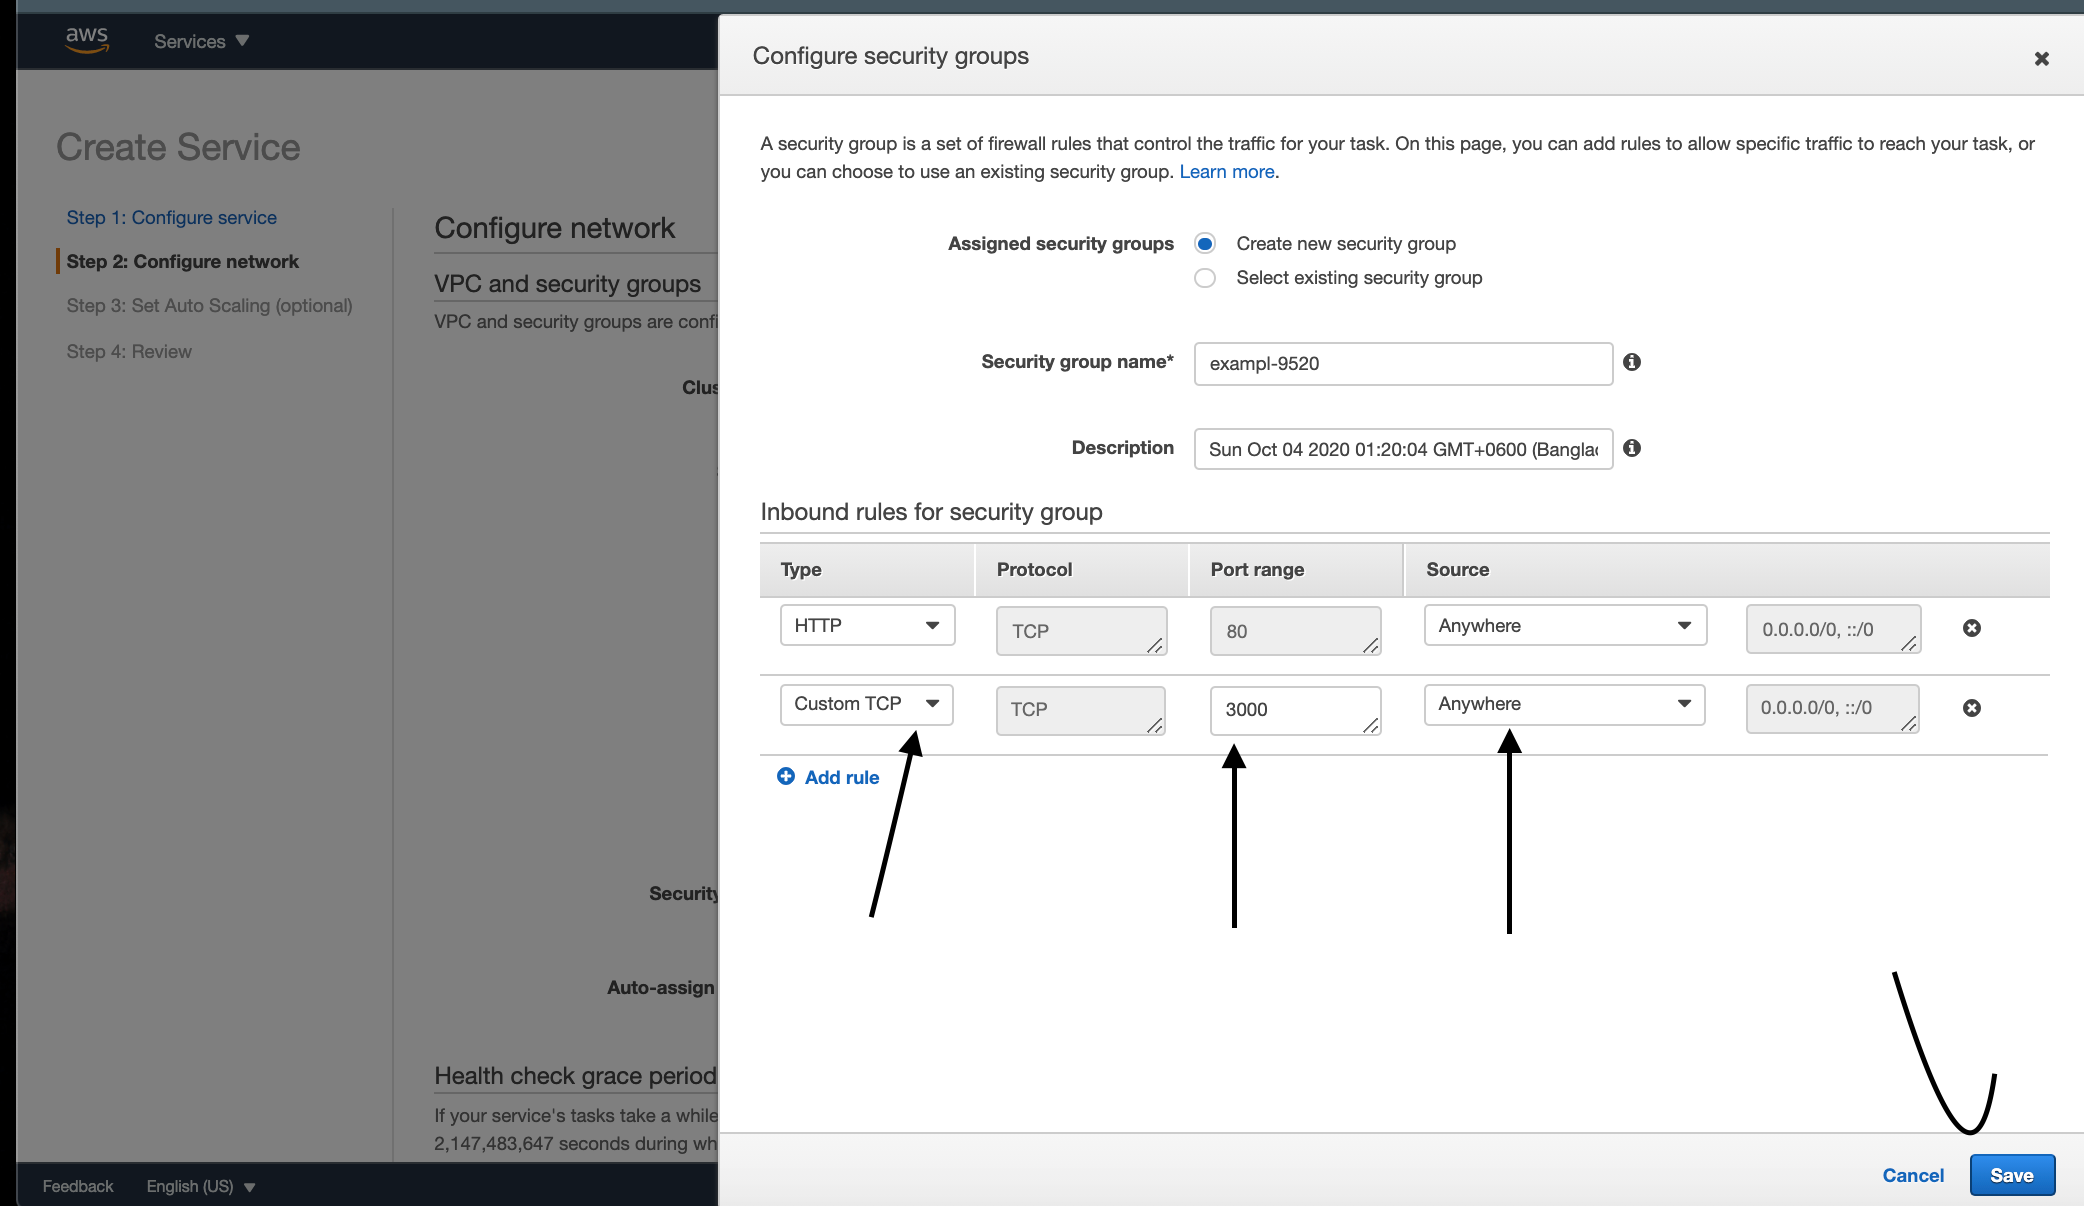
Click on the Edit button beside Security Group in the above image
Add a Custom TCP rule with port 3000 and source Anywhere. It will help us to access the fargate instances with IP addresses if we want to access them without a Load balancer (This is optional)
- Below Select Load Balancer Type as the Application Load balancer
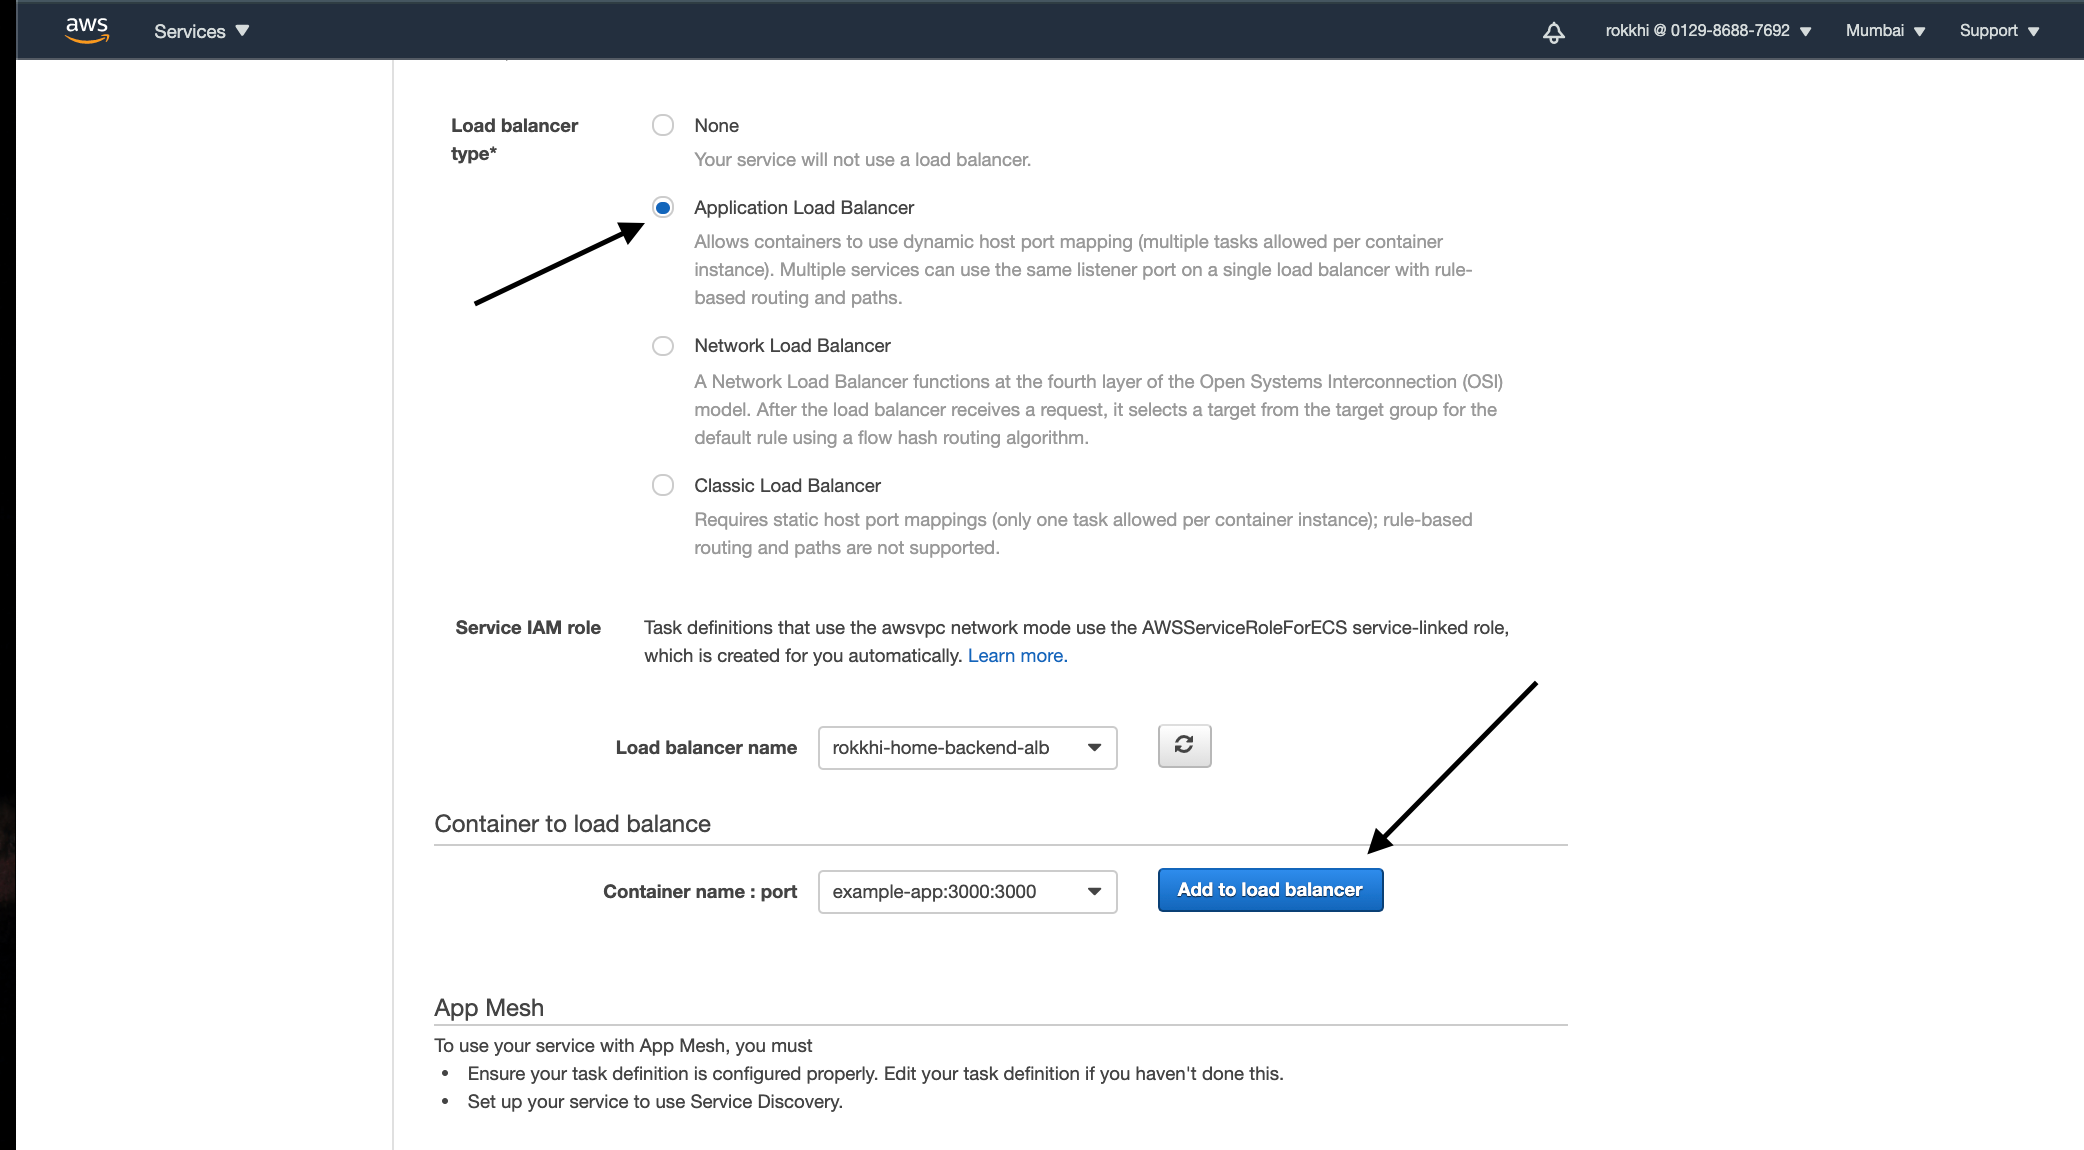
- Select the Load balancer that we created previously from the dropdown and hit Add to Load Balancer
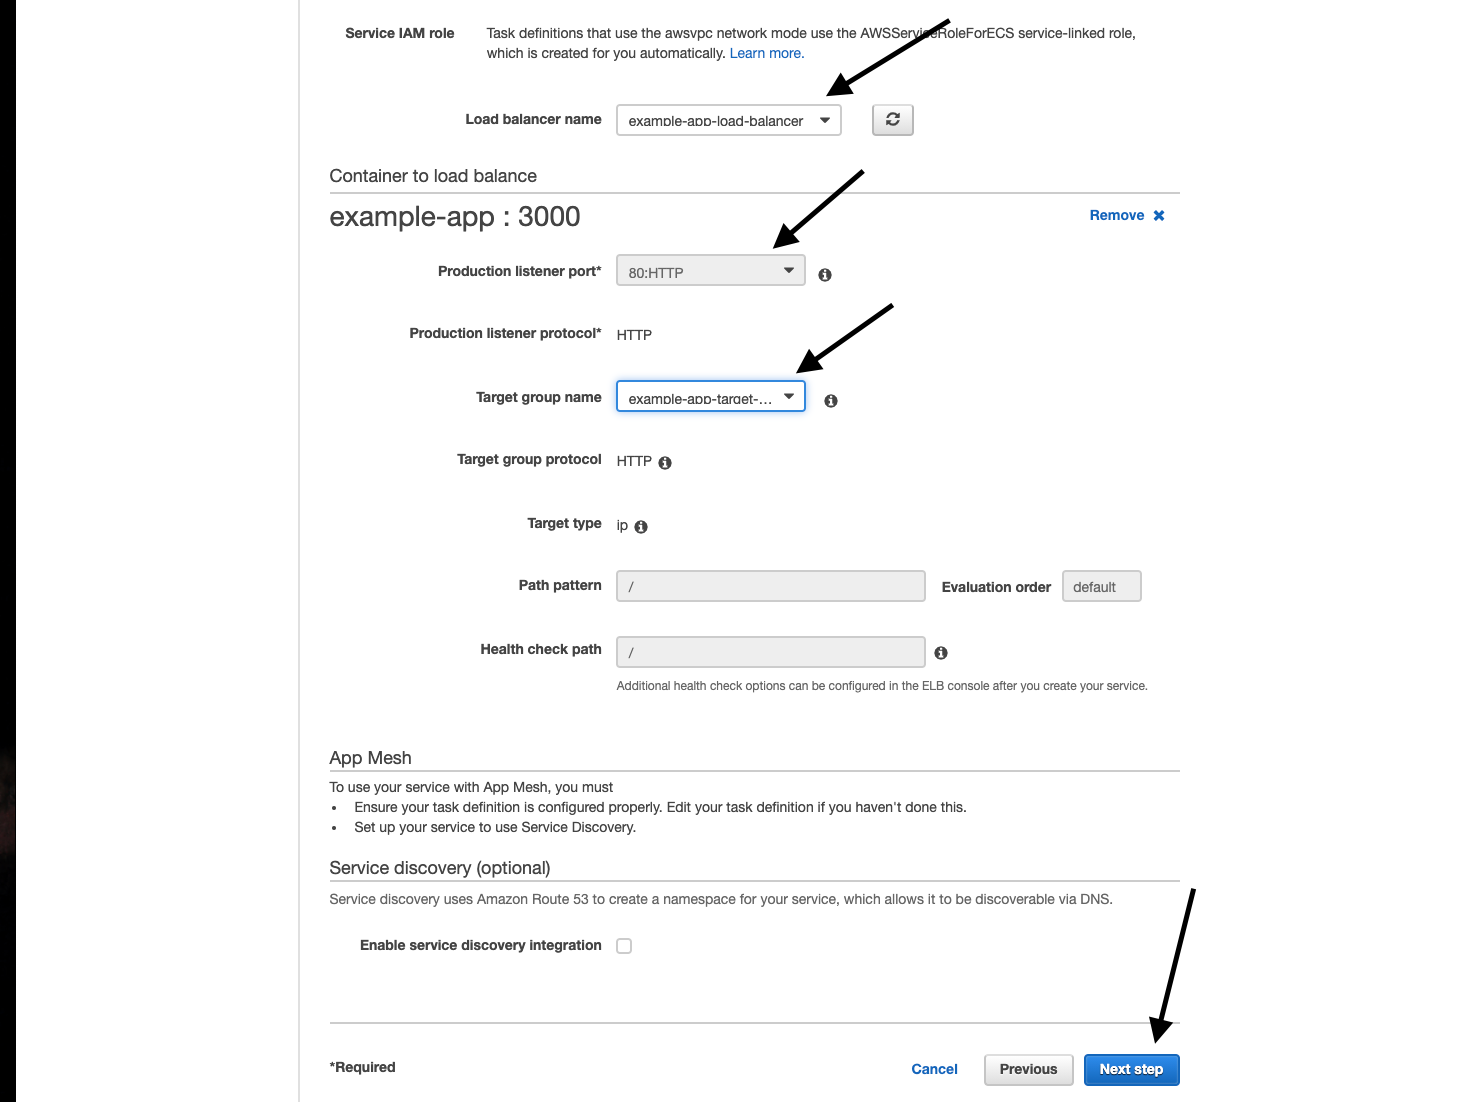
Select Production listener port as Http:80 instead of new from the dropdown
Select the Target group from the dropdown and hit next.
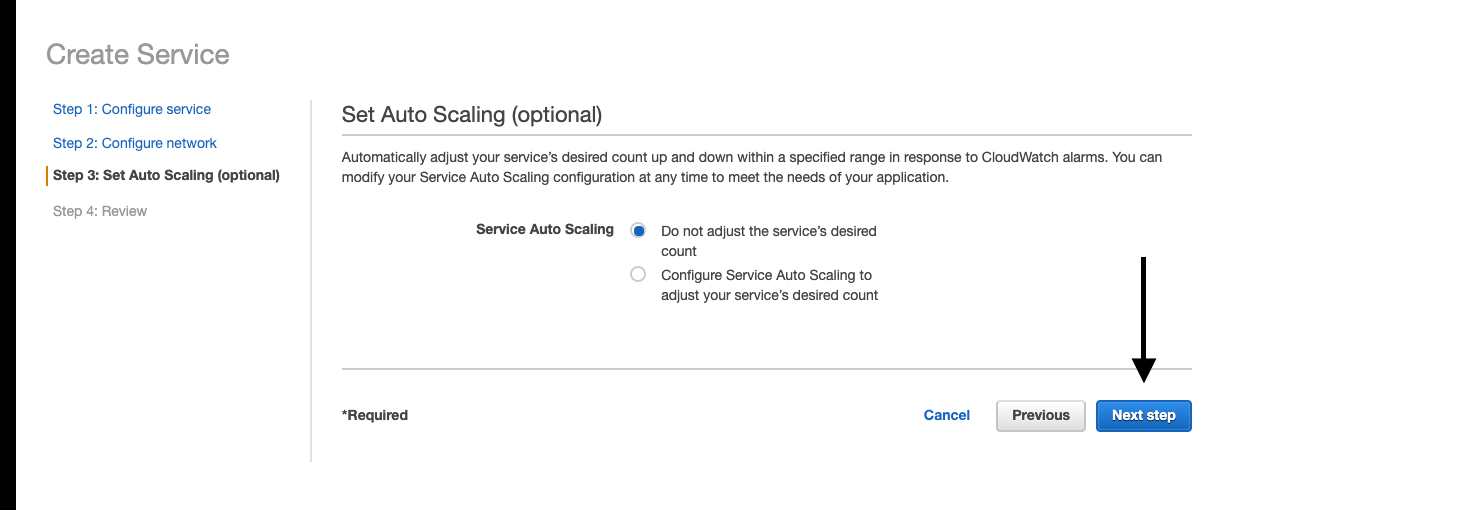
On the next page, select Do not adjust service’s desired count and hit next
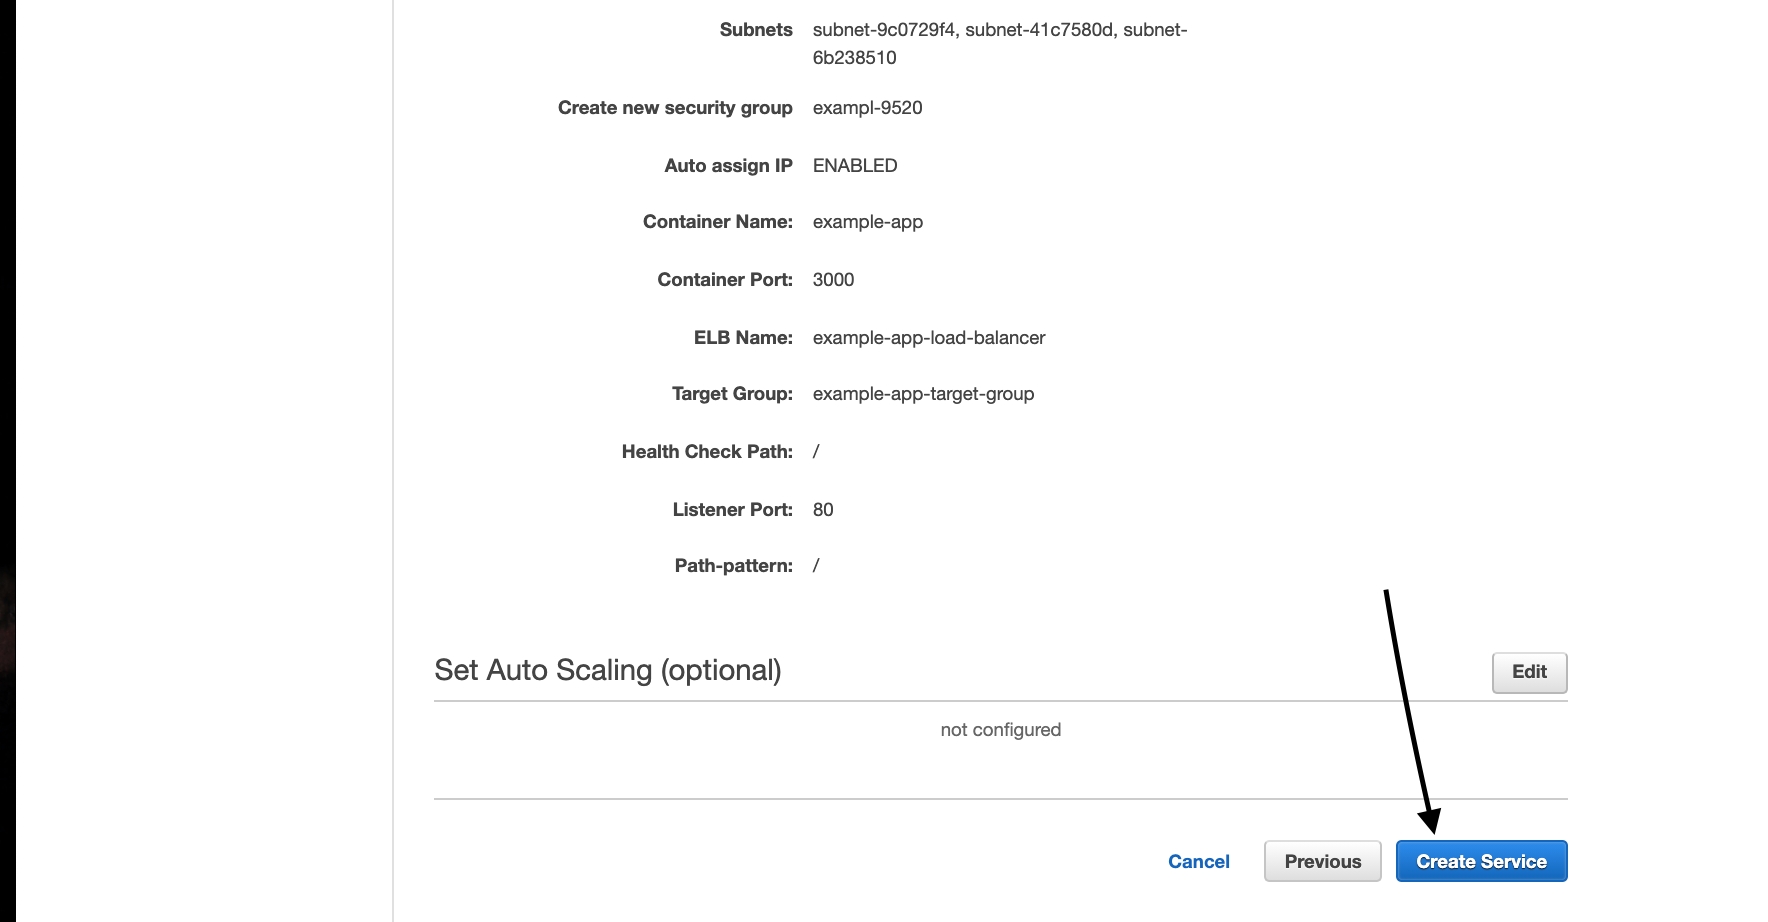
- Review everything and click Create Service.
- Your Service will be ready by now.

Step 8: Add Github Action to automate the whole process:
Here Comes the fun part. We have done everything to automate our deployment process now the only thing to do is automate it with GitHub actions.
If you read the previous article you should have a nestJS app with Dockerfile in it. Go to the GitHub repository of that project. If you don’t have own project you can fork this repository https://github.com/Mohammad-Faisal/example-nestjs-app > (don’t forget to replace the code of task-definition.json file inside the repository !)
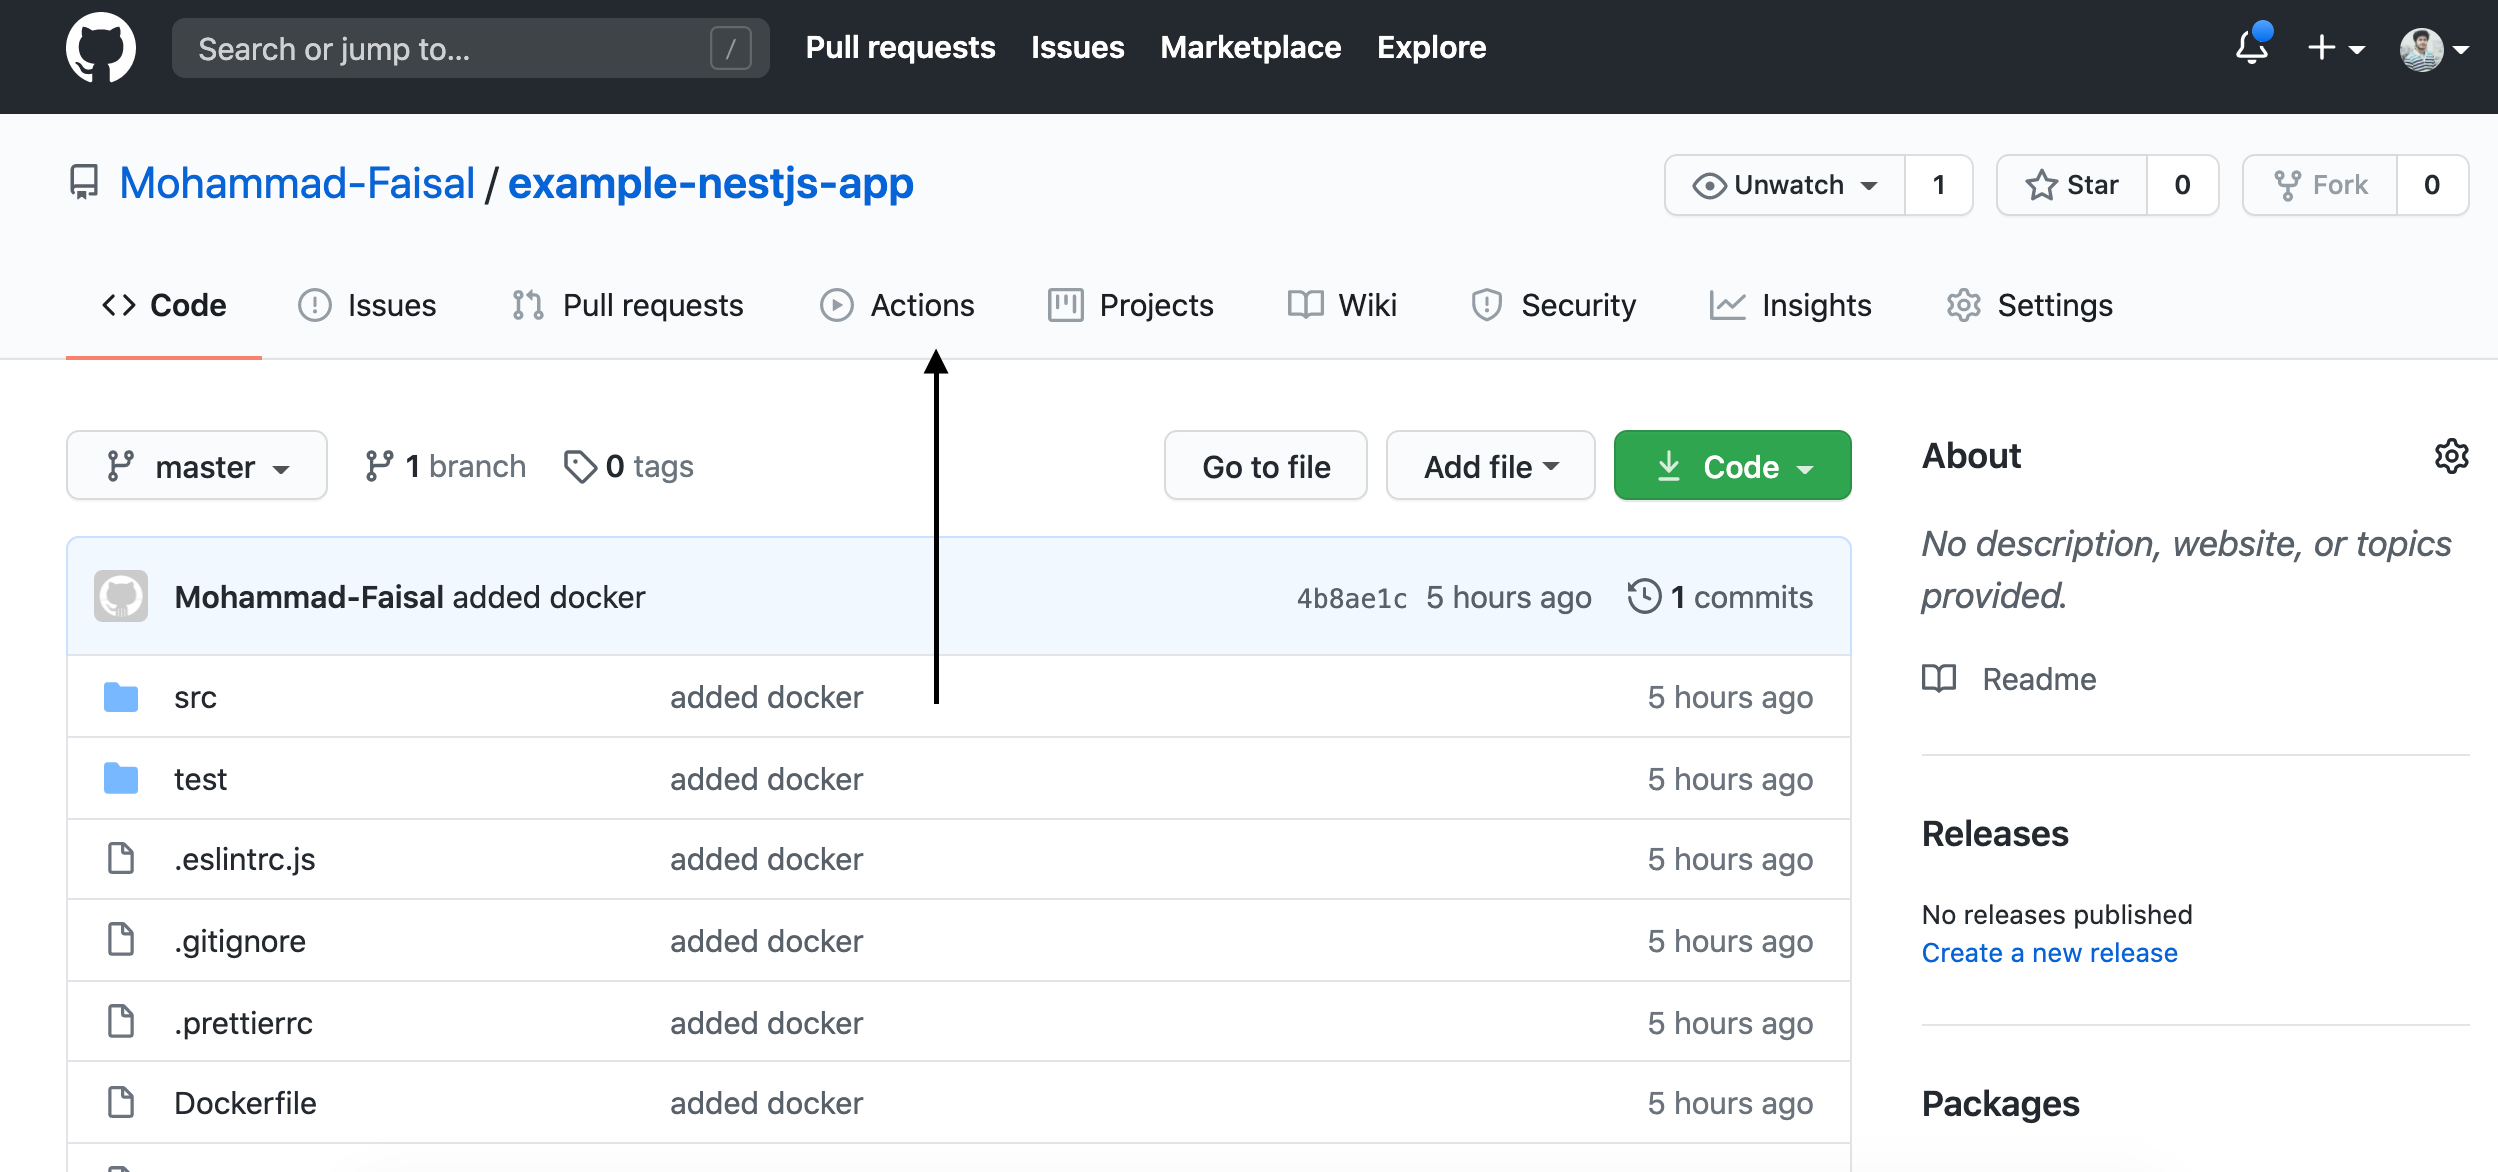
- Go to the Actions tab in your repository.
- Select Deploy to Amazon ECS and Click on Set up this workflow
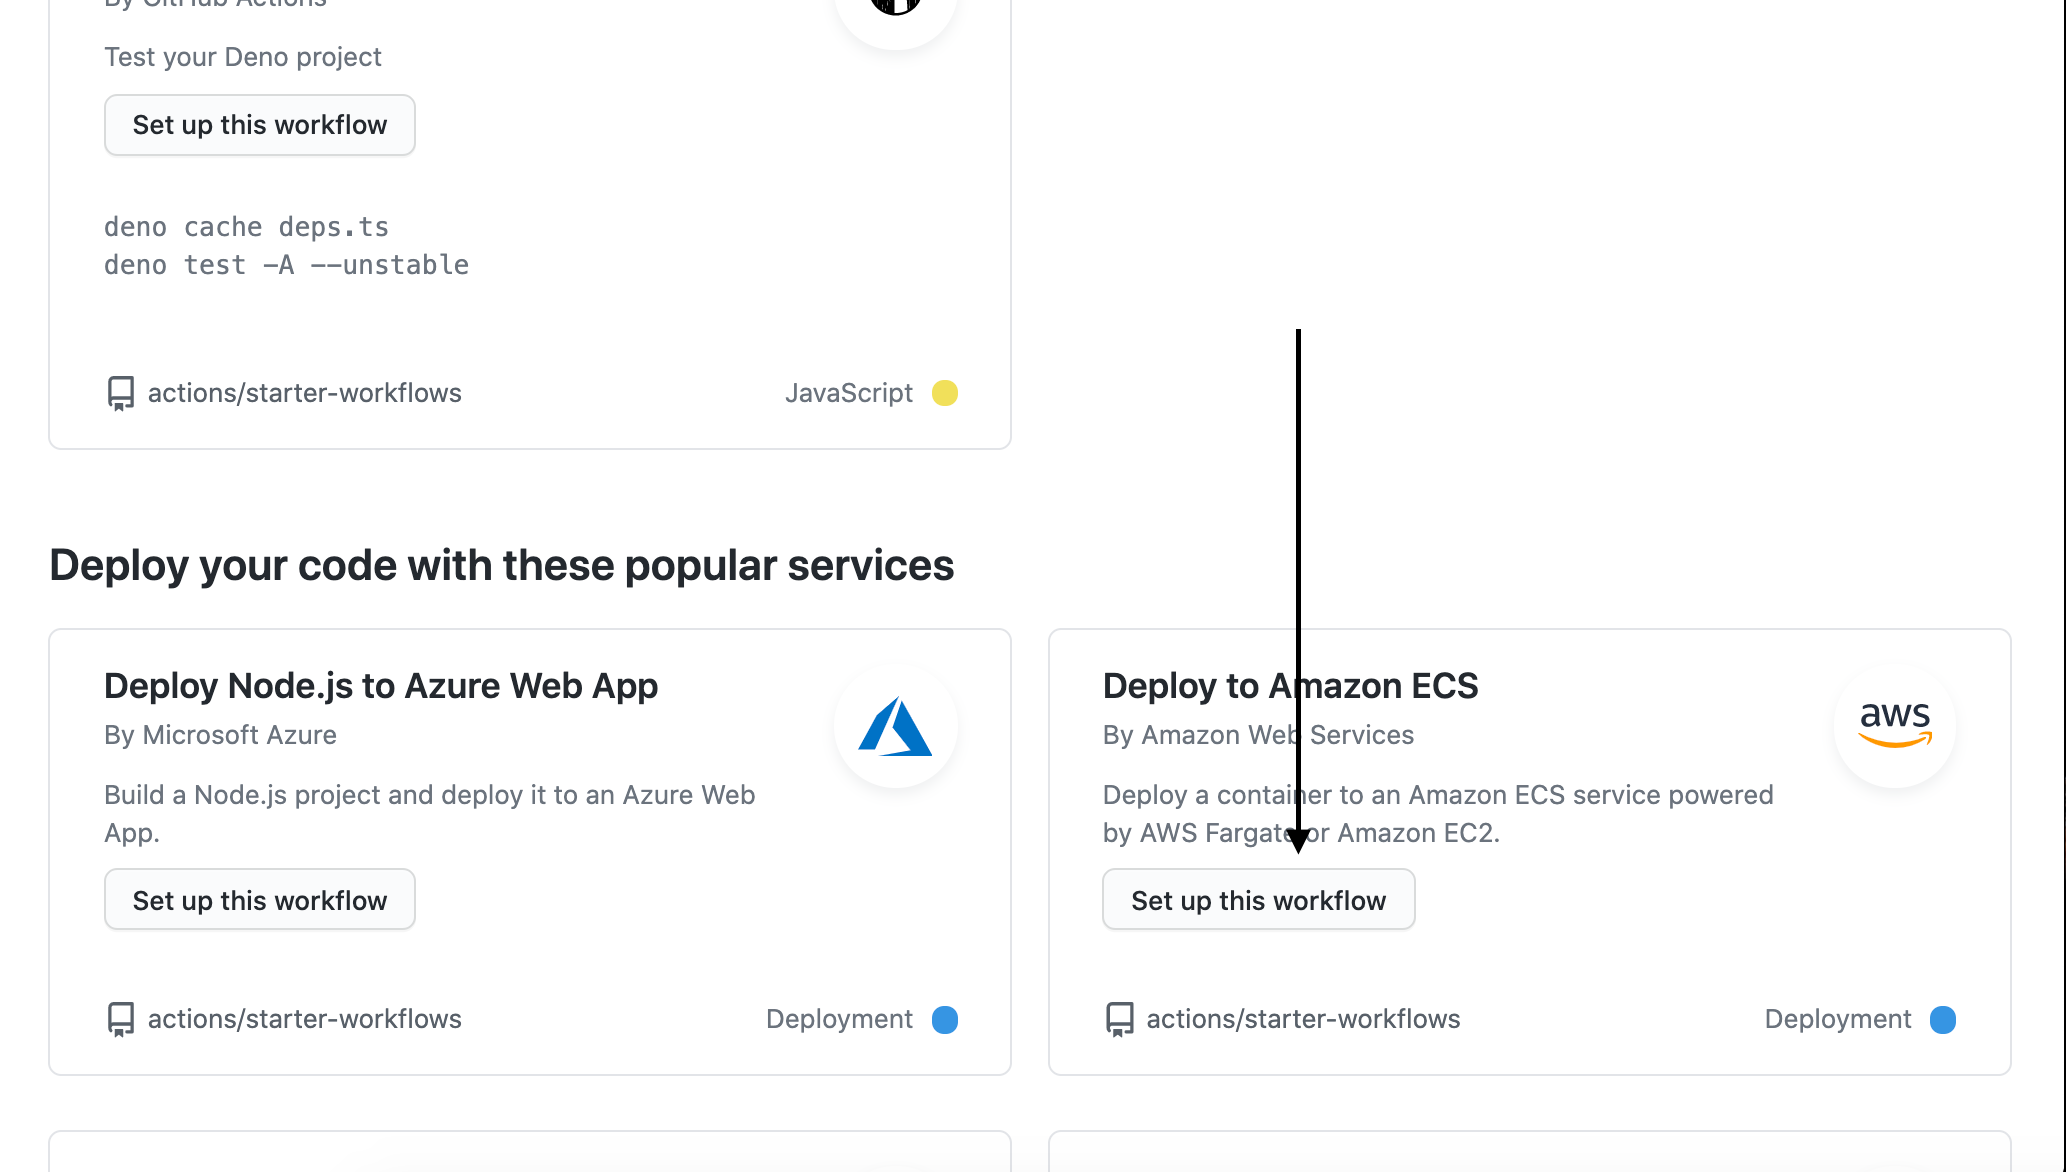
It will add a new file named aws.yml to your project. we have to fill up the required details in this file
Replace the aws-region with your region in my case it is ap-south-1 so my code becomes aws-region: ap-south-1

Replace ECR_REPOSITORY: my-ecr-repo with ECR_REPOSITORY: example-app (the name that we gave to the repository in step 2)
Replace IMAGE_TAG: ${{ github.sha }} with IMAGE_TAG: latest
Replace container-name: sample-app with container-name: example-app (with your given container name)
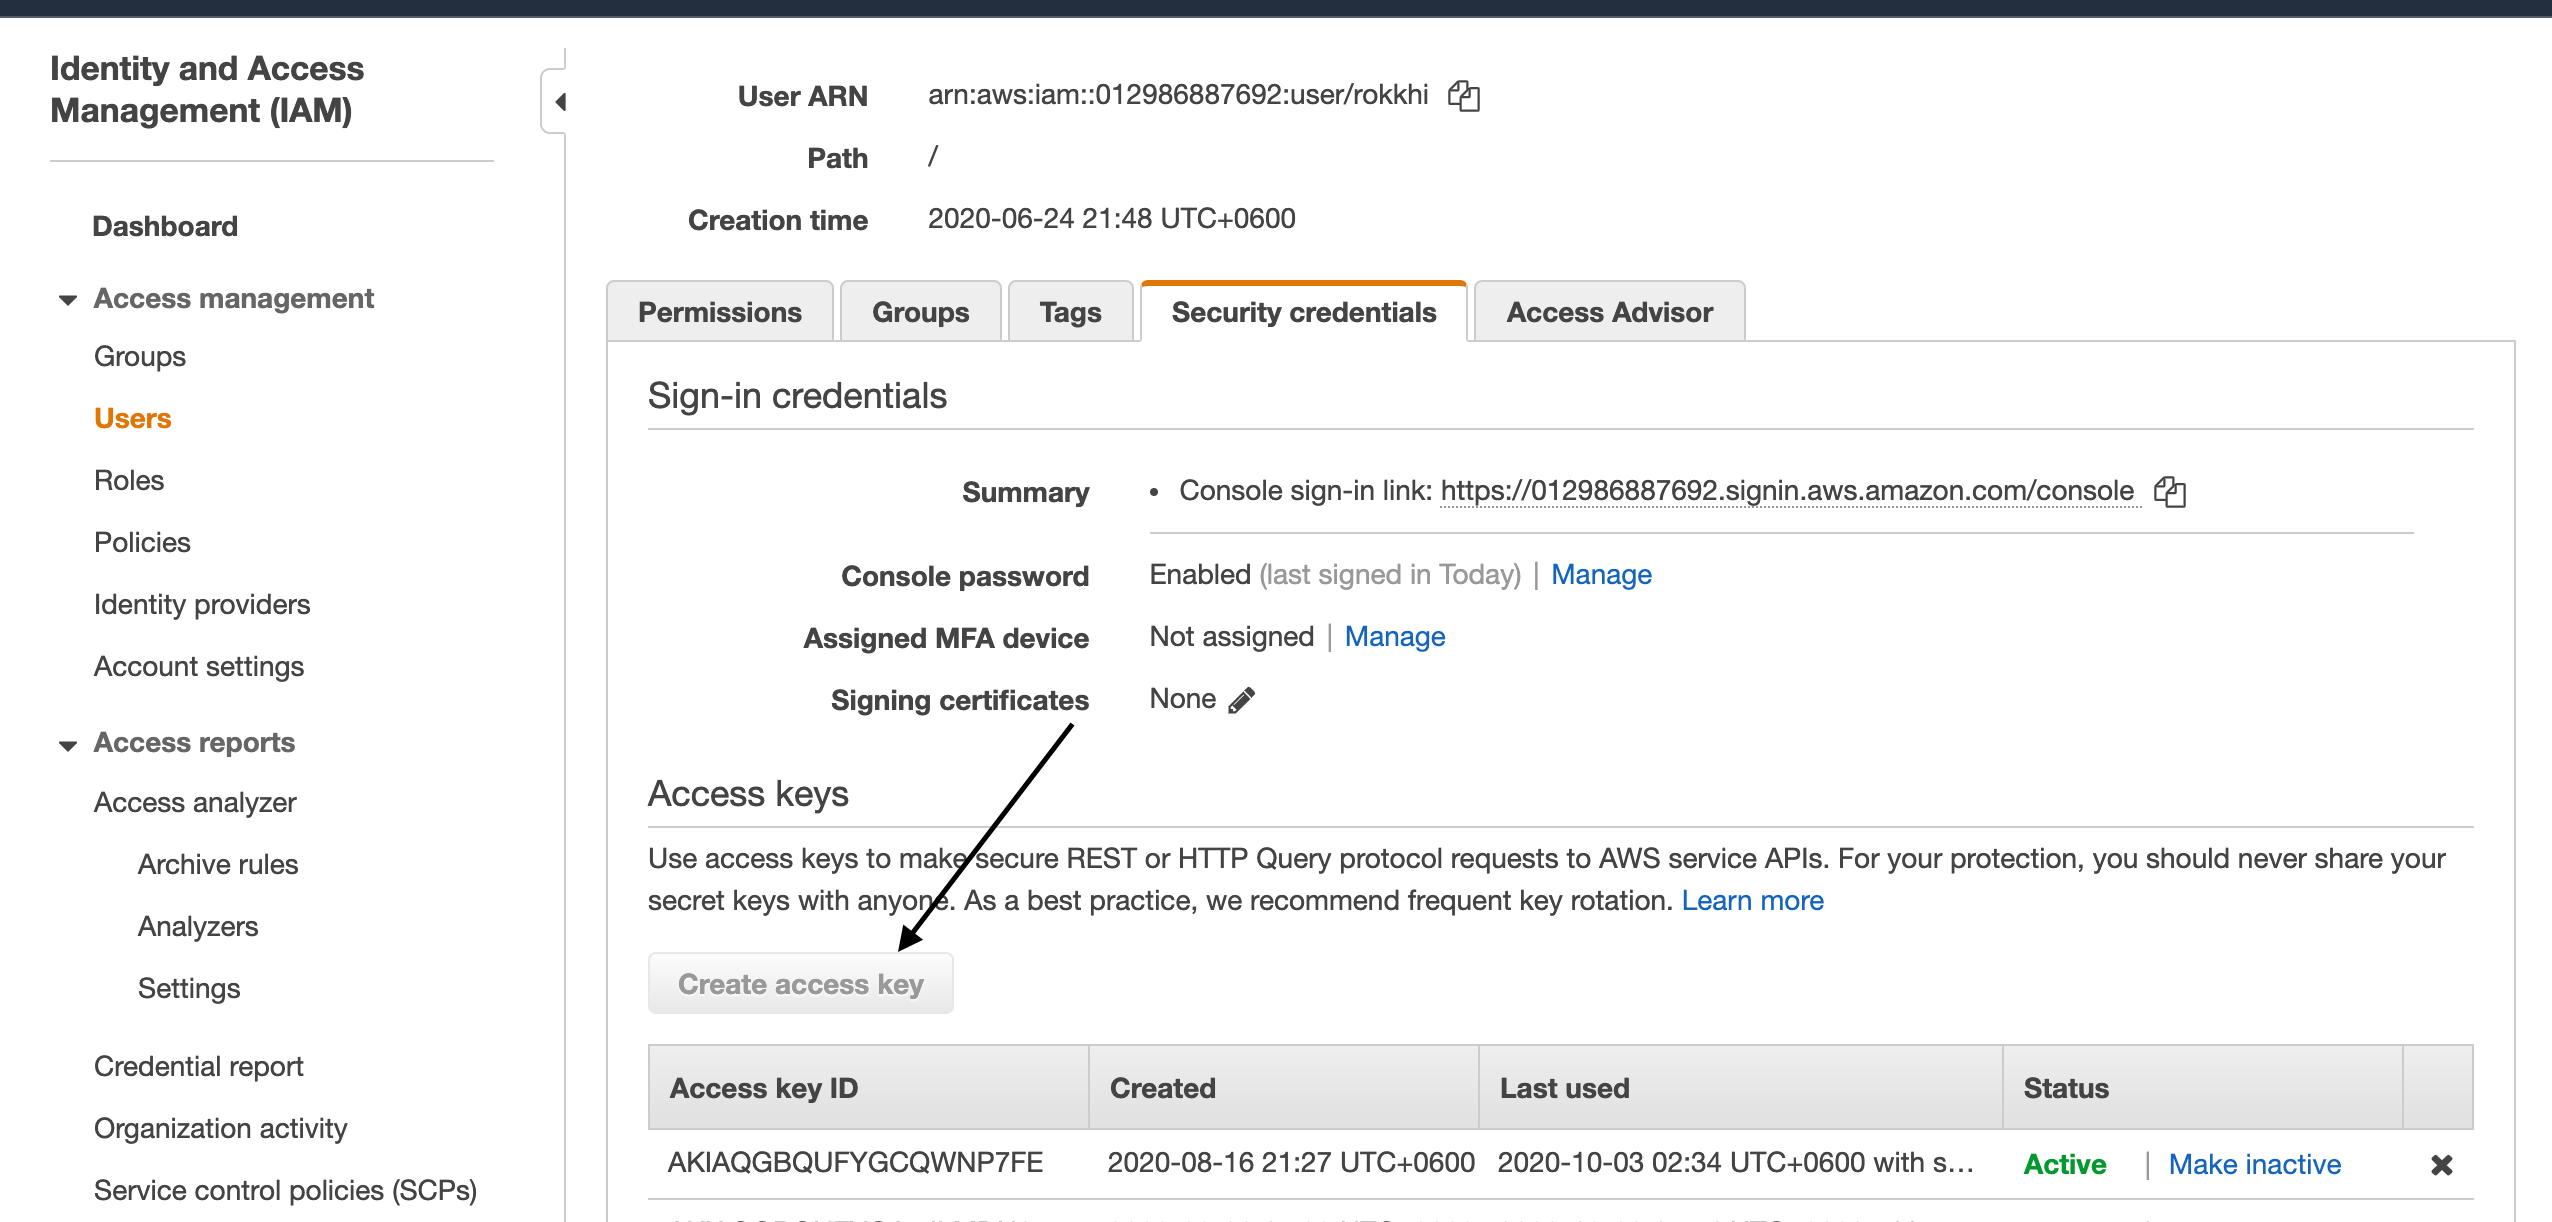
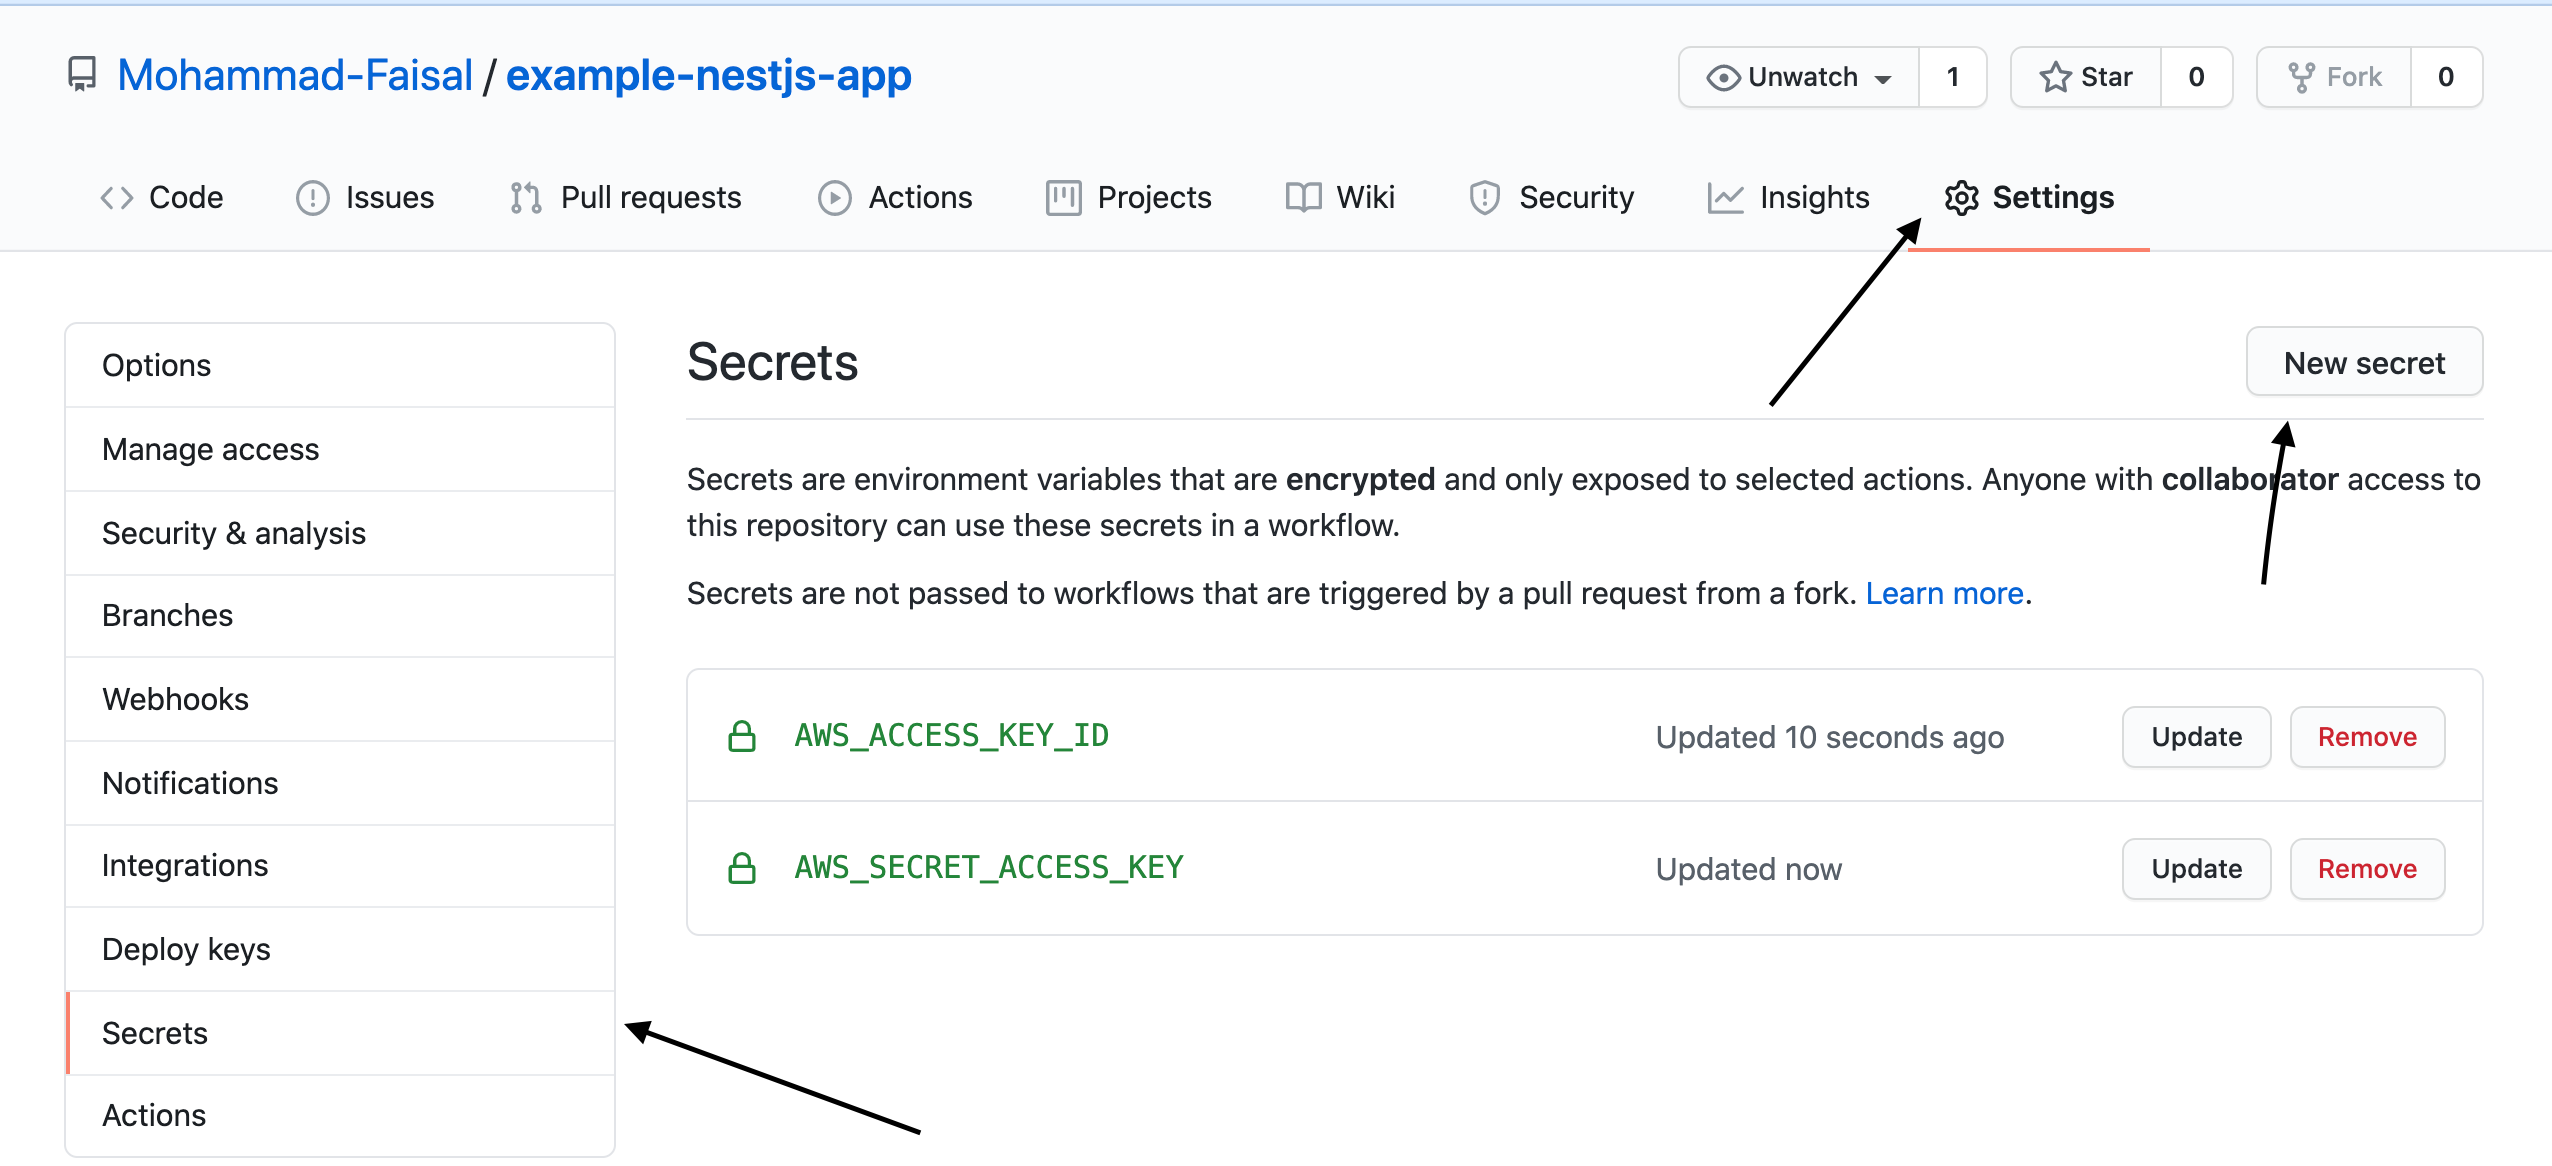
Grab your AWS_ACCESS_KEY_ID and AWS_SECRET_ACCESS_KEY from the IAM console of Aws Console.
- Then add them to your project's secrets tab
Replace service: sample-app-service with service: example-app-service (The same name we gave to our service in the previous step)
Replace cluster: default with the cluster: example-cluster (Our Cluster name)
Finally, Open your project and update the code of app.controller so that it returns statusCode of 200 on the default route (‘/’). If you are not using express or other frameworks you have to add a similar route to your controller so that the health check doesn’t fail for the load balancer.
In the app.controller.ts file add the following code
import { Controller, Get, HttpCode } from '@nestjs/common';

@Get()
@HttpCode(200)
getHello(): string {
   return this.appService.getHello();
}
The Final version of our aws.yml file is
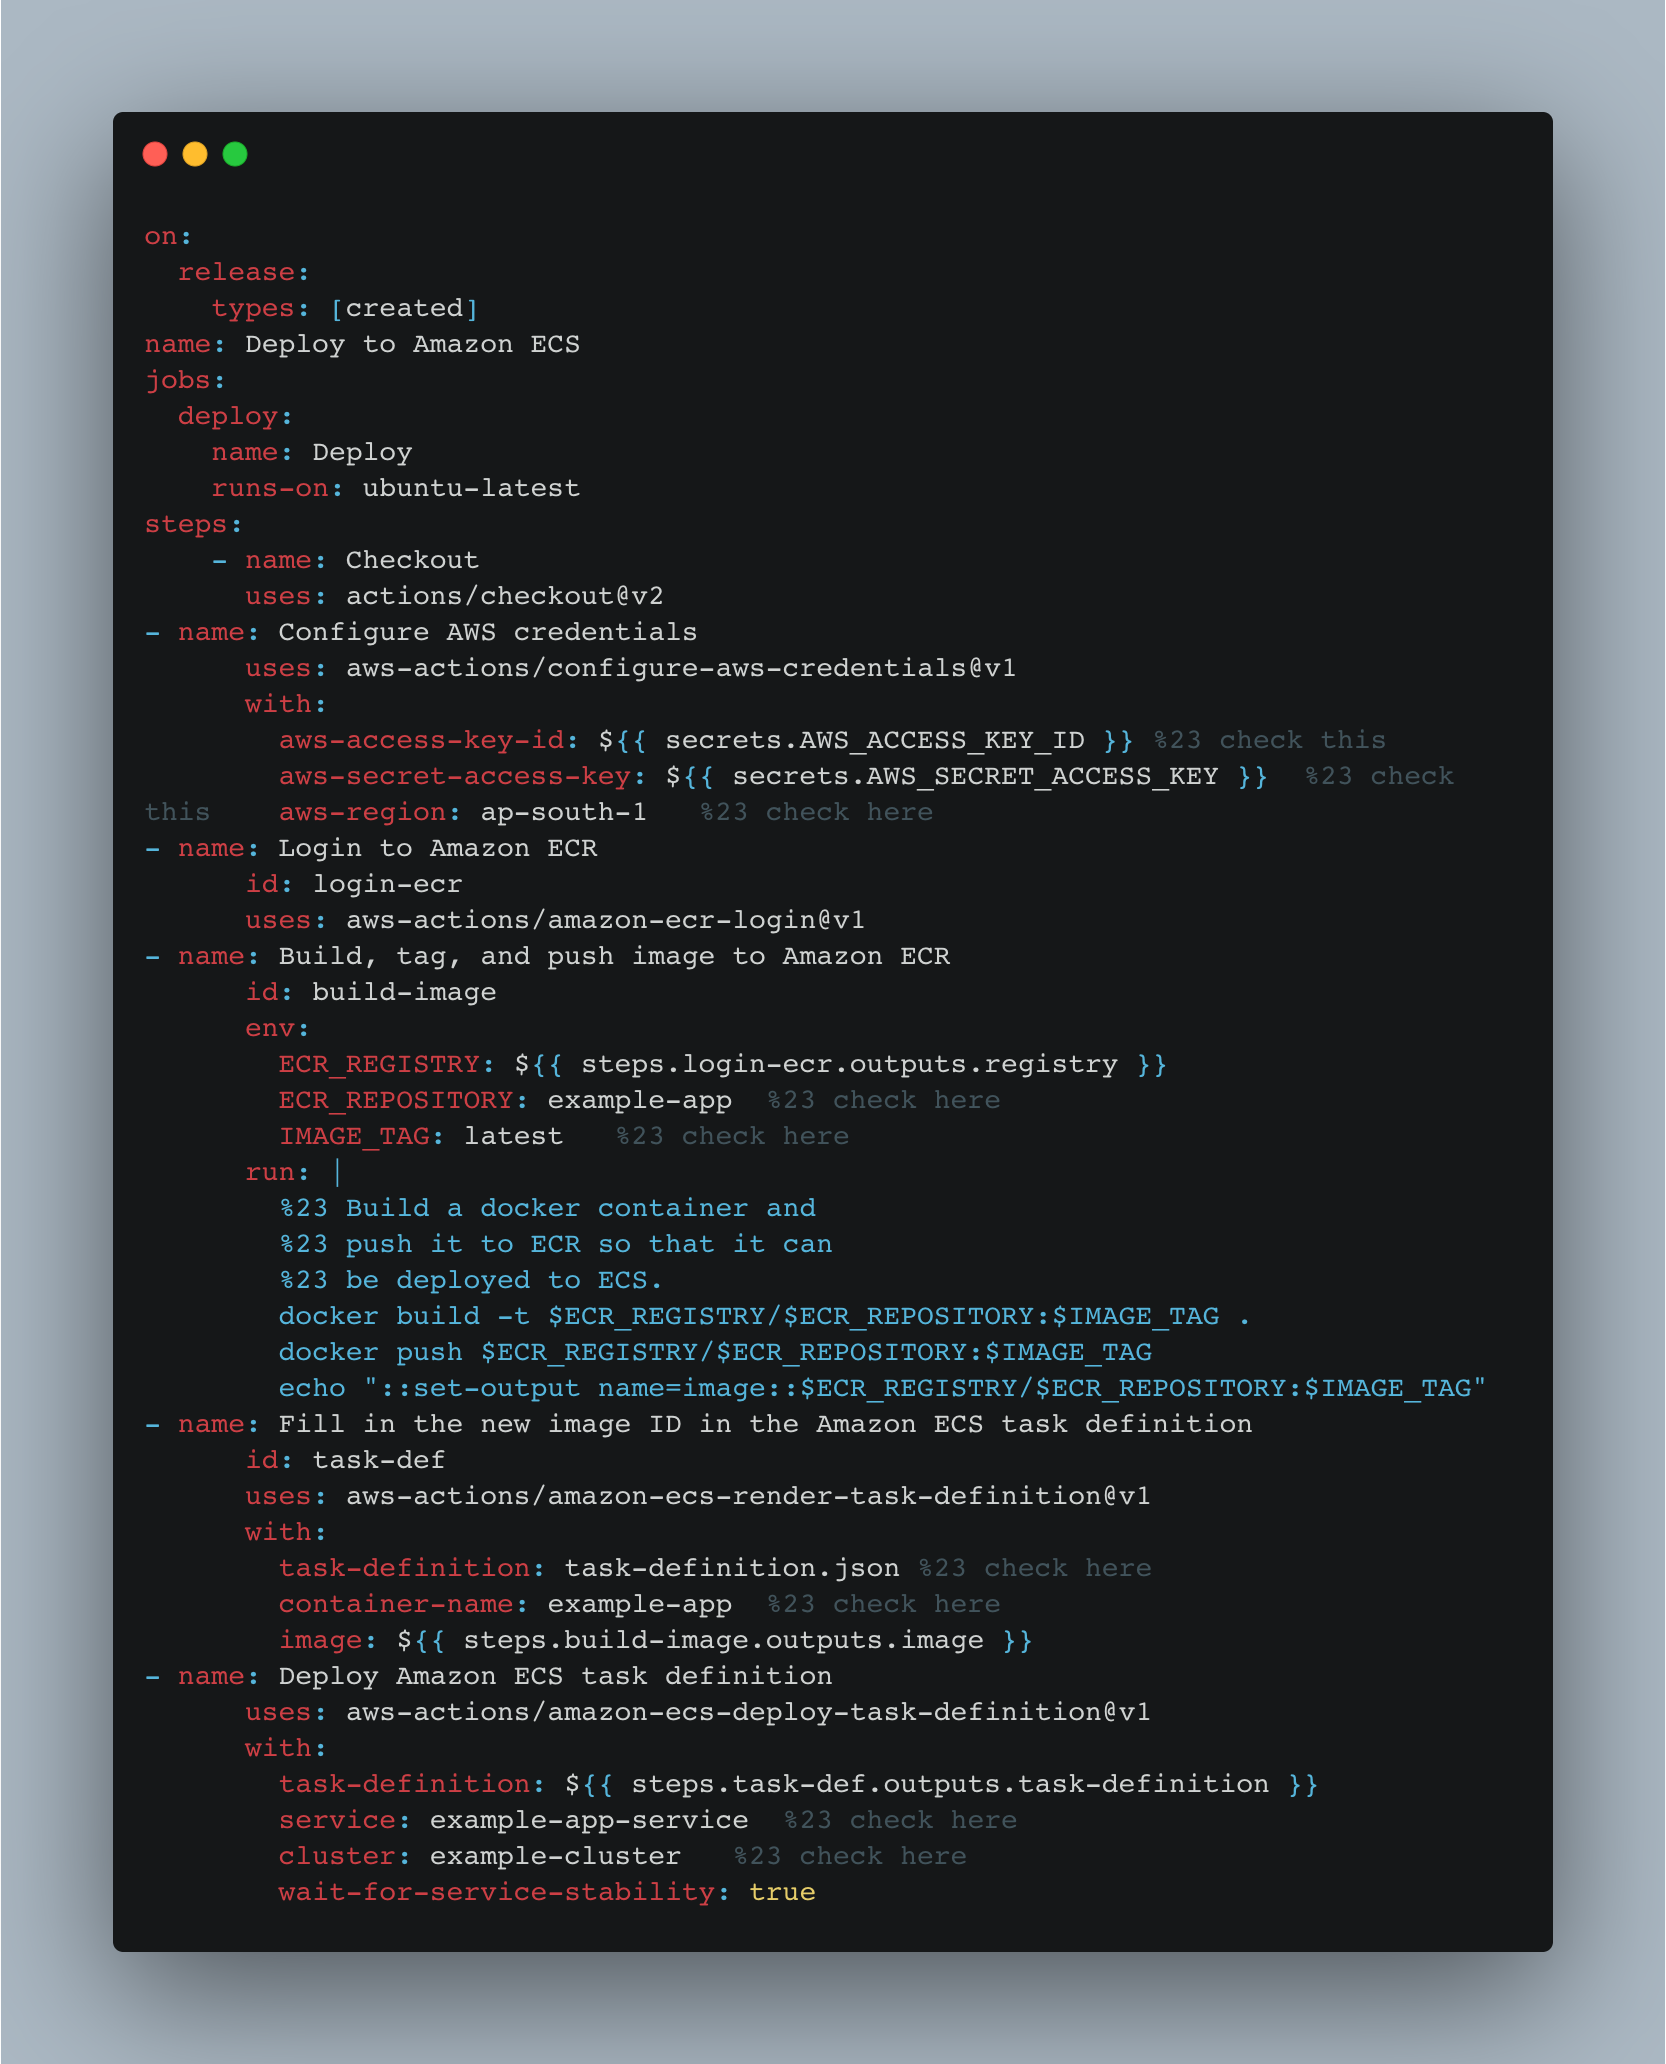
This action will be triggered when we create a new release. After each release, the following tasks will occur
Log in to Aws
Build an Image
Push the Image to ECR (Elastic Container Registry)
Run the Task definition
Use the Service to Deploy the Task Definitions
So now we will create a new release to kick off the process …
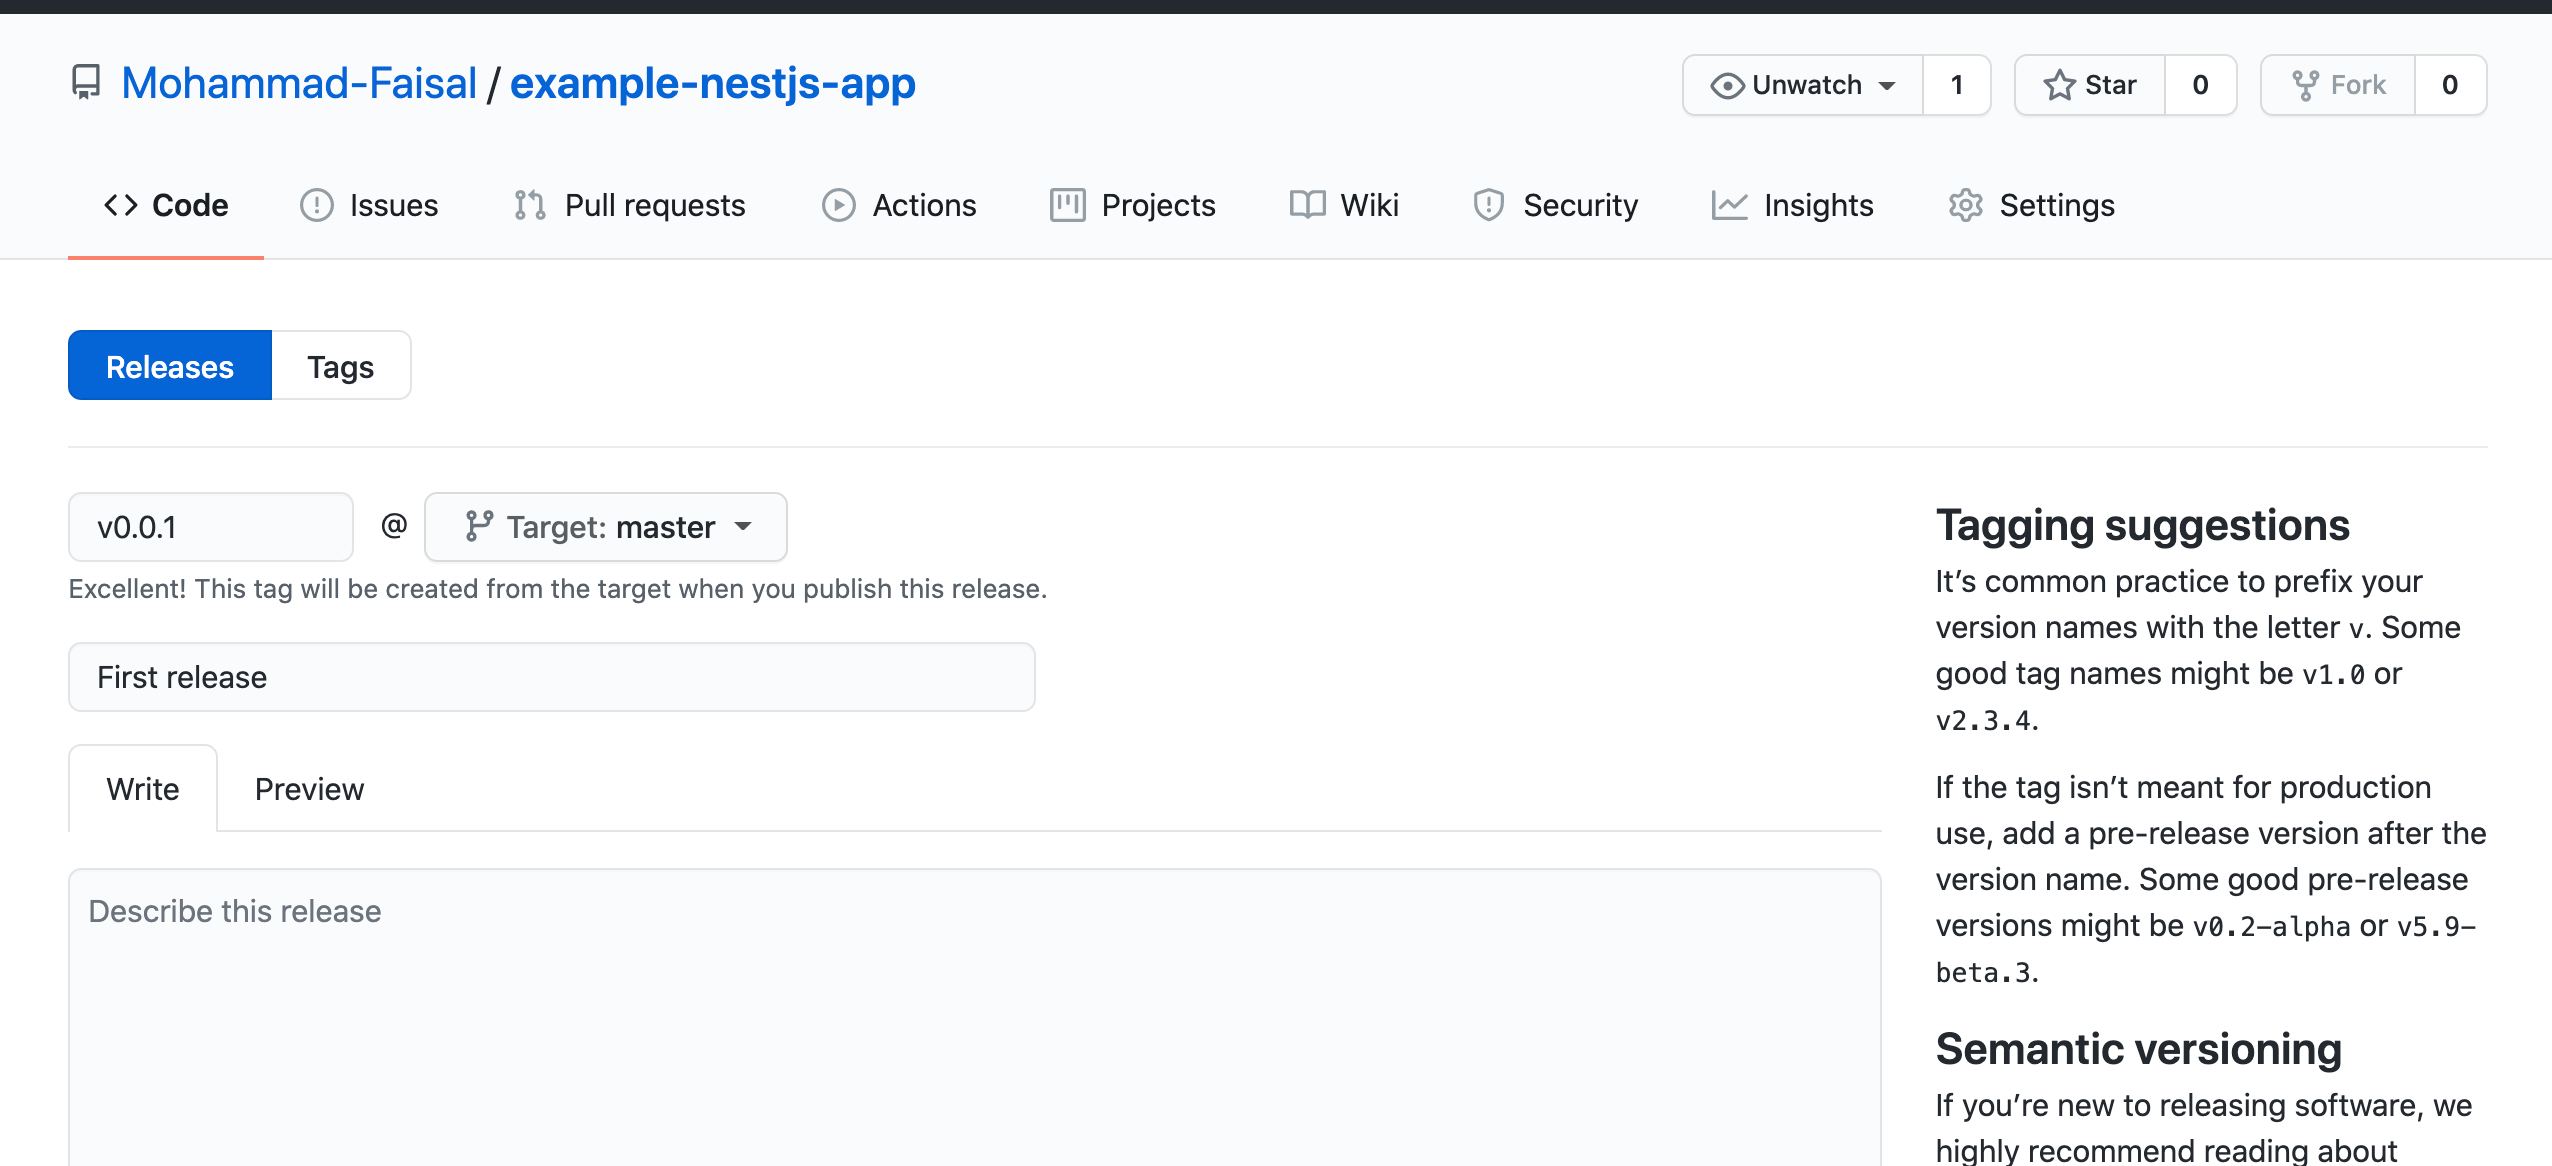
We can see the progress of the action in our actions tab again
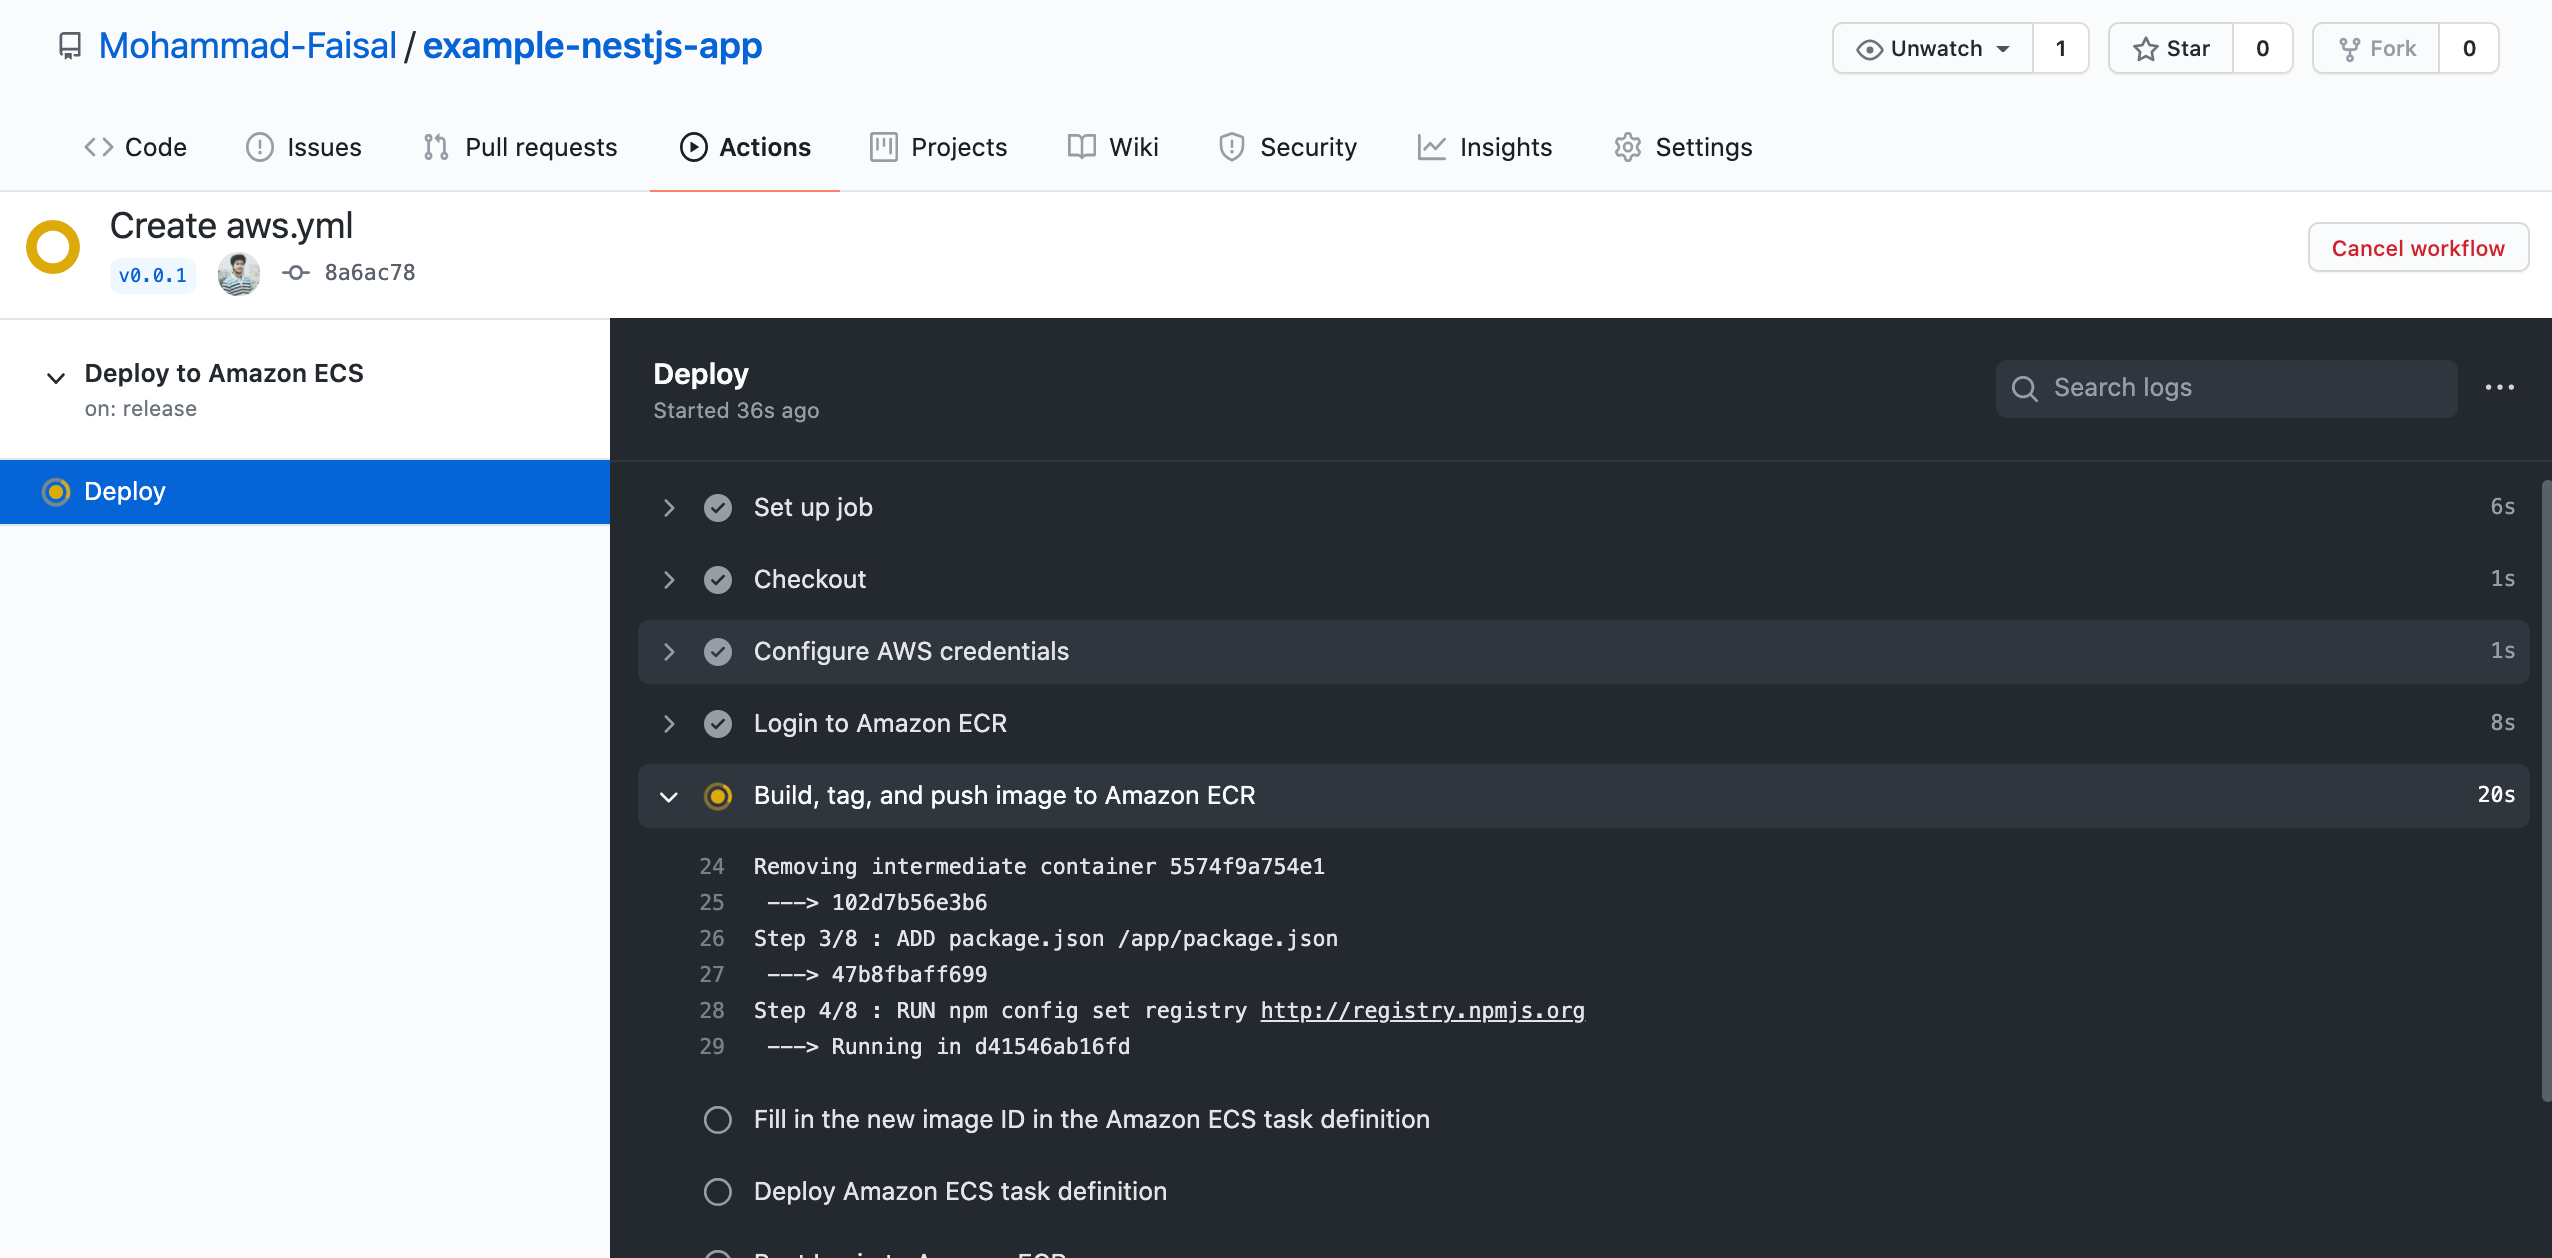
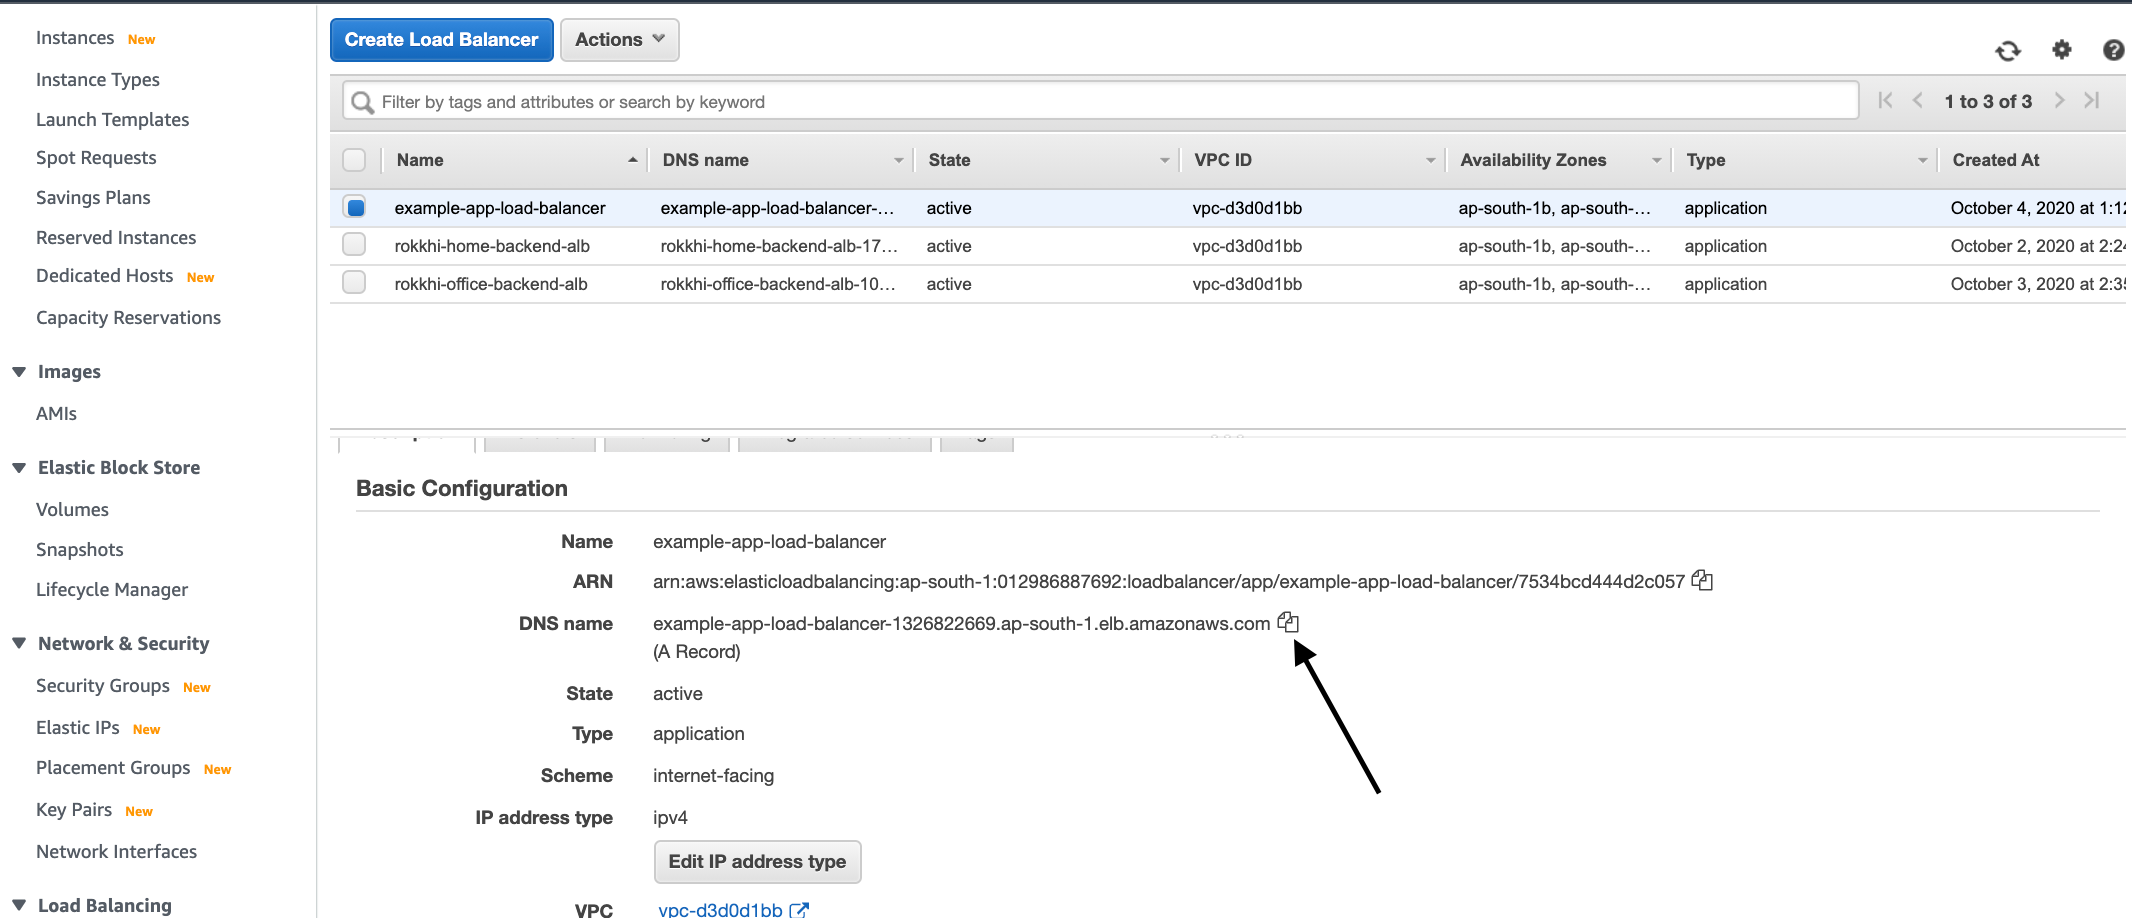
If Everything goes well you should see a green Tick. The service will take some to be up and running. Go to your LoadBalancer Menu in Aws Console and get the DNS Name and go to the link
Go to this link and you will be greeted with the response Hello World!

So congratulations if you’ve made it this far. There are so many areas you can make an error. So Be careful about everything. This process will work with any kind of Node.js app like Express or even React app. I tried my best to be as explicit as possible, but my knowledge is very limited. Any suggestion is welcome.
Get in touch with me via LinkedIn

