Build a Full Stack GraphQL Application with React + Express
GraphQL is an alternative to REST. It’s new and obviously. have some benefits over traditional REST API. Today we will see how we can build a simple full-stack GraphQL application.
Pre-requisites
To follow along you have to have a basic understanding of how a normal HTTP server works and some knowledge about ReactJS. You don’t have to be an expert in either of these.
Building the Backend
First, we create a very basic express application. You can see here how to create a boilerplate express application.
Step 1. Install Dependencies
Then inside the project's root directory, we need to install these additional dependencies for graphql.
yarn add express-graphql graphqlStep 2. Create Schema
Inside the project create a file named schema.js and create a schema for our Book. GraphQL needs to know about the underlying data structure.
For example, you must have some kind of backend in your application (Like MongoDB or Postgres) and for that, you must have some kind of data structure to talk with the database. But this schema is different.
const graphql = require('graphql');

const {GraphQLObjectType , GraphQLSchema ,GraphQLString ,GraphQLID, GraphQLInt ,GraphQLList , GraphQLNonNull} =graphql;


const BookType = new GraphQLObjectType({
    name: 'Book' ,
    fields: () => ({
        id: { type: GraphQLID},
        name: { type: GraphQLString},
        genre: { type: GraphQLString}
    })
})
Step 3. Create Query
So now we are ready to create our query. Query means accessing data. We created 2 queries, book and books.
The book query accepts an argument that is id of the book we want.
And books returns all of the books from the database.
const RootQuery = new GraphQLObjectType({
    name: 'RootQueryType',
    fields: {
        book:{
            type: BookType,
            args:{id:{type: GraphQLID}},
            resolve (parent ,args){
                return Book.findById(args.id) // Replace with your own database query
            }
        },
        books:{
            type: new GraphQLList(BookType),
            args:{id:{type: GraphQLID}},
            resolve (parent ,args){
                return Book.find() // Replace with your own database query
            }
        }
    }
})
Step 4. Create Mutation
Mutation means changing the data. Whenever we need to create or update data we have to create mutation.
const Mutation = new GraphQLObjectType({
    name:'Mutation',
    fields:{
        addBook: {
            type: BookType,
            args: {
                name: {type : new GraphQLNonNull(GraphQLString)},
                genre: {type : GraphQLString},
            },
            resolve(parent , args){
                const book = new Book({name: args.name , genre: args.genre})
                return book.save(); // replace with your database call
            }
        }
    }
})
Step 5. Use them
Now we just export our schema, query and mutation:
module.exports = new GraphQLSchema({
    query: RootQuery,
    mutation:Mutation
})
Inside app.js , we can let our express server know about the graphql schema like the following.
const {graphqlHTTP} = require('express-graphql');
const schema = require('./schema/schema')
app.use(
    '/graphql',
    graphqlHTTP({
        schema,
        graphiql: true,
    }),
);
app.listen( 4000 , () => {
    console.log('app is listening at port 4000')
})
Test Our First API
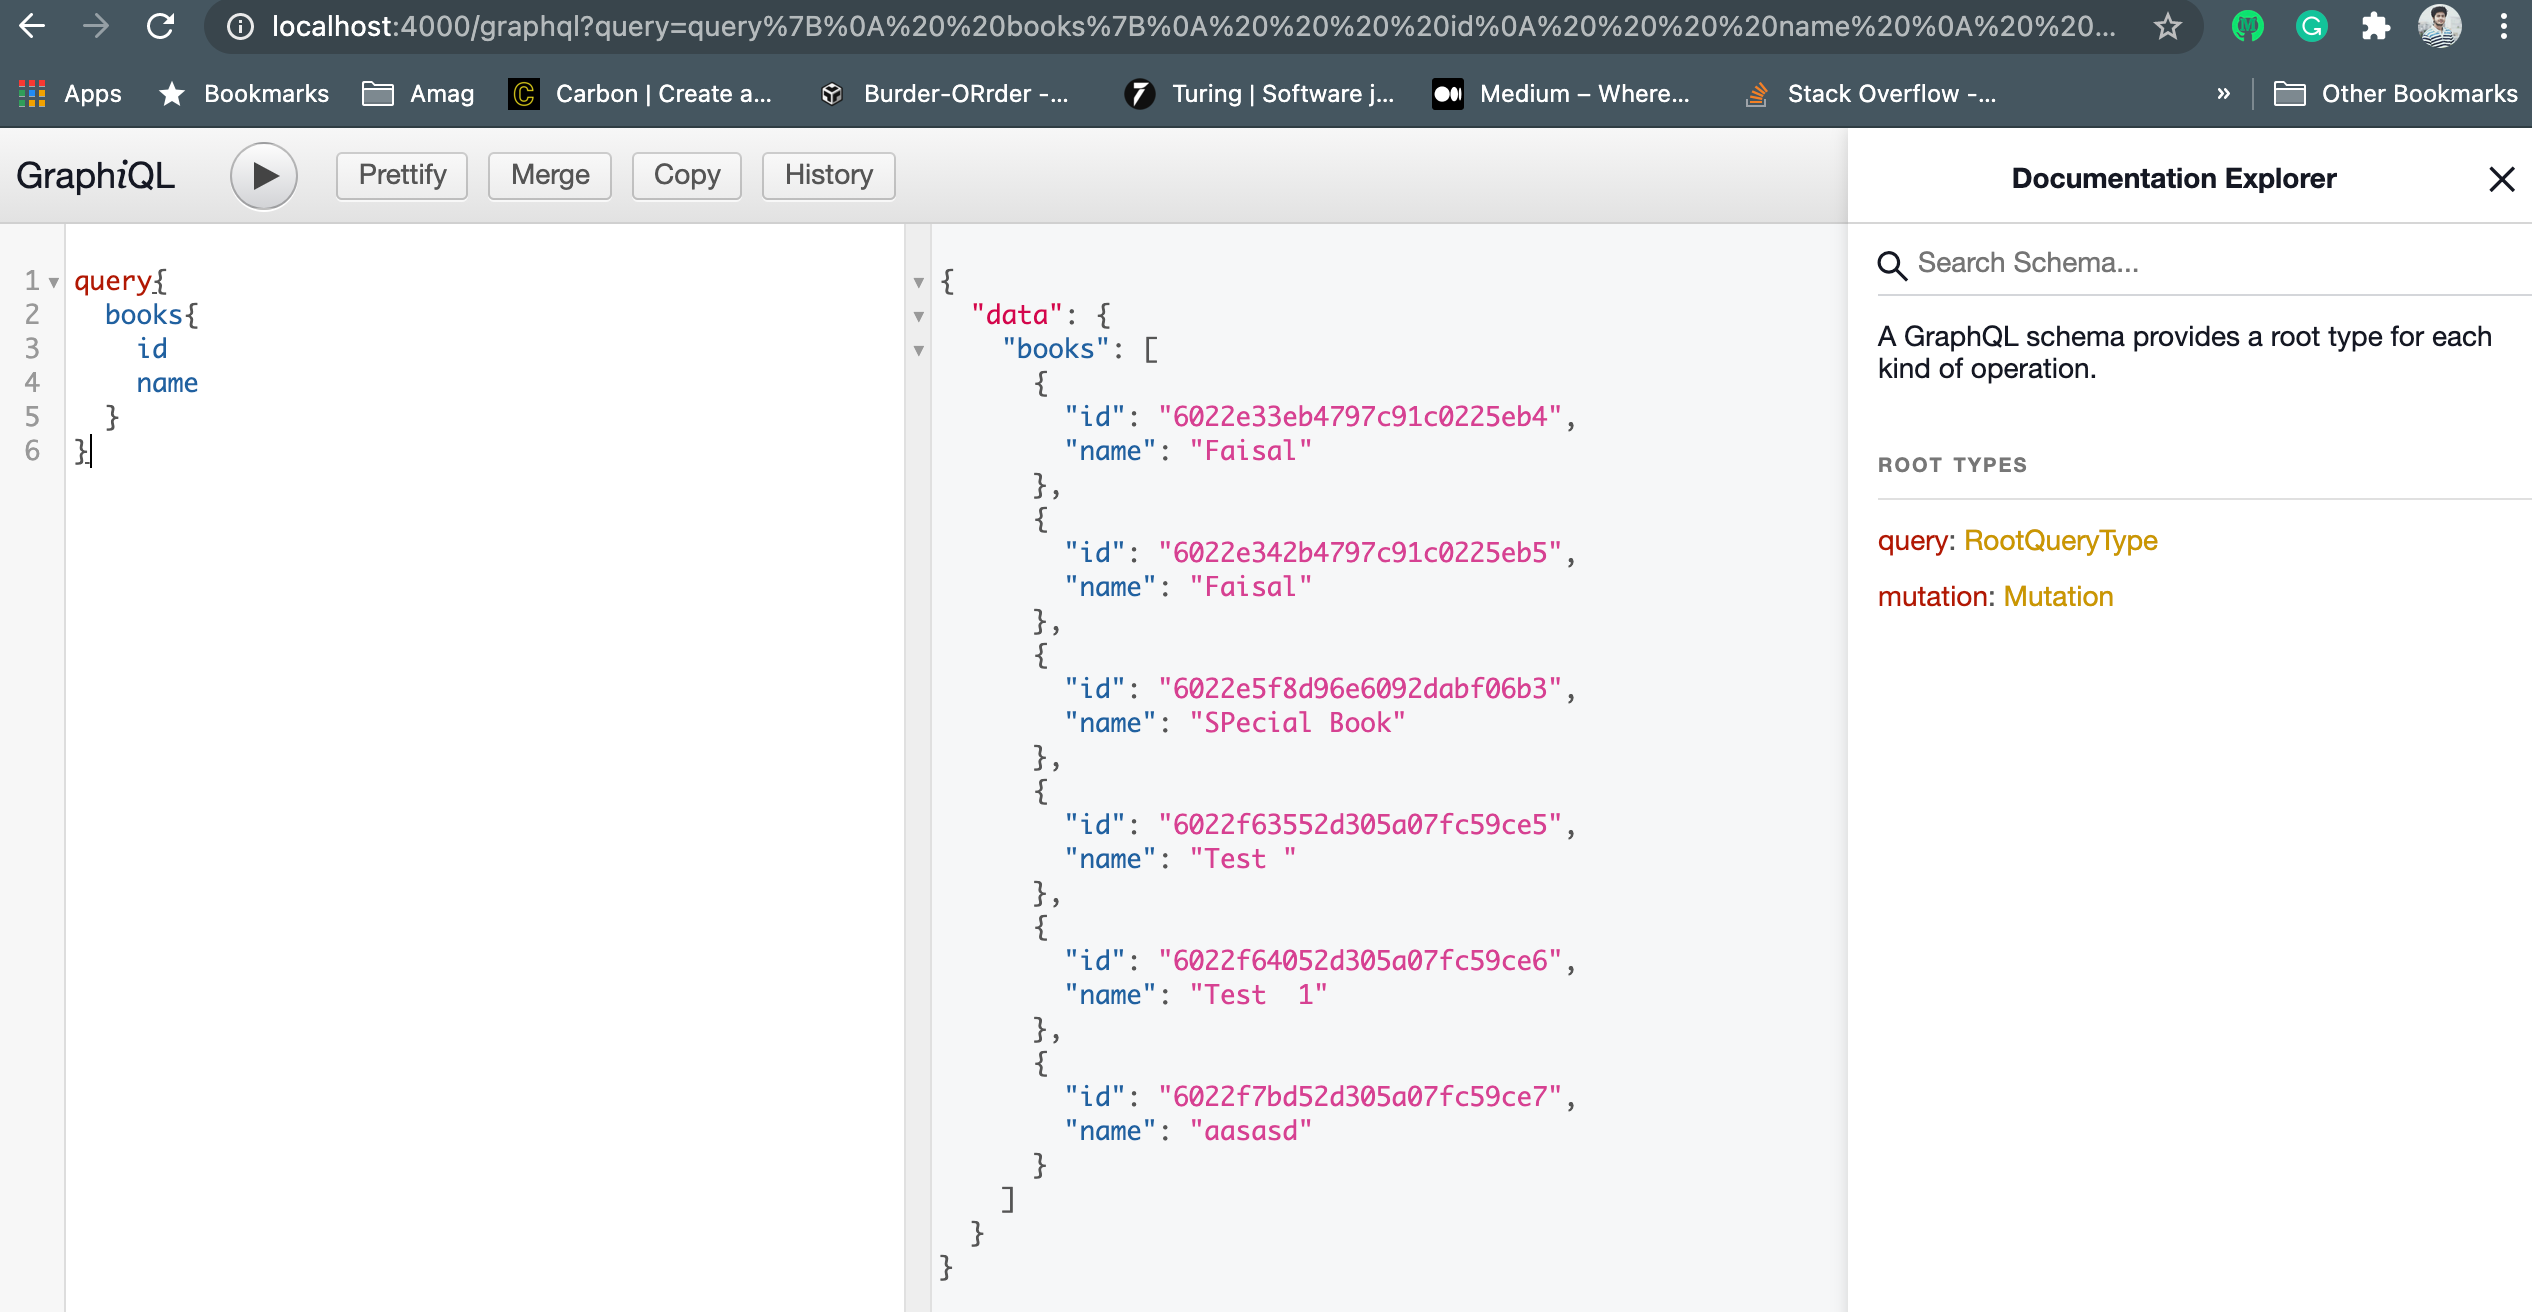
GraphQL provides us with an awesome tool called GraphiQL. which lets us test graphQL API very easily. It’s more like Swagger in Rest API
Go to http://localhost:4000/graphql and you can see the GraphiQL interface.

Building the Front-End
I expect you to know how to scaffold a basic react application using create-react-app . After creating our boilerplate application we now start to integrate GraphQL API into our application.
We need to use a special query library called Apollo which has awesome documentation. I highly encourage you to check that out!
Step 1. Install dependencies
First, install the following dependencies.
yarn add @apollo/client graphqlStep 2. Create a Client
We need to create a client that will talk to our GraphQL server. That client is called ApolloClient . Inside our index.js file create our first client.
import { ApolloClient, InMemoryCache } from '@apollo/client';

const client = new ApolloClient({
    uri: 'http://localhost:4000/graphql',
    cache: new InMemoryCache()
});
Step 3. Wrap with Provider
Our whole application needs to have this client so we wrap our App component with ApolloProvider and supply the client we just created.
import { ApolloProvider } from '@apollo/client';

ReactDOM.render(
  <React.StrictMode>
    <ApolloProvider client={client}>
        <App />
    </ApolloProvider>
  </React.StrictMode>,
  document.getElementById('root')
);
Step 4. Define Query
GraphQL has a specific query language. We need to use that to access our data. We create a BookList component to access the booklist
import React from 'react';
import {gql, useQuery} from "@apollo/client";


const GET_BOOKS = gql`
    {
        books{
            name
            genre
        }
    }
`;
export default funciton BookList () {

  // get data using useQuery hook
  const { loading, error, data } = useQuery(GET_BOOKS);

  return <div>
    <ul>
        {data.books.map(item => <li>{item.name}</li>)}
    </ul>
  </div>
}
Step 5. Mutation
Now we create another component to add a new book to the database.
import React ,{useState,useEffect} from 'react';
import {gql, useMutation, useQuery} from "@apollo/client";

// DEFINE MUTATION
const ADD_BOOK = gql`
    mutation AddBook($name: String! , $genre:String!) {
        addBook(name: $name , genre: $genre) {
            id
            name
        }
    }
`

const AddBook = () => {

    // useMutation hook which returns a function and data
    const [addBook, { data }] = useMutation(ADD_BOOK);
    const [name , setName] = useState('')
    const [genre , setGenre] = useState('')

    const onsubmit = () => {
        addBook({variables: { name , genre}})
    }

    return <div style={{margin:"30px"}}>
       <div>
           <input type={"text"} onChange={e => setName(e.target.value)}/>
           <input type={"text"} onChange={e => setGenre(e.target.value)}/>
            <button  onClick={onsubmit}> Submit</button>
       </div>
    </div>
}
So that’s it. Now we have a working application with both front-end and backend
You can check out the whole application’s source code from the below repo
https://github.com/Mohammad-Faisal/graphql-express-react
That’s it for today. Happy Coding! :D
Get in touch with me via LinkedIn

